


Widgets and Creating GS Screens
Graphical Status Screens/Floor Plans • 103
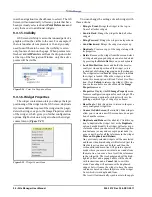
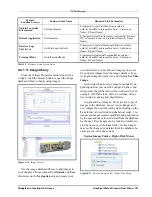
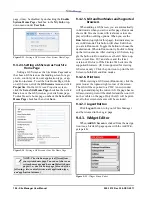
9.4.2. Running GS Screens
When you click a GS Screen from the Navigation
Tree, you are taken to that GS Screen’s page. Depend-
ing on how the GS Screen is set up, the appearance
will vary. GS Screen pages normally consist of real-
time values from the E2 controller and a graphical
layout of the store’s floor plan.
For Site Manager to display the current informa-
tion in the controller and synchronize the updates
from the controller configuration and the GS Screen,
an Obtain Controller Information or equivalent activ-
ity will need to be run for the updates to the controller
configuration to be visible. Note that if the configura-
tion of the controller changes while a GS Screen is be-
ing viewed, the system will not pick up configuration
changes between the time the application data inven-
tory is being received.
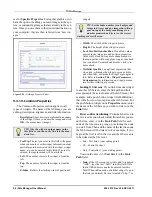
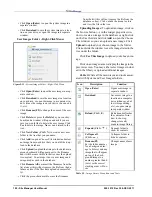
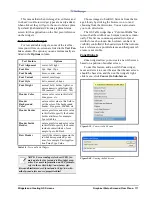
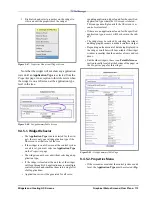
9.4.2.1. Widget GS Right-Click Menu
Options
Possible variations on the user-configurable right-
click menu options that appear for widgets:
• Control Temp: current control temperature reading
• Override: override from this window. Checking
this box opens an additional window that enables
you to select Fixed or Timed. Click OK to save.
• Modify: enter a modification for the setpoint from
this window by entering a value. Press OK to save
or Cancel.
• New Log: if the point has been logged, log data will
display (Date, Time, and Value).
• Graph: shows a graph of the logged data.
• Display Log Graph: shows log graph data if the
point has been logged.
• Point Properties: takes you to the Point Properties
page.
• Graph Collection: allows you to select points from
GS Screens at run mode and graph them.
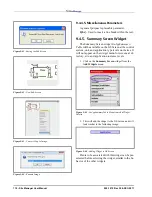
9.4.2.2. My System Home Page
Click the home page icon
to return to the set GS
system home page from anywhere within Site Manag-
er. If a GS Screen has not been set as a system home
page, a message will appear indicating that no home
page has been set.
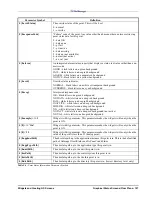
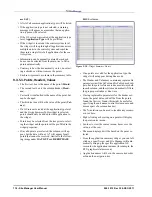
9.4.2.3. Setting a GS Screen as Your System
Home Page
Located off the My Info drop-down menu, click
Set As System Home Page to set a GS Screen as your
home page and overwrite any previously set GS
Screen system home page. A confirmation window
appears: click OK to set the GS Screen as your new
system home page (no undo) or close this window.
After a GS Screen has been set as a system home
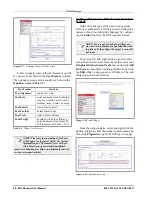
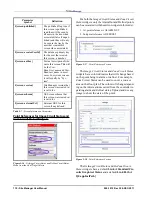
Delete
(Delete Key)
Deletes user image;
click Yes on prompt-
ing window to delete
image, or No to return
to the tree
Remove All
Erases all filenames
from list at once, but
will not remove file
from the database or
tree if it has been up-
loaded successfully.
Click the green check
mark to erase the file-
name from the list
(this will not remove
the file from the data-
base or tree). Click
outside the menu to
close and view the file
in the tree.
New Folder
(Ctrl + N)
Creates a new user
folder in the tree that
can be named
Add
Opens Choose File
window where imag-
es from drive can be
selected and uploaded
to database
Upload
Uploads image to da-
tabase; a green check
mark icon will appear
next to the filename
and image will be-
come visible in the
tree once upload is
complete; once image
is in database, it is cat-
egorized as user im-
age and can then be
used
Icon
Description
Function
Table 9-3 - Image Library Menu Icons and Tools
Summary of Contents for Site Manager
Page 1: ...026 1012 Rev 3 06 DEC 2011 Site Manager User Manual ...
Page 2: ......
Page 4: ......
Page 124: ......
Page 129: ......