Adding and Replacing Parts
177
3
Replace the memory module cover and tighten the three screws.
4
Insert the battery into the battery bay or connect the AC adapter to your
computer and an electrical outlet.
5
Turn on the computer.
As the computer boots, it detects the additional memory and automatically
updates the system configuration information.
To confirm the amount of memory installed in the computer:
•
In the Microsoft
®
Windows
®
XP operating system,
right-click the My
Computer icon on your desktop. Click
Properties
→
General
.
•
In the
Microsoft Windows Vista
™ operating system, click the Windows
Vista Start button
, and right-click
Computer
→
Properties
.
Modem
CAUTION:
Before you begin any of the procedures in this section, follow the
safety instructions in the
Product Information Guide
.
1
Follow the procedures in "Before You Begin" on page 163.
2
Turn the computer over, loosen the three captive screws on the modem
cover, and then remove the cover.
3
Remove the screw securing the modem to the system board.
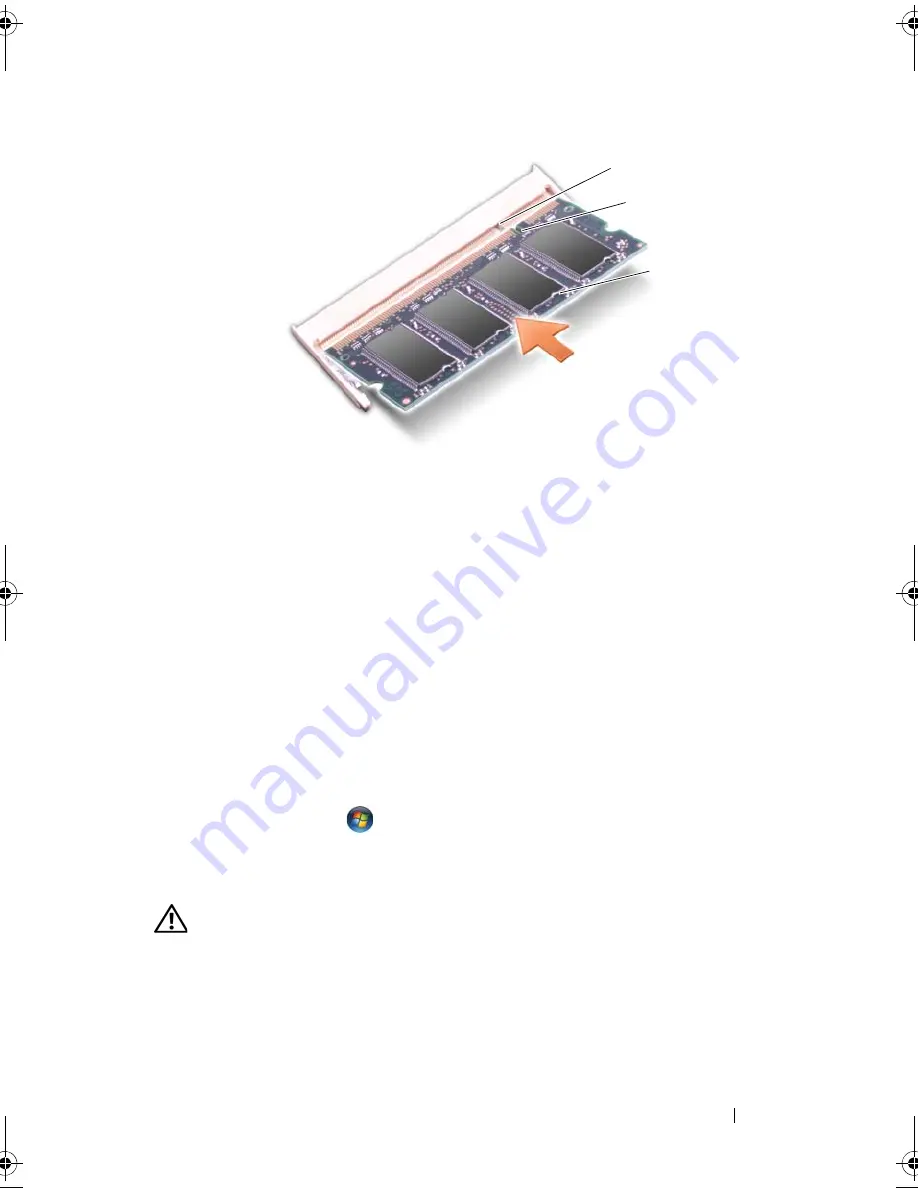
1
tab
2
notch
3
memory module
1
3
2
book.book Page 177 Wednesday, September 16, 2009 11:12 AM
Summary of Contents for Vostro 1400
Page 1: ...w w w d e l l c o m s u p p o r t d e l l c o m Dell Vostro 1400 Owner s Manual Model PP26L ...
Page 14: ...14 Contents Glossary 223 Index 241 ...
Page 22: ...22 Finding Information ...
Page 36: ...36 About Your Computer ...
Page 54: ...54 Using the Keyboard and Touch Pad ...
Page 66: ...66 Using the Optional Camera ...
Page 92: ...92 Using Multimedia ...
Page 96: ...96 Using ExpressCards ...
Page 110: ...110 Setting Up and Using Networks ...
Page 114: ...114 Securing Your Computer ...
Page 190: ...190 Adding and Replacing Parts ...
Page 192: ...192 Dell QuickSet Features ...
Page 202: ...202 Getting Help ...
Page 212: ...212 Specifications ...
Page 222: ...222 Appendix ...
Page 240: ...240 Glossary ...


