


TCNM-AD/EX/SP Family Software Configuration Parameter Guide
8
Network Wizard
Before performing this procedure, an ID-NET™ address must be assigned to each slave scanner. The most practical
method is through the Net-Autoset procedure. Refer to the scanner Reference manual for details about alternative
address assignment methods.
Once all addresses have been assigned, the Network Wizard is to be used when one or more scanner addresses and
labels need to be modified.
1.
Click on the
button to open the Network Wizard dialog box:
a.
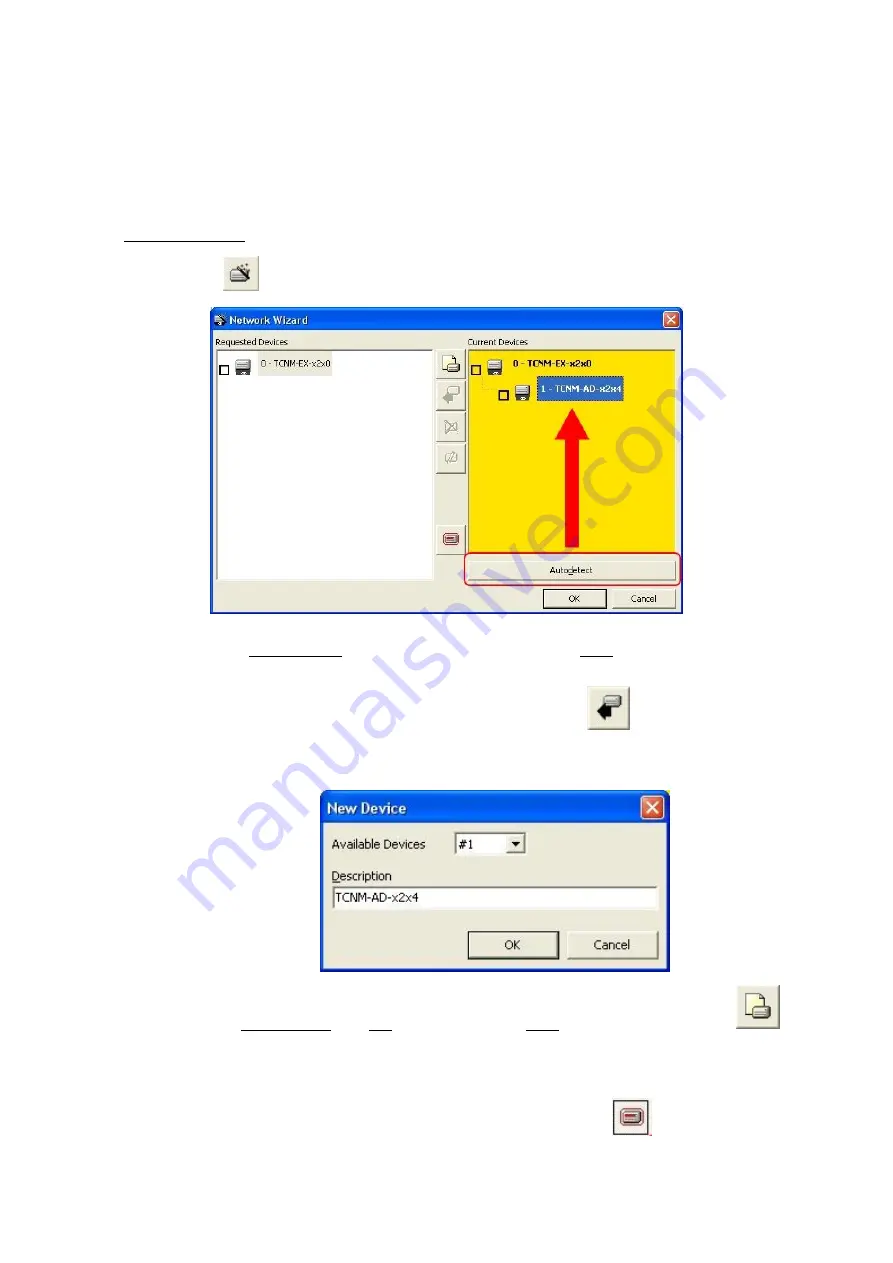
if the slave scanners have already been configured and wired to the network, click on the
Autodetect button to start a polling procedure of the current network. The master and all slave
scanners found will be represented in the "Current Devices" area. Then, select the desired slave
scanner from the "Current Devices" area and click on the
icon (or drag and drop) to
transfer it to the "Requested Devices" area where your network customization is defined. The
following dialog box will appear allowing (if necessary) to change the slave address ("Available
Device" field) and label ("Description" field):
b.
if the slave scanners have
not
been configured and wired to the network, click on the
icon
to add a new device defining its address and model. The added slave scanner will then be
displayed in the "Requested Devices" area.
2.
If desired, select a scanner within the "Current Devices" area and click on the
icon (or select the "Show
Device" option from the right-click menu) to make the dialog box appear as follows:


