


Chapter 4
75
Preparation of Measurement Accessories
Adapter Setting
4
. P
re
par
ati
on
of
M
eas
ur
em
en
t A
cce
ss
or
ie
s
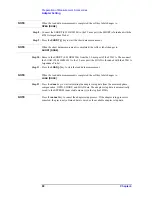
KIT” is displayed in the instrument state area in the LCD's upper-left side.
Step 1.
Make sure that the 42942A is correctly connected to the four-terminal pair port of the
Agilent 4294A.
Figure 4-4
Connecting the 42942A
NOTE
The 42942A must be directly connected to the four-terminal pair port of the Agilent
4294A. If another accessory such as a cable or adapter is inserted between the 42942A and
the four-terminal pair port of the Agilent 4294A, the correct adapter setup data cannot be
obtained and correct device measurement cannot be performed after the adapter setup.
Step 2.
More than 30 minutes warm-up time is required after turning on the Agilent 4294A.
Step 3.
Make the correct adapter selection for the 42942A in accordance with “Adapter Selection”
on page 68.
Step 4.
After performing Step 4 of “Adapter Selection” on page 68, press the
SETUP
key to
display the Adapter Setup Menu.
Step 5.
Connect OPEN (0 S) to the 7-mm port of the 42942A (the OPEN standard is furnished with
the 42942A Terminal Adapter).
Summary of Contents for 4294A
Page 1: ......
Page 2: ......
Page 4: ......
Page 5: ......
Page 6: ......
Page 8: ......
Page 16: ...8 ...
Page 30: ...22 Chapter1 Installation Power Cable Figure 1 2 Alternative Power Cable Options ...
Page 70: ...62 Chapter3 Front Rear Panel and LCD Display Items Displayed on the LCD ...
Page 436: ...428 AppendixB Key Definitions Softkeys displayed by pressing the Recall key ...
Page 454: ...446 AppendixC Error messages WRONG I O PORT DIRECTION ...
Page 468: ......


