


Chapter 5
107
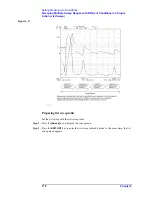
Setting Measurement Conditions
Setting and Applying dc Bias
5
. S
etti
ng M
eas
ur
em
ent
Cond
iti
on
s
Setting and Applying dc Bias
Follow the steps below to apply dc bias to DUT, regardless of whether you plan to sweep
by dc bias.
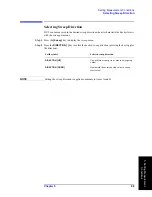
1. Selecting dc bias mode
Step 1.
Press the
[Source]
key to display the signal source menu.
Step 2.
Press
the
BIAS MENU
key to display the dc bias menu.
Step 3.
Press the
MODE [ ]
key to display the dc bias mode menu.
Step 4.
Select the dc bias mode.
Step 5.
Press the
return
key to return to the dc bias menu. Note that the dc bias mode currently
selected is displayed in the key label
[ ]
of the
MODE [ ]
key.
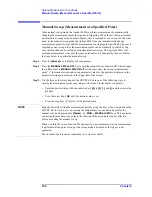
2. Setting fixed dc bias level
When the sweep parameter is not dc bias, select the dc bias mode and then follow the steps
below to set dc bias level.
NOTE
Follow the steps shown in “Setting Sweep Range” on page 89 to set the sweep range when
the sweep parameter is dc bias.
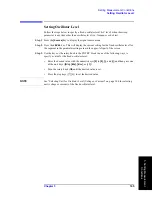
Step 1.
Press
the
VOLTAGE LEVEL
key if voltage source is selected for dc bias mode or the
CURRENT LEVEL
key if current source is selected. This will display the current setting for
the dc voltage or the current bias level for the segment in the parameter settings located in
the upper left area of the screen.
Step 2.
Use the keys or rotary knob of the ENTRY block in one of the following ways to specify a
value for the dc voltage or current bias level.
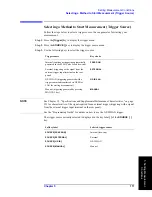
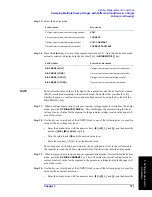
dc bias mode
Key stroke
Voltage source (non-constant voltage mode)
VOLT
Current source (non-constant current mode)
CURRENT
Voltage source (constant voltage mode)
VOLT CONSTANT
Current source (constant current mode)
CURRENT CONSTANT
Softkey label
Selected dc bias mode
MODE [VOLT]
Voltage source (non-constant voltage mode)
MODE [CURR]
Current source (non-constant current mode)
MODE [C-VOLT]
Voltage source (constant voltage mode)
MODE [C-CURR]
Current source (constant current mode)
Summary of Contents for 4294A
Page 1: ......
Page 2: ......
Page 4: ......
Page 5: ......
Page 6: ......
Page 8: ......
Page 16: ...8 ...
Page 30: ...22 Chapter1 Installation Power Cable Figure 1 2 Alternative Power Cable Options ...
Page 70: ...62 Chapter3 Front Rear Panel and LCD Display Items Displayed on the LCD ...
Page 436: ...428 AppendixB Key Definitions Softkeys displayed by pressing the Recall key ...
Page 454: ...446 AppendixC Error messages WRONG I O PORT DIRECTION ...
Page 468: ......


