179
Remote Reception Number Setting
Fax reception can be activated from an extension phone
connected to the machine by entering a 1-digit number
and pressing the
key twice on the phone's keypad.
This number is called the remote reception number, and
you can set it to any number from "0" to "9".
Specify the number with the
keys and touch the
[OK] key. (To make the number change quickly, keep
your finger on the
or
key.)
Original Print on Transaction Report
When a transaction report is printed following a memory
transmission, this setting is used to have part of the first
page of the original printed on the transaction report.
When printing of transaction reports is disabled, this
function will not operate.
Select [Print Out All Report], [Print Out Error Report
Only], or [No Printed Report] for the condition for printing
the original on transaction reports and touch the [OK]
key.
Transaction Report Print Select
Setting
These settings are used to set the conditions for printing
transaction reports for single transmissions, broadcast
transmissions, receptions, and confidential receptions.
For each type of operation, touch the key of the desired
condition.
The default settings are indicated in gray
.
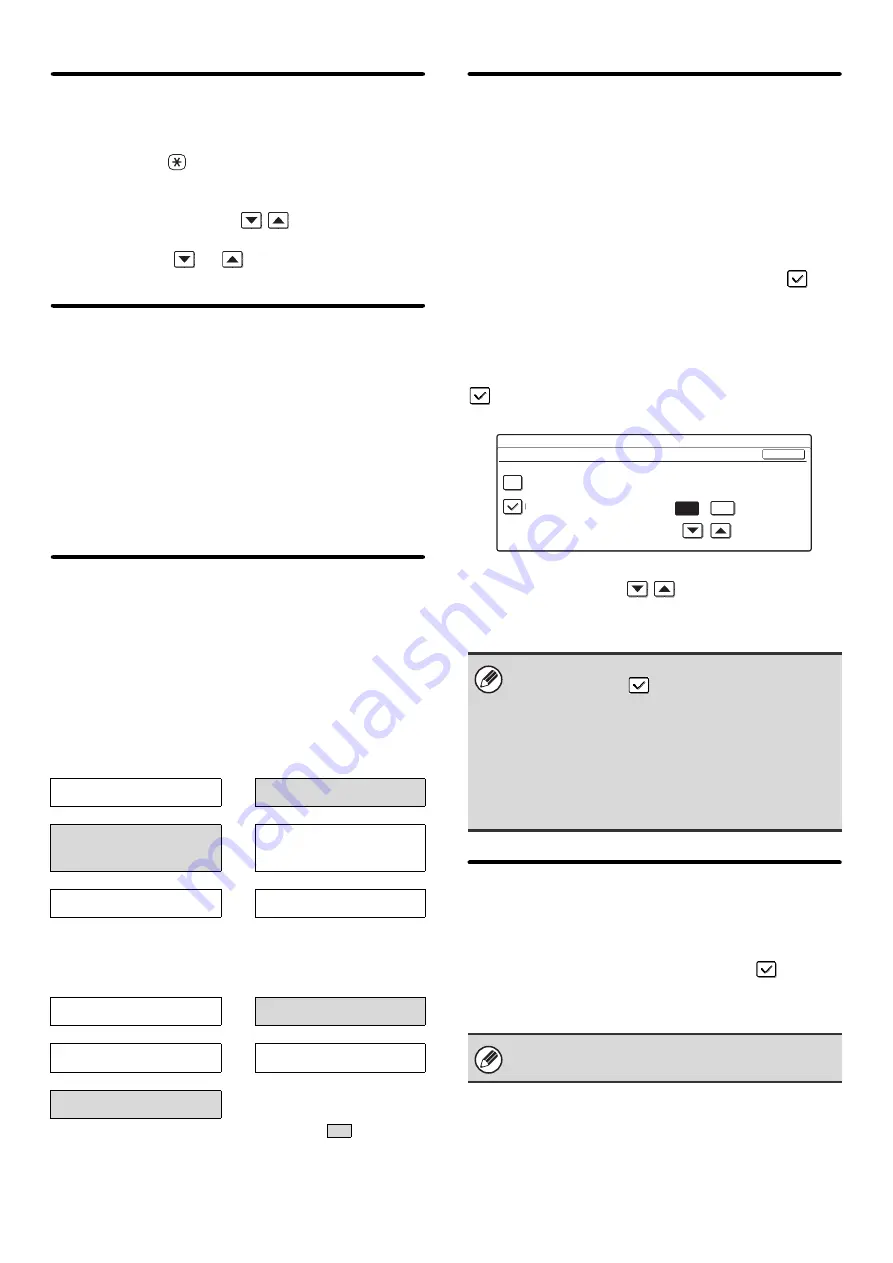
Activity Report Print Select Setting
This is used to have the Image Sending Activity Report
that is stored in the machine's memory printed at regular
intervals.
The Image Sending Activity Report can be set to
automatically print each time the number of transactions
reaches 200, and it can also be set to automatically print
at a specified time (once a day only). (Both settings can
be selected.)
When the [Auto Print at Memory Full] checkbox
is
selected, the Image Sending Activity Report will
automatically print when the number of transactions
reaches 200.
To have the report print automatically at a specified time,
select the [Print Daily at Designated Time] checkbox
. The "Hour" and "Minute" keys will appear at the
right.
Touch the "Hour" and "Minute" keys and specify the
setting of each with the
keys. When finished,
touch the [OK] key. The report will print at the specified
time.
ECM
Line conditions can sometimes distort a transmitted fax
image. When ECM (Error Correction Mode) is turned on,
pages that are distorted are automatically re-transmitted.
To enable this setting, select the checkbox
and
touch the [OK] key.
This setting is enabled by factory default.
Single Sending
Broadcasting
Print Out All Report
Print Out All Report
Print Out Error Report
Only
Print Out Error Report
Only
No Printed Report
No Printed Report
Receiving
Confidential
Reception
Print Out All Report
Print Out Notice Page
Print Out Error Report only
Not Print Out Notice Page
No Printed Report
• If you only select the [Print Daily at Designated
Time] checkbox
and the number of recorded
transactions reaches 200 before the specified time,
each new transaction will delete the oldest
transaction (the oldest transaction will not be
printed).
• The Image Sending Activity Report can also be
printed manually. See "
"
(page 186).
If the other machine supports Super G3, ECM will
function regardless of this setting.
System Settings
Activity Report Print Select Setting
Auto Print at Memory
Full
Print Daily at
Designated Time
Minute
Hour
00
00
OK
Содержание MX 3501N - Color Laser - Copier
Страница 1: ...User s Guide MX 3500N MX 3501N MX 4500N MX 4501N MX 2300N MX 2700N MODEL ...
Страница 2: ...System Settings Guide MX 3500N MX 3501N MX 4500N MX 4501N MX 2300N MX 2700N MODEL ...
Страница 127: ...MX4500 US SYS Z2 System Settings Guide MX 3500N MX 3501N MX 4500N MX 4501N MX 2300N MX 2700N MODEL ...
Страница 173: ... mx4500_us_ins book 44 ページ 2005年10月31日 月曜日 午前11時57分 ...
Страница 174: ... mx4500_us_ins book 45 ページ 2005年10月31日 月曜日 午前11時57分 ...
Страница 176: ...Document Filing Guide MX 3500N MX 3501N MX 4500N MX 4501N MX 2300N MX 2700N MODEL ...
Страница 222: ...MX4500 US FIL Z1 Document Filing Guide MX 3500N MX 3501N MX 4500N MX 4501N MX 2300N MX 2700N MODEL ...
Страница 223: ...Scanner Guide MX 3500N MX 3501N MX 4500N MX 4501N MX 2300N MX 2700N MODEL ...
Страница 354: ...MX4500 US SCN Z2 Scanner Guide MX 3500N MX 3501N MX 4500N MX 4501N MX 2300N MX 2700N MODEL ...
Страница 355: ...Printer Guide MX 3500N MX 3501N MX 4500N MX 4501N MX 2300N MX 2700N MODEL ...
Страница 370: ...15 2 Select 2 sided printing 1 Select 2 Sided Book or 2 Sided Tablet 2 Click the OK button 3 Start printing 2 1 ...
Страница 415: ...MX4500 US PRT Z2 Printer Guide MX 3500N MX 3501N MX 4500N MX 4501N MX 2300N MX 2700N MODEL ...
Страница 416: ...Facsimile Guide MX FXX1 MODEL ...
Страница 605: ...MX FXX1 MODEL MX4500 US FAX Z2 Facsimile Guide ...
Страница 606: ...Copier Guide MX 3500N MX 3501N MX 4500N MX 4501N MX 2300N MX 2700N MODEL ...
Страница 775: ...MX4500 US CPY Z1 Copier Guide MX 3500N MX 3501N MX 4500N MX 4501N MX 2300N MX 2700N MODEL ...
Страница 843: ...MX4500 US USR Z1 User s Guide MX 3500N MX 3501N MX 4500N MX 4501N MX 2300N MX 2700N MODEL ...


