109
I-Fax Settings
I-Fax Default Settings
These settings are used to configure the default settings for Internet fax.
Touch the [Image Send Settings] key, the [I-Fax Settings] key, and the [I-Fax Default Settings] key, and configure the
settings.
I-Fax Own Name and Address Set
This is used to configure the sender name and address
for Internet fax. The entered sender name and address
are printed at the top of each fax page you send.
1
Touch the [Name] key and enter the
name.
A maximum of 40 characters can be entered for the name.
After you have entered the name, touch the [OK] key.
2
Touch the [Own Address] key and enter
the sender address.
A maximum of 56 characters can be entered. After you
have entered the address/domain, touch the [OK] key.
3
Touch the [OK] key.
Auto Wake Up Print
When the [POWER] key (
) is "off" (but the main
power switch is "on") and an Internet fax is received, this
function activates the machine and prints the fax.
To enable this setting, select the checkbox
and
touch the [OK] key.
When this function is disabled, received Internet faxes
are not printed until the [POWER] key (
) is switched
"on".
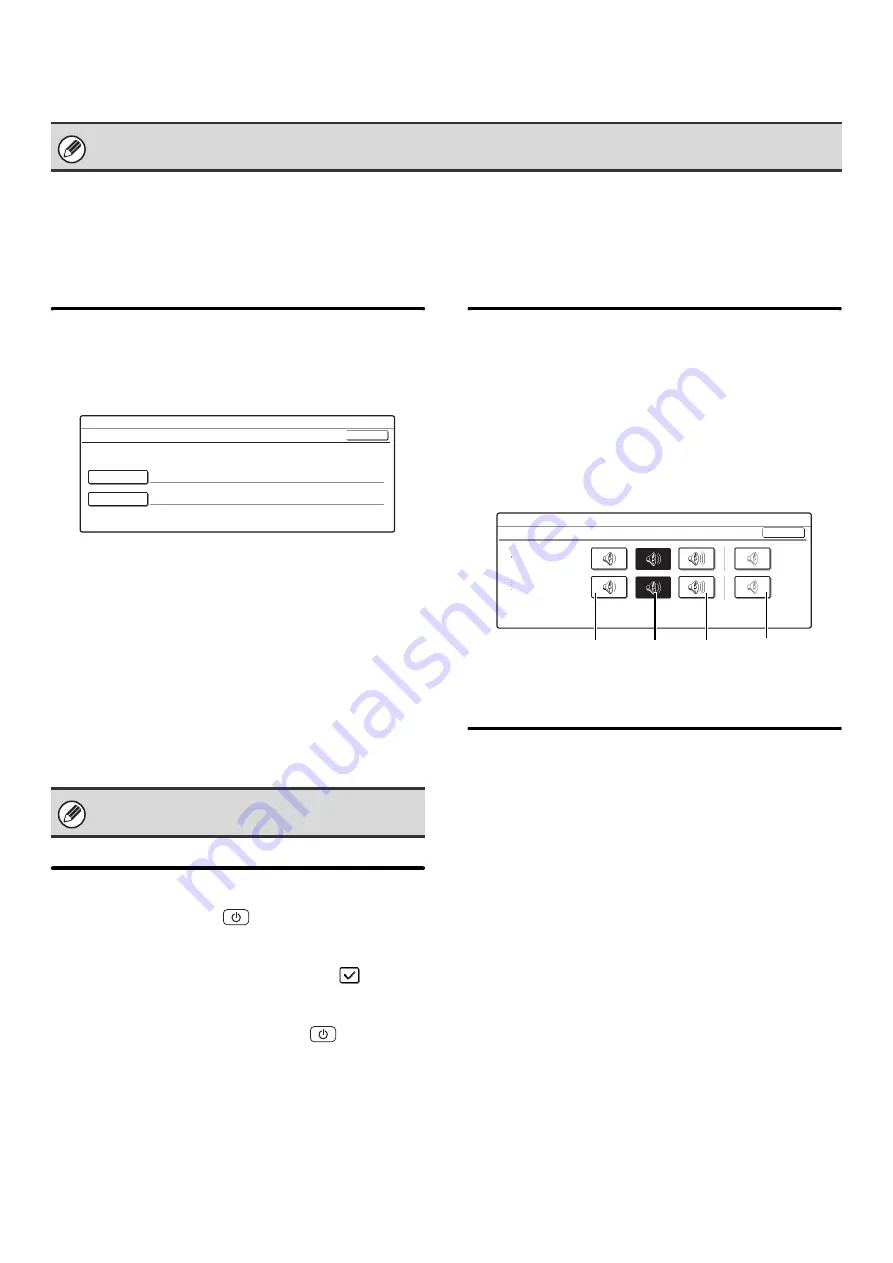
I-Fax Speaker Volume Settings
This is used to adjust the volume of fax receive signals
and communication error signals heard through the
speaker.
A fax receive signal sounds after the machine checks
the mail server and retrieves received faxes. A
communication error signal sounds when a delivery
failed e-mail is received from the destination Internet fax
machine.
Select one of the keys and touch the [OK] key.
Original Print on Transaction
Report
When a transaction report is printed, this is used to print
part of the first page of the transmitted original on the
transaction report. Select one of the settings below.
• Print Out All Report
• Print Out Error Report Only
• No Printed Report
Select one of the keys and touch the [OK] key.
This setting will not be effective if the following
"
Transaction Report Print Select Setting
set to "No Printed Report".
These settings can be configured when the Internet fax expansion kit is installed.
For the procedure for entering text, see "6.
ENTERING TEXT" in the User's Guide.
System Settings
I-Fax Own Name and Address Set
Name
AAA AAA
Own Address
OK
System Settings
I-Fax Speaker Volume Settings
OK
Receive Signal
Communication
Error Signal
Volume:
Small
Volume:
Middle
Volume:
Big
No Sound
Содержание MX 3501N - Color Laser - Copier
Страница 1: ...User s Guide MX 3500N MX 3501N MX 4500N MX 4501N MX 2300N MX 2700N MODEL ...
Страница 2: ...System Settings Guide MX 3500N MX 3501N MX 4500N MX 4501N MX 2300N MX 2700N MODEL ...
Страница 127: ...MX4500 US SYS Z2 System Settings Guide MX 3500N MX 3501N MX 4500N MX 4501N MX 2300N MX 2700N MODEL ...
Страница 173: ... mx4500_us_ins book 44 ページ 2005年10月31日 月曜日 午前11時57分 ...
Страница 174: ... mx4500_us_ins book 45 ページ 2005年10月31日 月曜日 午前11時57分 ...
Страница 176: ...Document Filing Guide MX 3500N MX 3501N MX 4500N MX 4501N MX 2300N MX 2700N MODEL ...
Страница 222: ...MX4500 US FIL Z1 Document Filing Guide MX 3500N MX 3501N MX 4500N MX 4501N MX 2300N MX 2700N MODEL ...
Страница 223: ...Scanner Guide MX 3500N MX 3501N MX 4500N MX 4501N MX 2300N MX 2700N MODEL ...
Страница 354: ...MX4500 US SCN Z2 Scanner Guide MX 3500N MX 3501N MX 4500N MX 4501N MX 2300N MX 2700N MODEL ...
Страница 355: ...Printer Guide MX 3500N MX 3501N MX 4500N MX 4501N MX 2300N MX 2700N MODEL ...
Страница 370: ...15 2 Select 2 sided printing 1 Select 2 Sided Book or 2 Sided Tablet 2 Click the OK button 3 Start printing 2 1 ...
Страница 415: ...MX4500 US PRT Z2 Printer Guide MX 3500N MX 3501N MX 4500N MX 4501N MX 2300N MX 2700N MODEL ...
Страница 416: ...Facsimile Guide MX FXX1 MODEL ...
Страница 605: ...MX FXX1 MODEL MX4500 US FAX Z2 Facsimile Guide ...
Страница 606: ...Copier Guide MX 3500N MX 3501N MX 4500N MX 4501N MX 2300N MX 2700N MODEL ...
Страница 775: ...MX4500 US CPY Z1 Copier Guide MX 3500N MX 3501N MX 4500N MX 4501N MX 2300N MX 2700N MODEL ...
Страница 843: ...MX4500 US USR Z1 User s Guide MX 3500N MX 3501N MX 4500N MX 4501N MX 2300N MX 2700N MODEL ...


