98
Auto Selection Setting of Tray that
is Supplied the Paper
When this setting is enabled and paper is loaded in a
tray while the machine is on standby in copy mode, that
tray is automatically selected.
To enable this setting, select the checkbox
and
touch the [OK] key.
Initial Color Balance Setting
Color balance values obtained using "Color Balance" in
the special modes can be stored in a program (1 to 48),
and those values can be called up and stored as the
initial color balance setting.* Use this feature when you
want to repeatedly use a color balance setting for a
favorite color or for correction when a change occurs in
the color balance.
* Preset values displayed when you select "Color
Balance" in the special modes. The factory default
settings are the "0" position for all eight levels of each
color.
Touch the key of the stored program number and then
touch the [OK] key. (A key of a program that has not
been stored cannot be selected.)
To return the stored initial color balance setting to the
factory default setting (the "0" position for all eight levels
of each color), touch the [Return to the Factory Default
Setting] key and then touch the [OK] key.
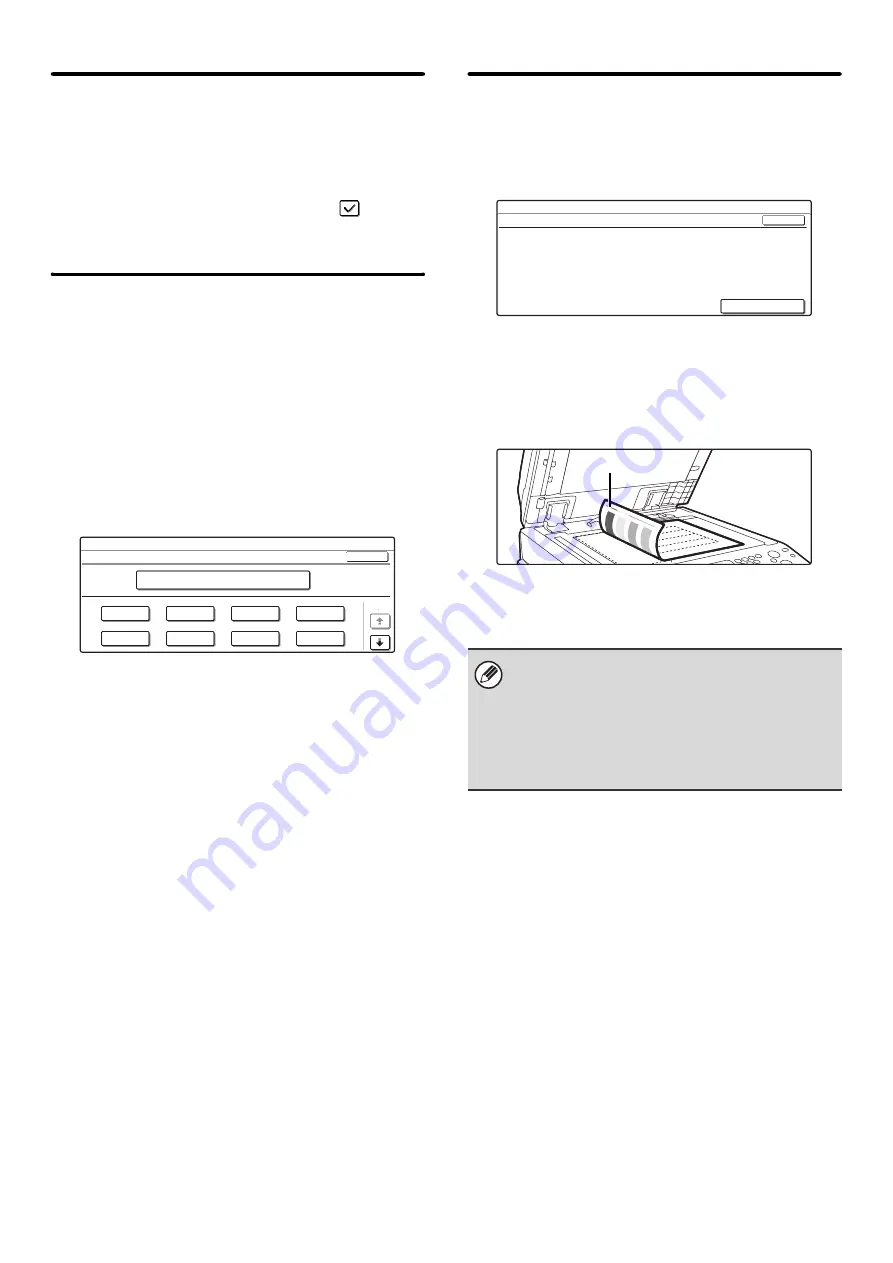
Auto Color Calibration
This is used to perform automatic color correction when
the color in color copies is off. The machine prints a test
patch, the test patch is scanned, and the color is
automatically corrected.
After the [Execute] key is touched and a test patch is
printed, a message appears prompting you to begin
automatic calibration. Place the test patch on the
document glass as shown below so that the narrow line
of one-side of the paper is on the left and touch the
[Execute] key.
Lay copy paper (about five sheets) that is the same size
as the test patch on top of the placed test patch, and
gently close the automatic document feeder.
System Settings
Initial Color Balance Setting
1
5
2
6
3
7
4
8
Return to the Factory Default Setting
OK
1/6
• Before executing Auto Color Calibration, check to
see if the registration adjustment is correct. If the
registration adjustment is not correct, perform
"
" (page 95).
• If the color is still off after performing Auto Color
Calibration, repeating Auto Color Calibration once
again may improve the color.
System Settings
Auto Color Calibration
Use 11"x17" or A3 paper for this adjustment.
Press [Execute] to print the test patch.
OK
Execute
Narrow line
Содержание MX 3501N - Color Laser - Copier
Страница 1: ...User s Guide MX 3500N MX 3501N MX 4500N MX 4501N MX 2300N MX 2700N MODEL ...
Страница 2: ...System Settings Guide MX 3500N MX 3501N MX 4500N MX 4501N MX 2300N MX 2700N MODEL ...
Страница 127: ...MX4500 US SYS Z2 System Settings Guide MX 3500N MX 3501N MX 4500N MX 4501N MX 2300N MX 2700N MODEL ...
Страница 173: ... mx4500_us_ins book 44 ページ 2005年10月31日 月曜日 午前11時57分 ...
Страница 174: ... mx4500_us_ins book 45 ページ 2005年10月31日 月曜日 午前11時57分 ...
Страница 176: ...Document Filing Guide MX 3500N MX 3501N MX 4500N MX 4501N MX 2300N MX 2700N MODEL ...
Страница 222: ...MX4500 US FIL Z1 Document Filing Guide MX 3500N MX 3501N MX 4500N MX 4501N MX 2300N MX 2700N MODEL ...
Страница 223: ...Scanner Guide MX 3500N MX 3501N MX 4500N MX 4501N MX 2300N MX 2700N MODEL ...
Страница 354: ...MX4500 US SCN Z2 Scanner Guide MX 3500N MX 3501N MX 4500N MX 4501N MX 2300N MX 2700N MODEL ...
Страница 355: ...Printer Guide MX 3500N MX 3501N MX 4500N MX 4501N MX 2300N MX 2700N MODEL ...
Страница 370: ...15 2 Select 2 sided printing 1 Select 2 Sided Book or 2 Sided Tablet 2 Click the OK button 3 Start printing 2 1 ...
Страница 415: ...MX4500 US PRT Z2 Printer Guide MX 3500N MX 3501N MX 4500N MX 4501N MX 2300N MX 2700N MODEL ...
Страница 416: ...Facsimile Guide MX FXX1 MODEL ...
Страница 605: ...MX FXX1 MODEL MX4500 US FAX Z2 Facsimile Guide ...
Страница 606: ...Copier Guide MX 3500N MX 3501N MX 4500N MX 4501N MX 2300N MX 2700N MODEL ...
Страница 775: ...MX4500 US CPY Z1 Copier Guide MX 3500N MX 3501N MX 4500N MX 4501N MX 2300N MX 2700N MODEL ...
Страница 843: ...MX4500 US USR Z1 User s Guide MX 3500N MX 3501N MX 4500N MX 4501N MX 2300N MX 2700N MODEL ...


