Group 8
Job Editor
Page 109
JET3 Series
Release 2.02
7.2.5.3 Create new job lists
–
Example „Batch Job”
Task:
Five different print jobs shall be printed (JL-Job1 to JL-Job5). The print-out shall be carried
out in a fixed order. The print jobs shall be printed in the following order and with the
respective repetitions:
job no.
Print job
Number of printouts and
repetitions
Total
number of
printouts
<PrintGo delay> in
[mm]. Defined in
each print job
1
JL-Job1
1 printout, 0 repetitions
1
0
2
JL-Job2
1 printout, 2 repetitions
3
10
3
JL-Job3
1 printout, 1 repetitions
2
20
4
JL-Job4
1 printout, 3 repetitions
4
10
5
JL-Job5
1 printout, 0 repetitions
1
30
Presets:
The described presets depend on the used hardware and may vary.
The print-out speed is measured with an external encoder with a resolution of 12.5
pulses/mm. The encoder shall only work clockwise and shall be locked against
backward movements. The speed dependent output shall not be used. The
<PrintGo>
signal is provided from an external sensor and provides a positive edge. The
<PrintGo
Gate>
function shall not be used and the print-out shall not be stopped immediately
when a
<PrintStop>
signal occurs but the current print job shall be finished. The
<Date
Change Parameter>
option shall not be used.
It is assumed that the 5 different print jobs are already created. A
<PrintGo delay>
(distance between
<PrintGo>
signal and start of the printout) cannot be
defined in the
job list. A
<PrintGo delay>
has to be defined in each print job itself. The
<PrintGo
delay>
of each of the five print jobs of this example are listed in the table above.
Approach:
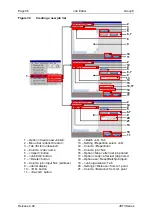
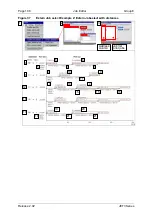
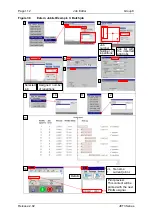
The numbers in brackets refer to the numbers in
Figure 38
1. Open the
<Batch Job>
tab from the menu bar of the main window of the printer:
<Job>
-
<Create new Joblist>
-
<Batch>
(1)
.
2. Push the
<Import>
button for adding the first print job to the list
(2).
3. Select the first print job
(2)
. The first column of the job list displays the print job
number, the second the numbers of repetitions and the third the print job names
(3)
4. Define the number of repetitions for the selected job
(3)
.
5. Fill the job list display with the 4 remaining print jobs
(4)
and assign the required
repetitions to each job
(4)
.
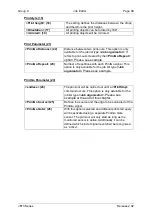
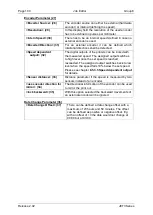
6. Enter the following settings in the
<Joblist settings>
(5-8)
:
Содержание JET3
Страница 1: ...Operating Manual V2 02 Please keep for future reference ...
Страница 2: ......
Страница 21: ...Group 2 Safety Page 19 JET3 Series Release 2 02 2 4 Safety sticker Figure 1 Safety sticker Safety sticker ...
Страница 380: ...Page 378 Appendix Connection Examples for the Interfaces Group 12 Release 2 02 JET3 Series Interface X3 Outputs ...
Страница 390: ...Page 388 Appendix List of illustrations Group 12 Release 2 02 JET3 Series 12 4 2 Print head SK 6 ...
Страница 391: ...Group 12 Appendix List of illustrations Page 389 JET3 Series Release 2 02 12 4 3 Print head SK 4 Option ...
Страница 392: ...Page 390 Appendix List of illustrations Group 12 Release 2 02 JET3 Series 12 4 4 Cabinet JET printer ...


