


To choose the shading properties that a light affects:
1
On the Lights tab, under Parameters, select the Affects option.
2
Under Light Affects, select the shading properties you want the light to
affect.
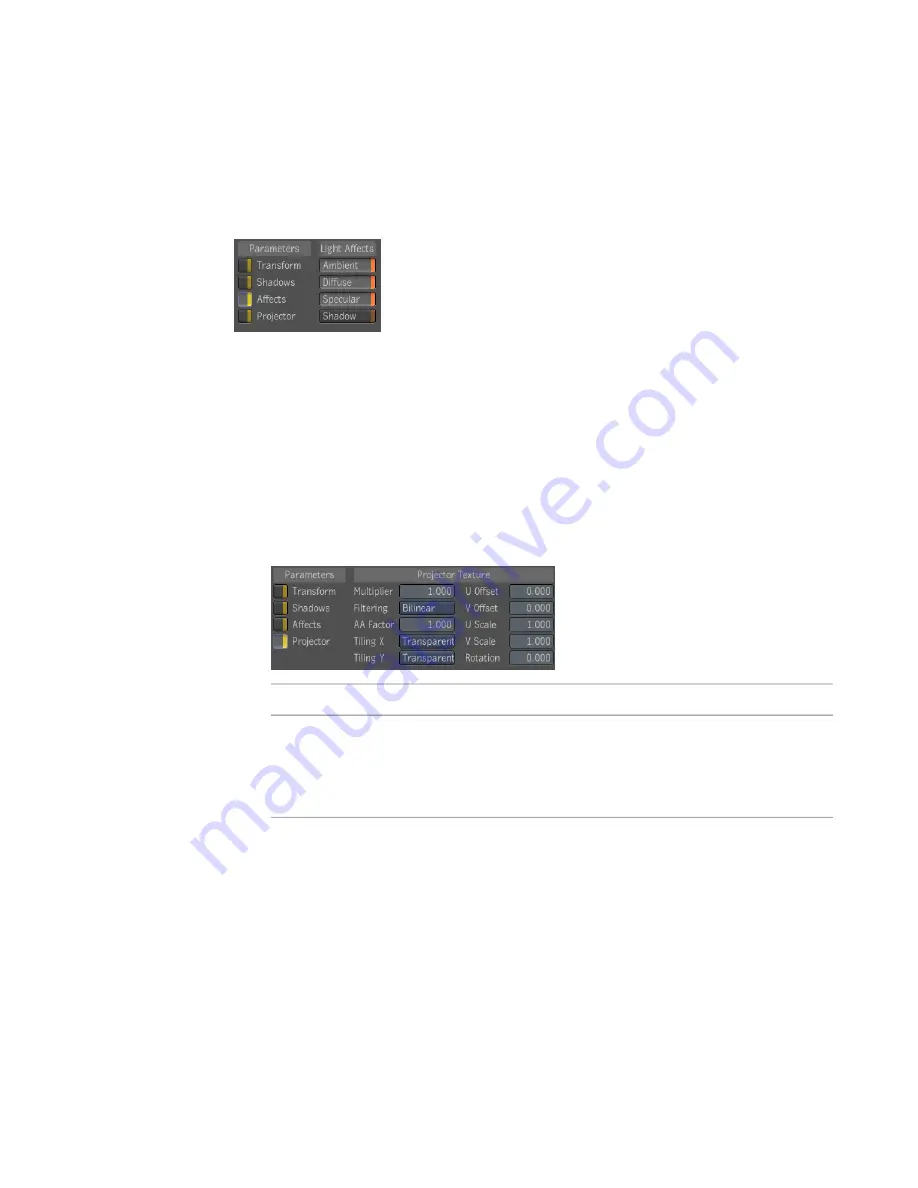
Adding a Projector Texture to a Light
A projector texture is created when you connect an image to a light node in
the Reaction Group Schematic. The Projector Texture is applied in the same
way as a material texture.
To add a projector texture to a light:
➤
On the Lights tab, under Parameters, select Projector.
Description
Property
Uniformly scales the brightness of the image texture up or down.
This is useful for setting the amount that a given texture affects the
Multiplier
object's overall look. The default value is 1, but you can overdrive
the brightness to achieve specific effects.
Sets the quality of the texture image. When a texture is stretched
onto an object, it may, depending on the camera position, lose
Filtering
some of its crispness. The rendered can compensate for this, but it
may slow the process. Filtering options include:
■
Nearest
A box filter and the fastest way to resample an im-
age since it only samples a single pixel of the input image to
determine the value of a given pixel in the result image. Pro-
duces significant amount of aliasing.
Adding a Projector Texture to a Light | 273
Содержание 495B1-05A111-1301 - 3ds Max Design 2010
Страница 1: ...Composite User Guide ...
Страница 16: ...4 ...
Страница 18: ...6 ...
Страница 88: ...76 ...
Страница 92: ...6 A new composition has been created 80 Chapter 4 Start Compositing Now ...
Страница 101: ...8 The Render dialog appears Click the Start button to start the rendering process To Render the Composition 89 ...
Страница 102: ...90 ...
Страница 122: ...110 ...
Страница 126: ...114 ...
Страница 186: ...174 Chapter 9 Getting Familiar with Your Workspace ...
Страница 195: ...UdaTextField XML Resource Files 183 ...
Страница 196: ...UdaValueEditor UdaMenu 184 Chapter 9 Getting Familiar with Your Workspace ...
Страница 197: ...UdaPushedToggle XML Resource Files 185 ...
Страница 198: ...UDA Declaration 186 Chapter 9 Getting Familiar with Your Workspace ...
Страница 200: ...188 ...
Страница 250: ...238 ...
Страница 309: ...The stereo rig is ready to use You can adjust left and right eye convergence Setting up a Stereo Camera Rig 297 ...
Страница 310: ...298 ...
Страница 348: ...336 ...
Страница 399: ...About Blurs 387 ...
Страница 411: ...Output Controls The Output UI allows you to control the following parameters About Blurs 399 ...
Страница 450: ...438 ...
Страница 478: ...466 ...
Страница 520: ...508 ...
Страница 548: ...536 ...
Страница 578: ...566 ...
Страница 596: ...The last step is to add the sun s reflection to the water 584 Chapter 24 Raster Paint ...
Страница 606: ...594 ...
Страница 670: ...658 ...
Страница 710: ... a Tool time cursor b Global time frame markers 698 Chapter 28 Time Tools ...
Страница 722: ...710 ...
Страница 729: ...Backward vectors Forward and backward vectors The Show Vectors tool has the following parameters Show Vectors 717 ...
Страница 805: ...8 Add any correction using the Translation Rotation Scale parameters Simultaneous Stabilizing and Tracking 793 ...
Страница 806: ...794 ...
Страница 828: ...816 ...
Страница 870: ...858 ...
Страница 888: ...876 ...
Страница 898: ...886 ...


