background image

To close a composition:

1

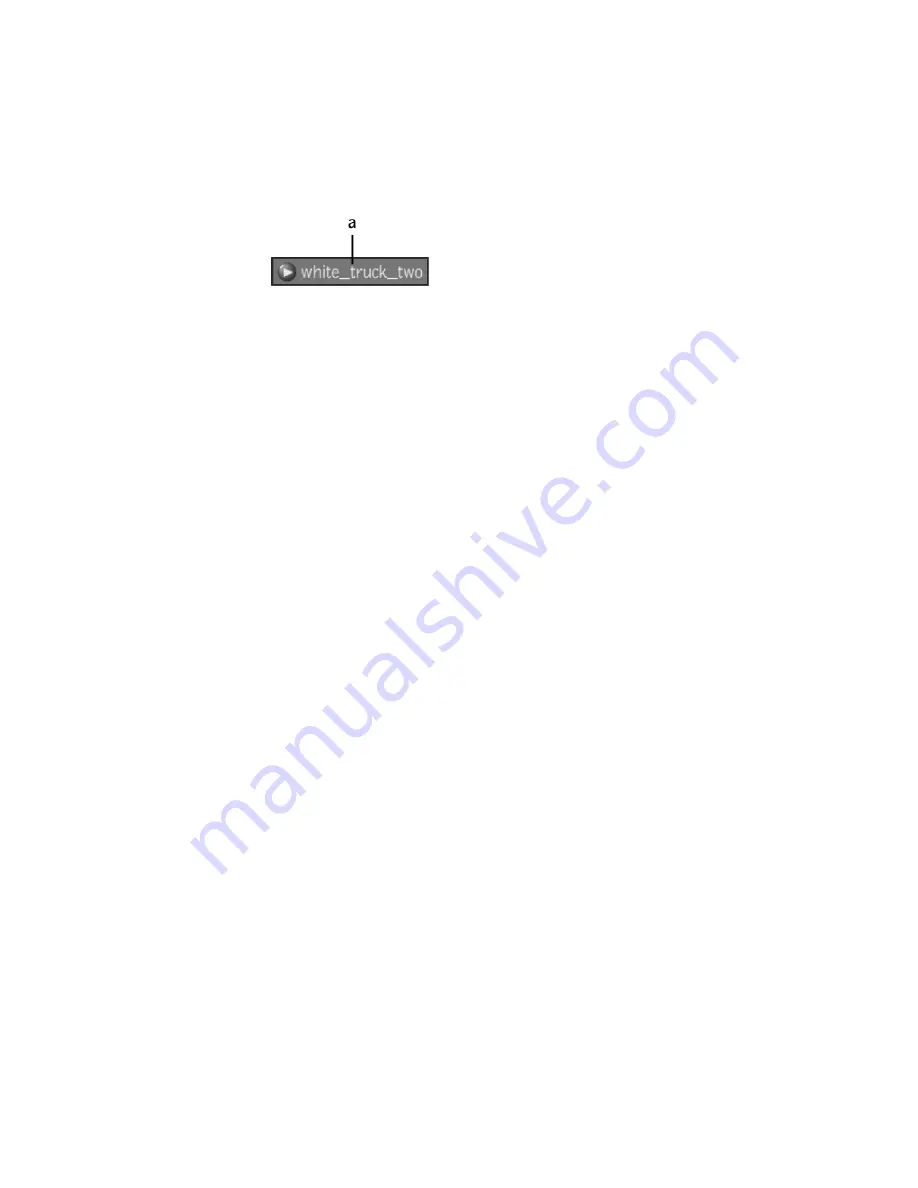
If the composition is not selected, in the taskbar, click the name of the
current composition (to the right of the composition icon) and then
select the composition you want to close.

(a) Name of the current composition in the taskbar

Alternatively, in a File Browser, click the composition you want to close.

2

Select File > Close or press 

Ctrl + W 

(for Windows or Linux) or 

Cmd + W

(for Mac OS).

Things to Remember

All open compositions are automatically closed when you exit. You cannot
keep a composition open between sessions.

Closing a Composition | 237

Содержание 495B1-05A111-1301 - 3ds Max Design 2010

Страница 1: ...Composite User Guide ...

Страница 2: ... Backburner Backdraft Built with ObjectARX logo Burn Buzzsaw CAiCE Civil 3D Cleaner Cleaner Central ClearScale Colour Warper Combustion Communication Specification Constructware Content Explorer Dancing Baby image DesignCenter Design Doctor Designer s Toolkit DesignKids DesignProf DesignServer DesignStudio Design Web Format Discreet DWF DWG DWG logo DWG Extreme DWG TrueConvert DWG TrueView DXF Eco...

Страница 3: ...d 5 Chapter 2 About Getting Started 7 About The Chapters 7 Chapter 3 Interface Fundamentals 9 Basic Interface Functions 9 The Gate UI 12 The Drop Gate 14 The Composite Interface 17 Tools Views Pick List tabs 30 The Player 34 Zooming and Panning 39 Navigating and Browsing 40 Working with Schematic 50 iii ...

Страница 4: ...ssing the IFFFS Libraries on the Network Using Wiretap 111 Accessing Media Via Wiretap 112 Accessing IFFFS Clips 113 Chapter 8 Importing Media 115 About Media 115 Physical Location of Media 116 Supported Media Formats 116 Importing Media 118 Using the Image Import Tool 125 Log to Lin Workflows 126 Moving Imported Compositions into Project Folders 126 Image and File I O 127 Premultiplication 138 Ch...

Страница 5: ...chronizing or Separating Playback between Views 199 Setting the Playback Point when the Player Updates 200 Setting the Resolution for a Player 201 Setting the Grid in the Player 201 Setting a Region of Interest ROI in the Player 202 Displaying Masks and Guides 203 Showing or Hiding Tiles 204 Turning Hardware Rendering On or Off 205 Setting the Pixel Aspect Ratio of the Player 206 Displaying Player...

Страница 6: ...tting up a Stereo Camera Rig 293 Chapter 13 Pre Compositing 299 About Pre Compositing 299 The Pre Compositing Import Options 306 About Anchors 307 Using Pre Compositing Templates 310 Pre Comp File Creation and Updates 313 Chapter 14 Importing FBX Files 323 Importing FBX Files 323 FBX Import Limitations 329 Chapter 15 Premultiplication 337 Premultiplied Images 337 When to Premultiply 337 Common Pro...

Страница 7: ...497 About Effects Tools 497 Drop Shadow 497 Glow 498 Chapter 21 Managing Film Grain 501 About Managing Grain 501 Adding Grain to a Composition 502 Removing Grain from a Composition 504 Fine tuning the Grain 505 Saving and Loading Grain Profiles 507 Chapter 22 Pulling Keys and Creating Mattes 509 Keying Concepts 509 Keying Workflow 512 Extracting a Key Using the Diamond Keyer 514 Creating a Differe...

Страница 8: ...dding Deleting Clearing and Wiping Layers 574 Layer Behavior 578 Stroke Operations 582 Chapter 25 Vector Paint 595 About Vector Paint 595 Vector Paint Image Inputs 596 Shape Properties 596 Vector Paint UI 597 Chapter 26 Color Correction 617 About Color Correcting 618 Applying LUTs 618 Working with ASC CDLs 624 Broadcast Safe Tool 625 Transforming Color Space with the Log and Delog Tools 627 Color ...

Страница 9: ... Editing Keyframes in the Tool UI 681 Editing Keyframes in the Animation Editor 682 Adding and Deleting Keyframes 683 Modifying Interpolation 687 Modifying Extrapolation 688 Temporarily Modifying Attribute Values 688 Customizing the Layout when Working with Animation Curves 689 Global Time vs Local Time 690 Time Offsets Keyframing and Instancing 690 Chapter 28 Time Tools 691 Retiming Footage with ...

Страница 10: ...unctions 748 Random Number Functions 749 Rounding Functions 750 Trigonometric Functions 750 Constants 751 Time Functions 751 Profile Functions 751 Conditional Functions 752 Chapter 32 Tracking and Stabilizing 753 About Tracking and Stabilizing 754 Tracking Concepts 754 Stabilizing Concepts 755 Tracker UI 755 Tracking Workflow 757 Choosing a Reference Point 762 Positioning the Reference Box 763 Res...

Страница 11: ...gh Tool 813 Switcher Tool 814 Appendix A Hotkeys 817 Hotkeys 818 Windows and Linux 818 Login Screen 818 General 818 User Interface Elements 819 Browsers 823 Composition Hotkeys 824 Views 827 Tools 832 Mac OS 837 Login Screen 838 General 838 User Interface Elements 839 Browsers 842 Composition Hotkeys 843 Views 846 Tools 851 Appendix B Composite Executables 859 Working with the Composite Executable...

Страница 12: ...ripting 867 About Python Scripting 867 Appendix D Initialization Variables and String Substitutions 873 Initialization Variables 873 String Substitutions 874 Appendix E Glossary 877 List of Terms 877 Index 887 xii Contents ...

Страница 13: ...c Range HDR pipeline next generation 3D compositing high performance interaction at extremely high resolutions and advanced rendering It primarily features a database less workflow for data management one Composite seat one scripting license and unlimited rendering capabilities The Composite creative toolset includes keying color correction tracking camera mapping paint spline based warping motion...

Страница 14: ...ssed in the Getting Started section are described in further detail here The reference section includes advanced topics and is most useful for users who have a good understanding of Composite basics Getting Help There are two ways to access Help for Composite depending on whether you want more information on a particular subject or whether you need assistance with a specific problem Viewing Online...

Страница 15: ...Contacting Support For further assistance please contact Technical Support at the following address http www autodesk com subscriptionlogin Contacting Support 3 ...

Страница 16: ...4 ...

Страница 17: ...Part 1 Getting Started Getting Started includes these chapters About Getting Started on page 7 Interface Fundamentals on page 9 Start Compositing Now on page 77 5 ...

Страница 18: ...6 ...

Страница 19: ...le Here is a brief description of the chapters included in this section Interface Fundamentals This chapter provides the first detailed descriptions about some essential Composite interface features Composite interface mechanics like the Gate UI and the Pick List as well as critical functions such as zooming and panning and working with nodes are explained You ll find more in depth information abo...

Страница 20: ...des you with a step by step example of how to composite using Composite The goal is to demonstrate how easily you can begin to use the tool even before you explore some of the more advanced topics covered in the Reference section 8 Chapter 2 About Getting Started ...

Страница 21: ... tabs on page 30 The Player on page 34 Zooming and Panning on page 39 Navigating and Browsing on page 40 Working with Schematic on page 50 Basic Interface Functions An intuitive set of editing functions are available to manipulate elements such as compositions folders and so on These include basic functions for cutting copying pasting and deleting as well as more advanced functions 3 9 ...

Страница 22: ... folders To cut or copy then paste an element 1 Right click the element and select Cut Ctrl X for Windows Linux or Cmd X for Mac OS or Copy Ctrl C for Windows Linux or Cmd C for Mac OS 2 Navigate to the location where you want to paste the element Then right click the location and select Paste or press Ctrl V for Windows Linux or Cmd V for Mac OS Entering Text Tools such as the Slate and Notes too...

Страница 23: ...ration you undo To undo or redo an operation do one of the following From the Edit menu select Undo or press Ctrl Z for Windows Linux or Cmd Z for Mac OS Or select Redo or press Ctrl Y for Windows Linux or Cmd Shift Z for Mac OS Or in the taskbar at the bottom of the UI locate the Undo icon The last action performed is displayed beside it Then do one of two things To undo the last operation you pe...

Страница 24: ...separate undo redo list Press Ctrl Y for Windows and Linux or Cmd Shift Z for Mac OS to redo an operation Deleting Elements and Compositions You can delete an element such as a composition or folder To delete an element do one of the following Select the element and press Delete Right click the element and select Delete The Gate UI The Gate UI allows you to access any of the four hidden panels in ...

Страница 25: ...dd tools to compos itions and access the Pick List see Tools Views Pick List tabs on page 30 View options for the view on which the cursor is currently paused For example if c South gate you access the Gate UI when the cursor is over a Player the south gate will display the Player options The Composition Browser d West gate To access the Gate UI 1 Press the tilde key or middle click your mouse The...

Страница 26: ...tly selected in the dependency graph For example if you drop a composition on a Reaction node in the Schematic view the Composition Drop Gate appears Here are the options associated with the Drop Gate when used in conjunction with a composition or a tool To use the Drop gate when dropping a composition do the following 1 Either drop a composition into the Player or Layer Editor Or drop a compositi...

Страница 27: ... with no composition or tool selected or Layer Editor with no composition or tool selected 2 Or drop a tool onto a selected composition in the Schematic view or the Composition Browser The Tool Drop Gate appears 3 Or drop a tool onto a selected tool in the Schematic view or the Composition Browser The Drop Gate 15 ...

Страница 28: ...ic view or a selected primary output node in the Composition Browser 5 Drop a tool onto a secondary output node in the Schematic view or a selected secondary output node in the Composition Browser The Tool Drop Gate appears 16 Chapter 3 Interface Fundamentals ...

Страница 29: ... select it or click to cancel the drop The Composite Interface The Composite interface may include a variety of views and elements all of which are designed to ensure a seamless and intuitive workflow Each preset contains views typically used to perform particular tasks The Composite Interface 17 ...

Страница 30: ...and Views on page 20 c Tool UI Displays information about the current tool or composition or the current view when accessed from the Gate UI You can edit information or set options and attributes in this view It is composed of four main sections Animation controls Player controls Node Independent tabs and Node Specific tabs See The Tool UI on page 23 d Taskbar This is always visible by default and...

Страница 31: ...ze button at the far right To show or hide the menu bar press Ctrl M To Use Open new or existing projects close or save projects import projects archive or render projects create new versions per form pre compositing import projects or exit projects Undo redo actions access the Hotkeys Project and User preferences and the Lay out presets The Menu Bar 19 ...

Страница 32: ...d Initialization Variables and About Composite Minimize the Composite window Viewports and Views The Composite UI is composed of one or more viewports and populated with one or more views Viewport A viewport is simply a container in which you can drop a view into You can modify a viewport s layout using the Layout icon in the taskbar You can change a viewport s size or drag it to another location ...

Страница 33: ...the tools and parameters in a composition Composition in a browser format See The Composition Browser on page 48 Allows you to create compositions by im porting media and provides a view of the folders that your installation references File Browser Allows you to add edit and reorder layers associated with one or more Reaction compositing nodes Layer Editor Allows you to store frequently used tools...

Страница 34: ...ews a File browser b Layer Editor c Schematic d Player To add a view to a viewport 1 Press the tilde key or middle click your mouse to display the Gate UI then swipe through the east gate to display the Tools Views and Pick List tabs 2 Select the Views tab 22 Chapter 3 Interface Fundamentals ...

Страница 35: ...k the fullscreen button to play the composition The view displays as a fullscreen view Press F to exit the fullscreen view The Tool UI The Tool UI is located at the bottom of the user interface just above the task bar It allows you to view information about the composition which is currently open as well as view and adjust settings for any of the tool nodes in that composition The Tool UI 23 ...

Страница 36: ... controls that c Details or node independent tabs are relevant for any of the nodes in the composition A tab that contains information and con trols specific to the currently selected node in the composition d Tool UI or node specific tabs Node Independent Tabs There are several node independent tabs including from left to right in the user interface Composition Versions Metadata Animation Cue Mar...

Страница 37: ... added You can use this tab to edit the data associated with an individual field Animation Displays controls for animating individual variables in the composition See The Animation Tab on page 661 Cue Marks Displays the list of cue marks set for the composition you currently have open See Working with Cue Marks on page 668 Pick List Provides a place for storing frequently used tools view and compo...

Страница 38: ...ith that composition see Linking Compositions on page 234 A vertical bar in the tab indicates more options may exist underneath the area to the right of the bar Drag right on the bar to expose the options The contents of most tool node tabs are organized into left and right areas The left hand area contains Player related controls and direct manipulation controls unrelated to the Player for exampl...

Страница 39: ...l presets d Reload Reloads the currently selected tool node with the same tool preset This lets you revert back to the parameters contained in the tool preset The lower portion of the Tool Options area contains the following controls a Back One Keyframe b Set Keyframe c Forward One Key d Mute e Reset f Name g Time h Affects i IR j Delete a Back one keyframe Move back one keyframe in the currently ...

Страница 40: ...sibly in a tool specific way For example a muted Diamond Keyer node outputs a solid white matte a muted Noise node outputs a black image You cannot mute a supertool e Reset Resets all parameters of this tool node to their default values f Name Examine or edit the name of the currently selected tool node To edit the name click in the field enter your edits and then press Enter g Time Displays the g...

Страница 41: ...e last operation in the list or click the text beside the arrow to display the list of operations performed The arrow that appears in the list indicates your cur rent position in the undo list all operations above it are operations you can undo and all operations below are ones you can redo In the User Preferences window General tab you can specify the number of undo levels View messages When mess...

Страница 42: ...it Displays the list of compositions that are currently open The name of the current composition is displayed beside the icon If the user opens a composition version the version name appears to the right of the composition name The gray icon rep resents a read write version while a yellow icon represents a read only version To switch to a composition or version select it from the list Open the Pro...

Страница 43: ...nd are consistent across sessions The Pick List exists as a tab in two locations a through the east gate of the Gate UI and b the tool UI a Pick List tab b Pick List in Tool UI To display the Tools Views and Pick List tabs 1 Middle click or press the tilde key to display the Gate UI 2 Swipe through the east gate and select one of the tabs Tools Views Pick List tabs 31 ...

Страница 44: ... lower portion of the panel and drag it into a view If you drag a tool into the Schematic view you can drop it onto any connection to insert it in the composition a Tool Category b Tools For more information on views please see Viewports and Views on page 20 32 Chapter 3 Interface Fundamentals ...

Страница 45: ...ategory of tools known as Super tools A super tool is a tool that is composed of a set of tools Super tools include Macro Reaction Garbage Mask 2D Compositor Image Import Keyer Tracker and Paint Super tools are indicated by a sphere icon For more information on each of these super tools please see the following The Macro Super Tool on page 699 Tools Views Pick List tabs 33 ...

Страница 46: ...on page 567 Vector Paint on page 595 The Player The Player is used to play or preview a composition or preview media There are three different versions of the Player the Player View the Mini Player and the Fullscreen Player The Player View Allows you to play compositions and view the changes you make to compositions as you work You can drag a Player View from the Views tab and drop it into a viewp...

Страница 47: ...r or on your Desktop See The Mini Player on page 211 The Fullscreen Player This version of the player is useful when you want a more immersive environment You can use it to play compositions work on compositions and preview media See The Fullscreen Player on page 213 The Player 35 ...

Страница 48: ...yback Scrub through the composition Adjust the start or end frames of the composition Set a cue mark Move to an existing cue mark Delete a cue mark Set a keyframe manually Move to an existing keyframe Turn Autokey on or off To play a composition To Click Play the composition backward Play the composition forward Enter the fullscreen Player Press theF key to return to the Player view Step backward ...

Страница 49: ...position forward to the last frame then backward to the first frame in a continuous cycle No repeat to restrict playback to the re gion between the mark in and mark out frames Loop continuously restrict playback to the region between the mark in and mark out frames Ping pong restrict playback to the region between the mark in and mark out frames To scrub through a composition Click and drag in the...

Страница 50: ...rk then click the Set Cue Mark button The cue mark appears in the Current Frame field To move to an existing cue mark Click a cue mark button on the left of the Player controls to move to an existing cue mark To Click Move to the previous cue mark Move to the next cue mark To delete a cue mark In the Tool UI select the Cue Mark tab locate the cue mark you want to delete then right click and select...

Страница 51: ...tically on page 680 For more information on the player please see The Player on page 189 Zooming and Panning You can zoom or pan in the Schematic view and in any of the three player views Player View the Mini Player and the Fullscreen Player To zoom do one of the following In the view or player press the Up Arrow to zoom in or the Down Arrow to zoom out Press Ctrl Spacebar on Windows Linux or Cmd ...

Страница 52: ...jects etc The File browser is a central tool in the overall Composite workflow It has the following general uses Identifies Composite compositions or external media such as files on a hard disk Helps you locate organize and manage compositions already in a project Provides access to compositions for Composite tools and for Composite utilities Customizing the File Browser You can resize any compone...

Страница 53: ...in the File browser shows the hierarchy of available folders in your project as well as external drives and resources in an expandable tree like structure By default the Folders area appears on the left side of the browser but you can close it to increase the size of the Contents area To show or hide the folders area Click the View button and select Folder The File Browser 41 ...

Страница 54: ...on buttons These are the navigation buttons NOTE You can also navigate in the browser using Hotkeys See Browsers on page 823 To Use Return to the top level of the project folder Home Move back through the folder list in the File Browser Back Move to the level of the parent folder Up You can enter paths in this field Paths can be separated by either forward or back ward slashes Path Field View a li...

Страница 55: ...lows you to easily sort information by clicking one of the column headings A thumbnail is an icon for a folder source or composition There are thumbnails for folders fonts audio and so on The thumbnails for sources or compositions show a frame You can change thumbnails to show a source or composition s matte if it contains one The folder hierarchy shows folder relationships child folders cascade f...

Страница 56: ...9 x 180 Large To view mattes Click the View button and select Alpha Thumbnails for sources or compositions with mattes display their black and white matte Thumbnails for sources or compositions without mattes remain in color The Bookmarks Button Bookmarks allow you to quickly navigate to a directory Click the button and then click a name in the pop up list Clicking a bookmark s name positions the ...

Страница 57: ...on Not edit able Bookmarks location of user directory User Data Depends on user logged on No editable Home directory of user logged on OS User Home Not edit able Composite installation folder Install Folder In addition to the predefined bookmarks personal bookmarks can also be created There are two methods to create personal bookmarks To create a personal bookmark From the bookmarks list select Ad...

Страница 58: ...es the name unique Although multiple bookmarks can share the same target directory duplicate naming of bookmarks is not permitted The extension ensures that no two bookmarks have exactly the same name For example if you name a bookmark New Bookmark and then try to give another bookmark the same name it will be named New Bookmark 1 Managing Bookmarks Bookmarks are managed through the Bookmark Manag...

Страница 59: ...okmarks from one folder to another Removing bookmark folders and personal bookmarks To manage bookmarks 1 Use the Manage Bookmarks option It is accessible through the bookmarks pop up list 2 Clicking Manage Bookmarks opens the Bookmark Manager 3 Use the up or down arrows to rearrange the order of the bookmarks in the Bookmark Manager Click the Sort button to arrange the bookmarks in alphabetical o...

Страница 60: ...wser with the Show Compositions Only view option set Press Ctrl I for Windows and Linux orCmd I for Mac OS to open the File Browser without the Show Compositions Only view option i e view all files The Composition Browser The Composition Browser displays all the nodes for the current composition Using this browser you can view parameters and set keyframes for animation It s also an easy way to qui...

Страница 61: ...on Browser Functionality There are five buttons at the bottom of the Composition Browser the Filters Option button the Filter button The Auto Expand button The Expand Column button and the Collapse Column button The Filters Options Button The Filters Options lets you select one or more filters The filters are divided into two groups Tools and Channels Multiple filters are additive except for the A...

Страница 62: ...n Display nodes in the result that contain channels marked for keyframing Marked The Filter Button Click this button to apply the filters you have selected The Auto Expand button Click this button to expand the parent folders of the selection and center on the first item when the global selection changes The Expand Columns button Click this button to expand all the columns in the browser The Colla...

Страница 63: ... page 52 You can set the direction in which processing proceeds in the User Preferences Creative tab For 2D workflows you can build the dependency graph left to right or top down direction For 3D workflfows you can build the dependency graph in a left to right or bottom top direction see Setting User Preferences on page 168 A dependency graph with left to right flow A dependency graph with a top d...

Страница 64: ... group or enter a Super tool exit a group or a Super tool ungroup a group add inputs and outputs to group nodes Work with branches collapse or expand a branch Mute or unmute a node Turn intermediate results on or off for a node Set or clear a context point on a node See Setting Context Points on page 191 Reset the node to its default values Cut copy paste or delete nodes Navigate nodes NOTE When u...

Страница 65: ...t is identified by a small film icon on the left of the proxy The Link Image tab opens when a footage in put node is selected in the Schematic view An input node for a linked composition It is identified by a small composition icon on the left of the proxy When you select a linked composition input node the tool UI displays the Link Image tab The input node displays a proxy of the rendered output ...

Страница 66: ...to the composition See Multiple Output Nodes on page 56 The output node represents the result of the composition When you select this node the tool UI displays the Output tab The output node does not display a proxy of the result A secondary output node for a composi tion Note that secondary output nodes vary slightly in appearance from the primary input node it is a lighter gray Node Anatomy Each...

Страница 67: ... between nodes by connect Output ing the output tab of one node to the in put tab of another The Output node con tains the result of the dependency graph Note that you can connect an output to more than one input Click this tab or the T hotkey to show or hide the proxy for the node Proxy Node Overview 55 ...

Страница 68: ...t tab when the tool has been marked Marked for keyframing icon for keyframing See Marking Attributes for Keyframing on page 674 Output Nodes There are several characteristics of Output nodes that are useful for you to know Multiple Output Nodes A composition can support multiple output nodes which provide simultaneous renders from different points in the dependency graph This characteristic of 56 ...

Страница 69: ...ons area Reset button Description Value Initialized to Output Name Of arbitrary length empty by default Description Width height pixel aspect ratio and rate Primary output is initialized from the composition project settings additional outputs from the primary output Image Format Channels and depth Primary output is initialized from the composition project settings additional outputs from the prim...

Страница 70: ...default Render mode Primary Output One of the outputs is tagged as being the primary output Aside from identifying the principal output of a composition the primary output is most useful in the following workflows The composition start end in the timeline and rate are dictated by the primary output start end and rate respectively Composition format displayed in the File Browser is driven by the fo...

Страница 71: ...tialized or reset with the values of the primary output Other outputs can also follow various sets of values from the primary output image format pixel format time The first output node that is automatically created with a new composition is the primary output by default However in a composition with multiple outputs any output can be set as the primary output at any time This can be achieved thro...

Страница 72: ...es folder in the Tools tab and drop it into the Schematic view Select an output node in the Schematic view right click and select Copy or press Ctrl C for Windows and Linux or Cmd C for Mac OS Then right click again and select Paste or press Ctrl V for Windows and Linux or Cmd V for Mac OS If you have added the Output tool to a Pick List right click in the Schematic view and select the Output tool...

Страница 73: ...Schematic view highlight the secondary output s you want to delete right click and select Delete or press the Delete key Highlight the secondary output node s you want to delete in the Composition Browser right click and select Delete Node Connections The connection lines in a dependency graph visually indicate by color and style what you are outputting RGBA RGB or A You can also choose how you wa...

Страница 74: ...mber of ways to manipulate nodes in the Schematic view To clean up all or a portion of the dependently graph do one of the following 1 To clean up the complete tree right click and select Layout All or press Ctrl L for Windows and Linux or Cmd L for Mac OS 2 To clean up a portion of the tree select the nodes to clean up then right click and select Layout Selected or press L To reset the zoom and p...

Страница 75: ...play the thumbnail of a node select one or more nodes and do one of the following 1 Right click the node and select Thumbnail 2 Click T 3 Click the tab on the node To connect two nodes do one of the following 1 Click the output of a node and drag to the input of another node or click and drag from the input area of one node to the output area of another A gray connection line appears as you drag R...

Страница 76: ...ckly disconnect and reconnect nodes Hold down the Ctrl key click one end of a connection link to break the link Drop the link on a different node To reposition a node within a dependency graph do one of the following 1 Disconnect the node and then connect it in a new position 2 Press Alt and drag the node to a new position in the tree then release The connection lines adjust to disconnect the node...

Страница 77: ... rename the group tab by entering a new name in the Name field in the Tool Options To edit a group or enter a super tool 1 Right click the group node to edit a group or the super tool to enter the super tool and select Edit Group or double click the node 2 The Schematic view updates to display the nodes in the group or the nodes of the super tool To exit a group or a super tool Right click in the ...

Страница 78: ...p or press G To add input or output connections to a group node 1 Enter the group node by double clicking the node then drag the link from an input or output beyond the top border of the schematic Control will be transferred to the group level one up in the hierarchy At this point releasing beyond the border will create a connection node Moving within the border will allow connection to another no...

Страница 79: ...Right click the node and select Expand or Collapse or press E 3 The branch leading into that node collapses The arrow on the left of the node indicates a collapsed branch To expand a collapsed node Right click the node containing the collapsed branch and select Expand or Collapse or press E Node Overview 67 ...

Страница 80: ... Mute button in the Tool Options area This button is located to the left of the Reset button To select an entire branch of the dependency graph do one of the following 1 Press X and click a node 2 Right click and choose Select Upstream All nodes upstream are selected Hint You can select multiple branches without clearing the selection 68 Chapter 3 Interface Fundamentals ...

Страница 81: ...context point 3 appears to the left of the node name and a broken green line appears around the center of the node 3 NOTE If you set more than one context point on a node the numbers of all context points set on the node appear after the C For example C134 indicates you set context points 1 3 and 4 on the node To clear a context point on a node 1 Press the number of the context point you want to c...

Страница 82: ...ght click outside all nodes and select Paste or press Ctrl V for Windows and Linux or Cmd V for Mac OS To delete one or more nodes 1 Select the node or nodes you want to delete 2 Then do one of the following Either right click one of the nodes and select Delete or press Delete Or drag a reasonable distance outside the bottom edge of the Schematic view and release A garbage icon will appear to indi...

Страница 83: ...ted to the first output 3 Press Alt Shift Down arrow to select the next node for the last direction taken For example after pressing Alt Shift Left Arrow to go towards the primary input pressing Alt Shift Down Arrow will select the node on the second input It works similarly for outputs pressing Alt Shift Down Arrow will visit the next node connected the output or go to the next output whichever a...

Страница 84: ...iew to that context point Then use the context point s hotkey number 1 2 3 or 4 to cycle through the Keyer s outputs See Setting Context Points on page 191 Schematic Options You can set a number of display and playback option for the Schematic view To access the Schematic options 1 With the cursor over the Schematic view middle click or press the tilde key and go through the south gate 2 The setti...

Страница 85: ...matic when you select in the Composition browser Locate Node NOTE You can make any of the display settings the default settings for the view by selecting them in your user preferences See Setting User Preferences on page 168 To hide the Schematic Navigator in the full screen Schematic 1 Middle click or press the tilde key to display the drop gate and swipe north to view the full screen Schematic 2...

Страница 86: ...h frame when you play the composi tion Deselect to update proxy only when you stop playing the Update on Play composition and only at the scrub frames when you scrub through the composition Finally set the Frame Rate options To Set Plays all frames in the composition regardless of whether it maintains the frame rate set for the composition Deselect to Play All Frames have the view maintain the fra...

Страница 87: ...Things to Remember Each Schematic view has its own set of options except for the flow left right top bottom etc Schematic Options 75 ...

Страница 88: ...76 ...

Страница 89: ...many of the tools available in Composite are probably familiar to you and as soon as you import some media you can start trying it out Later on you ll want to review the Projects on page 95 and Getting Familiar with Your Workspace on page 139 chapters to get a deeper understanding of how best to take advantage of Composite s many capabilities Start Composite Create Composition Import Media and Go ...

Страница 90: ...oup and a preset displays a UI configuration with the views you need to perform a particular task After you ve chosen a preset and created a composition press the tilde key or middle click to display the Gate UI Swipe to the right east and choose a tool from the Tools tab NOTE You can of course customize presets or create your own To start a new composition in Composite 1 Start Composite NOTE You ...

Страница 91: ...g appears 5 In the Name field enter a name for the composition You can change the location of the composition in the field above the Name field Once you have entered the information click the Create button Start Composite Create Composition Import Media and Go 79 ...

Страница 92: ...6 A new composition has been created 80 Chapter 4 Start Compositing Now ...

Страница 93: ...a 1 Select File Import or press Ctrl I for Windows and Linux or Cmd I for Mac OS The File Browser appears 2 Navigate to the location on your machine or network where your media is stored The View button at the bottom of the File browser allows you to change the Details view to a Thumbnail display in the Contents area which is on the right side of the browser Add Media 81 ...

Страница 94: ... import To select multiple files press Ctrl click 4 Click the Import button or right click one of the selected media files and select Import File s The media files are imported into the composition using an Image Import tool 82 Chapter 4 Start Compositing Now ...

Страница 95: ...dded you can start to add tools to your composition To add tools to your composition 1 Middle click or press the tilde key to display the Gate UI and swipe east right 2 If it isn t already selected select the Tools tab Add Tools 83 ...

Страница 96: ...3 Select a tool and add it to your composition by dragging it into the Schematic For this example we will add a Garbage Mask a Panner tool and a Blend Comp tool 84 Chapter 4 Start Compositing Now ...

Страница 97: ...Garbage Mask to key out areas of the image which you don t need See Garbage Mask Tool Tabs on page 538 Use the Panner tool to position the image See Panner Tool on page 437 Use the Blend Comp tool to blend the two images together See Blend Comp on page 367 Add Tools 85 ...

Страница 98: ...To Render the Composition Now that you have completed your composition you ll want to render it 86 Chapter 4 Start Compositing Now ...

Страница 99: ...r your composition 1 Select the output node 2 In the Tool Details area select the Output tab 3 Set the image format to the proper format you want to render 4 Click on the render tab To Render the Composition 87 ...

Страница 100: ...ose the sequence file format to be rendered 6 The default is to name the rendered file the comp name and the output name Change the output name if desired 7 Go to the file menu and choose render 88 Chapter 4 Start Compositing Now ...

Страница 101: ...8 The Render dialog appears Click the Start button to start the rendering process To Render the Composition 89 ...

Страница 102: ...90 ...

Страница 103: ... Your Workspace on page 139 The Player on page 189 Working with Compositions on page 217 Multilayer Compositing and 3D Effects on page 239 Pre Compositing on page 299 Importing FBX Files on page 323 Premultiplication on page 337 2D Compositing on page 339 Image Processing Tools on page 379 Pixel Expressions on page 439 Warping on page 467 Effects Tools on page 497 91 ...

Страница 104: ...aster Paint on page 567 Vector Paint on page 595 Color Correction on page 617 Animation on page 659 Time Tools on page 691 Customization Tools on page 699 Vectors on page 711 Expressions on page 719 Tracking and Stabilizing on page 753 Video Tools on page 795 Utilities on page 805 92 Part 2 Reference ...

Страница 105: ...by providing in depth information about topics that were introduced in that section as well as the rest of the Composite application The Reference section contains the following chapters 1 Projects on page 95 2 Wiretap on page 111 3 Importing Media on page 115 4 Getting Familiar with Your Workspace on page 139 5 The Player on page 189 6 Working with Compositions on page 217 7 Multilayer Compositin...

Страница 106: ... 16 Managing Film Grain on page 501 17 Pulling Keys and Creating Mattes on page 509 18 Masking on page 537 19 Raster Paint on page 567 20 Vector Paint on page 595 21 Color Correction on page 617 22 Animation on page 659 23 Time Tools on page 691 24 Customization Tools on page 699 25 Vectors on page 711 26 Expressions on page 719 27 Tracking and Stabilizing on page 753 28 Video Tools on page 795 29...

Страница 107: ...xample to specify render directories that will differ from one shot to the other without having to re type them for every composition used within this shot This is the kind of service that project management is intended for By comparison the User Preferences are more geared towards controlling the behavior of the user interface By default project management is turned off in Composite but can be en...

Страница 108: ...ose Programs Autodesk Composite Composite Documentation Scripting API Project Preferences At the beginning of a project you can define the following preferences General The physical location of the home folder and the command line for the render queue Composition The default format for any compositions you create in the project as well as the name template used when creating new versions for this ...

Страница 109: ... example you might have a script that creates projects Refer to the Composite Python API documentation In the Windows Start menu choose Programs Autodesk Composite Composite Documentation Scripting API Workflow for administrative tasks during a project 1 Import media see Importing Media on page 118 2 Set up and manage background rendering of the work produced during the project 3 Archive projects ...

Страница 110: ...nu bar select Edit Project Preferences In the taskbar click the project name or use the Ctrl Alt P hotkey The Project Preferences window is displayed Information on the project is displayed on the Information tab It contains basic information that is set automatically when the project was created You can enter a description of your project in the Description field The remaining tabs contain the pr...

Страница 111: ...in the project The compositions Composite creates when you import media retain their original format information Format Set the media format for the project Select Custom to define a custom format Width Height Displays the width and height in pixels of the selected format If you selected Custom in the Format box you can click in these boxes and edit the values Image Aspect Ratio Displays the image...

Страница 112: ...tton to select the custom attribute you want to insert then click UDA to insert it Note that the file name after all variables are resolved cannot exceed 126 characters in length Select a name for the composition version Channels Select the channels you want the media for the new composition to have by default Select A to only have the alpha channel RGB to have only red green and blue channels or ...

Страница 113: ...35 Destination Folder Enter the path to the project folder in which you want to import media when using the Import as Footage actions in the contextual menus By default the path is ad rectory inside the project home folder but you can specify any folder 8 Select the Post Import tab and add any command such as Python command s that will become available as post import processing actions in the cont...

Страница 114: ... 10 Select the Tools tab and set the path for the CTL tool see CTL Tool on page 463 11 Select the Archive tab and set the preferences for your archive and restore operations see Archiving or Restoring on page 104 Archive Name The name template using substitution tokens that you select for the archive 102 Chapter 6 Projects ...

Страница 115: ...erisk question mark colon quote mark open angle bracket close angle bracket Restore Executable The command line that executes when you perform a restore operation in Composite This command line launches the restore py script which is located in the resources scripts folder of the Composite program folder Consult the script for an explanation of each of the command line options You can click in the...

Страница 116: ...endencies NOTE Archives created with earlier versions of Composite have the dlarchive extension and are supported for backward compatibility When you create an archive you can produce compressed or non compressed zip files The maximum size of a zip file cannot exceed 2 GB However if it does then the file is skipped and the archiving process continues The name of each zip file is generated by the a...

Страница 117: ...as linked compositions paint strokes 1D LUTs and 3D LUTs are on by default for all external dependency types with the exception of media 3 Select the archiving options and click OK All external dependency files are stored in one or many zip files named after their type for example MEDIA PAINT_STROKES 1D_LUT 3D_LUT WARNING Changing the name of a zip file moving or transferring an archive will resul...

Страница 118: ...d after their type for example MEDIA PAINT_STROKES 1D_LUT 3D_LUT WARNING Changing the name of a zip file moving or transferring an archive will result in undefined restoration behavior Archiving Linked Compositions You can recursively archive the compositions to which a composition is linked Linked composition archiving is optional and is on by default Linked compositions are stored in the same xm...

Страница 119: ...s are stored in one or many zip files named after their type for example MEDIA PAINT_STROKES 1D_LUT 3D_LUT Restoring Archives Unlike archiving all the compositions in the archive including the linked compositions are restored That is there is no selective restoring of compositions NOTE When restoring an archive that contains a user and its settings the user is skipped and a warning message is disp...

Страница 120: ...ing Dependencies You can change the location of external dependencies in an archive when you restore the archive The ability to relocate external files allows an archived file created on a Windows environment to be restored in a UNIX environment and vice versa Once you choose to restore an archive and any external dependencies a relocation dialog box appears showing the path used by the external d...

Страница 121: ...he relocation browser The restored compositions are updated to point to the relocated files Changing Default Archive and Restore Settings You can change the default settings for archiving and restoring To change the default archive and restore settings 1 Do one of the following From the menu bar select Edit Preferences Project In the taskbar click the project name The Project Preferences window is...

Страница 122: ...110 ...

Страница 123: ...remote storage device The data is presented in a tree like hierarchy and is accessible via the Wiretap Client API The ability for Composite to support Wiretap improves interoperability between Composite and IFFFS applications Wiretap is comprised of a Client API that taps into the remote storage filesystem through a Wiretap Server plug in running on the remote system via a high performance network...

Страница 124: ... name of the host on which the Wiretap server is running for example Wiretap ServerName You can access Wireptap as you would access any folder To access Wiretap 1 Start Composite 2 Open a File Browser and navigate to the Wiretap folder 3 Expand the Wiretap folder Wiretap displays a list of available servers If a Wiretap server does not appear in the list it may be because it was not running when y...

Страница 125: ...o import all Wiretap clips In practice though it may happen that the media is not supported in Composite In this case the images will display a red X to indicate media that is not accessible See Supported Media Formats on page 116 An IFFFS clip can be made up of different types of formats For example it can be made up of standard file formats from a NAS or it can be made up of images from a frames...

Страница 126: ...114 ...

Страница 127: ...Folders on page 126 Image and File I O on page 127 Premultiplication on page 138 About Media In Composite media is a sequence of one or more images that you import All media is represented as RGBA images When you import media Composite uses the information in the media file to determine whether the media is RGB RGBA or A When you create a composition Composite applies the project preferences to cr...

Страница 128: ...omposite also supports Wiretap see Accessing the IFFFS Libraries on the Network Using Wiretap on page 111 Supported Media Formats You can import media in any of the following formats NOTE When you import dpx media from Autodesk Flame you import the media with LUT To disable the import conversion see Importing Media on page 118 Supported bit depths for imports File exten sion Format 8 bmp Bitmap 10...

Страница 129: ... HDR 8 16 or 32 depending on the composition The media you create has the same bit depth as the iff IFF composition For 16 bit compositions the bit depth of the created media is 16 bit integer not 16 bit float 8 jpg jpeg JPEG JFIF 16 bit float 32 exr Open EXR 8 png PNG 8 sgi SGI 8 16 or 32 depending on the composition The media you create has the same bit depth as the tif tiff TIFF composition For...

Страница 130: ... the tool When the original image aspect ratio bit depth of an input does not match that of the primary input of a multiple input tool the input tab on the tool node turns red to indicate the difference Importing Media While you are working you can import media at any time using the File Browser or the floating File Browser You can browse the network and import media on a shared folder using the U...

Страница 131: ...avigate to the folder that contains the media you want to import 3 Select the media files you want to import You can either import drag and drop or use the UNC path to import the media Importing Media 119 ...

Страница 132: ...ile Browser view navigate to the folder that contains the media you want to import 3 If necessary view individual media files by selecting them and reviewing the Information tab that appears in the Tool UI NOTE You can import an image sequence by entering the UNC path in the Path field You can also play the media in the mini Player at the bottom left of the Tool UI or click the Full Screen button ...

Страница 133: ...ually To select multiple files click the first file to import then Ctrl click each additional file to add it to the selection Shift click a file to select it and all files between it and the last file selected The following displays the color conversion options for Cineon and DPX image formats a Select Raw to disable conversion The following displays the color conversion options for image formats ...

Страница 134: ... media quickly and is useful when you do not need to immediately work with the media on the machine on which you are performing the import Things to Remember You can define the folder into which the media is imported by specifying it in the Project Preferences window If necessary you can also modify the Python script or command line used to cache media when you perform an Import Cache The Informat...

Страница 135: ...Information on the selected file including channels depth pixel ratio and whether it is tiled and so on Duration The length of the selected file in frames Start The start frame of the selected file End The end frame of the selected file Poster The thumbnail of the selected file that is displayed in the File Browser in Proxy view and in the mini Player of the Information tab Format The destination ...

Страница 136: ...urces Source Initial Value The composition was created Composite In Composite new File From an import operation not from DND The value of the tape name property From Wiretap IFFFS Wiretap From Wiretap generic NOTE When you publish to Wiretap IFFFS the value of Source is written out to the Tape Name property of the IFFFS clip Channels The channels in the selected file Depth The bit depth of the sel...

Страница 137: ... in the Import Image Tool UI Path Pixel Ratio Repeat mode Mark In Mark Out and Offset on a tool You can also modify attributes on the Options tab To import an image using the Image Import super tool 1 In the Schematic view press Ctrl N Windows and Linux or Cmd N Mac OS to create a new composition 2 Middle click or press the tilde key to display the Gate UI Swipe east and select the Tools tab 3 Dra...

Страница 138: ... format the data is transformed back to logarithmic NOTE Since floating point formats both 16 bit and 32 bit versions are used no data is lost going from a logarithmic encoding to a linear one In the Active state you can make adjustments to both the film gamma and to the reference white of the image you are importing or exporting You can however override these settings by changing the default Acti...

Страница 139: ...ck each additional composition to add it to the selection Ctrl click a composition a second time to remove it from the selection Shift click a composition to select it and all compositions between it and the last composition selected Image and File I O Composite supports OpenEXR 16 bit half float 32 bit float and integer This improves import workflow footage versus composition distinction and data...

Страница 140: ...ts into any existing group definition The None option is the default group selected and the initial assignment always attempts to match a channel with itself then assigns it arbitrarily by using an alphanumeric order Channel Views The available channel views are listed You can select a channel view to be displayed in the mini player Or if you are using the Import Image tool the channel view is dis...

Страница 141: ...t channels are assigned to R G and B respectively resulting in an RGB image U V input channels are assigned to R and G respectively resulting in an RGB image Z input channel is assigned to A resulting in an A image Channel Groups In the Options tab you can assign any channel to the R G B and A channel When the RGBA channels are available in the files they are mapped by default to the same channels...

Страница 142: ... Blue Green and Alpha channels Colors Alpha Z axis only Depth X Y and Z axis Surface Normals X and Y axis Velocity From File to Output Maps a channel present in the file to a channel output in the resulting node or composition You can assign a channel from the file to an output channel by clicking the Output Channel menu and selecting the channel wanted As shown the channels NX NY and NZ have been...

Страница 143: ...ne new groups in the Import tab A number of default channel groups and predefined assignments are provided Groups can be added renamed removed and channel mapping can be updated The predefined groups are Mapping Group A to A Alpha RGB to RGB Colors RGBA to RGBA Colors Alpha Z to R Depth NX NY and NZ to R G and B Surface Normals velX and velY to R and G Velocity NOTE The groups map to a subset of t...

Страница 144: ...to B and A Under From File To Output are four fields labeled R G B and A Each contains all the channels available in the EXR file Description Channel Red Intensity R Green Intensity G Alpha Opacity A Equivalent to X axis in a 2D plane U Equivalent to Y axis in a 2D plane V Z axis or depth in a 3D plane Z X axis Normals NX Y axis Normals NY 132 Chapter 8 Importing Media ...

Страница 145: ...e value that determines which object will be used when you apply it to the object objectID X axis Motion Vector velX Y axis Motion Vector velY No channels selected None Import OpenEXR File To import all channels of an OpenEXR file do the following 1 From the File menu click Import 2 When the File Browser opens select an OpenEXR file 3 Right click on the file and select Import All Channels from the...

Страница 146: ...t displays the group node the Schematic on the right displays the import nodes with their output connections Unpremultiply in Import Mode In Composite it is typically not desirable to work with images that have their alpha premultiplied with the colors If you are working with such an image then you should manually add an Unpremultiply node from the Image Import tab or create a post import script t...

Страница 147: ...ls that let you override these default properties include Output channels RGB RGBA and A Bit depth either 16 bit or 32 bit regardless of the files original depth Your initial bit depth values can vary depending on the properties of the image files From a jpeg file the default proposed is 16 bit From a dpx 10 bit int file the default is 16 bit From a dpx 16 bit int file the default is 32 bit From a...

Страница 148: ... drop it on an input of a node the Gate UI does not appear However if you drop the sequence anywhere in the Schematic or the Player the Gate UI appears with several options To create footage and link in the Gate UI Drag and drop your first image into the Player Three options are available from the Gate UI If you drag and drop your first image directly onto an Output node you have a choice of four ...

Страница 149: ... a choice of five options Footage Role How do you distinguish a composition representing footage from a composition you are using for compositing Composite has a role for a composition named Footage A composition with a Footage role displays a different icon in the Tool UI Footage Role 137 ...

Страница 150: ...lected Channel group is not a predefined group such as Colors or Colors Alpha The name would be FileName Alpha FileName Velocity This is useful when you need to import the same file twice first to import the image channels and then to import the motion vectors NOTE The description of the footage corresponds to the description in the Information tab in the Tool UI see The Information Tab on page 12...

Страница 151: ...n page 146 Animation Editor on page 149 Layer Editor on page 150 Player on page 153 View Layouts on page 153 Color Picker on page 154 Calculators on page 161 Hotkey Editor on page 163 Setting User Preferences on page 168 Previewing Video on page 172 Creating User Defined Attributes on page 176 Other Workspace Functions on page 187 9 139 ...

Страница 152: ...ble media and tools into a loose composition you would build a three view layout that displays a configuration that included a File Browser a Layer Editor and a Player as well as the Details area for displaying information about the composition or currently selected tool Now if you want to add and tweak layers in your composition you could then switch to an editing preset to display only the Layer...

Страница 153: ...e of the preset to a new location higher or lower within the menu NOTE You must designate or set the default state of a preset When you select the Reset to Default option the preset will return to the state that you have designated as the default Pick List The Pick List is a convenient way to access frequently used tools and other elements You can add tools views and compositions to the Pick List ...

Страница 154: ...new Pick List group delete Pick List groups you no longer use and reorder Pick List groups You can color code Pick List groups for easier recognition as well as rename them You can also set a Pick List as a default reset a layout to that default and restore the Pick List to the factory default group layout 142 Chapter 9 Getting Familiar with Your Workspace ...

Страница 155: ... dependency graph or into a view If you add an item from the Pick List into a Player view the drop gate appears Add the item as per the selections in the drop gate If you drag an item from the Pick List to a Schematic view then connect it to the dependency graph as if you were dragging the item from the Tools or Views tab Right click in the view Schematic Player Composition Browser or Layer Editor...

Страница 156: ...rrently selected group This will allow new groups to be placed in between existing groups To move the groups within the Pick List in the Tool UI 1 Right click and select Edit Groups 2 Click anywhere in a group s window 3 Use the right and left arrow buttons To delete a Pick List group Right click inside a Pick List group and select Delete Group The Pick List group is deleted To rename a Pick List ...

Страница 157: ...s OK see Color Picker on page 154 The Pick List group assumes the selected color To set a Pick List group as the default group Right click inside the group and select Set as Default To reset a Pick List group to the factory default group layout Right click inside the group and select Reset to Factory Default All Pick List groups are reset to their factory default states Working with the Pick List ...

Страница 158: ...example in the following illustration three tool presets were created from the Glow tool which reside in the UserData toolPresets Effects Glow folder Working with Tool Presets You can create a tool preset from the current tool after customizing it for your project Once you create a tool preset you can load it into the dependency graph and starting using it Reloading the tool preset returns it to t...

Страница 159: ...c select a tool node from the dependency graph 2 Do one of the following Right click the tool node and select Presets Load In the Tool options area click the Load button Middle click or press the tilde key to display the Gate UI and swipe east to display the Pick List Tools and Views tabs Select a tool right click and select Presets Then select a preset from the list and drag it over the selected ...

Страница 160: ...ition data NOTE You can apply a tool preset to the fullscreen Player only if you entered it through a Player view To use a tool preset as a display modifier 1 In the Player view or fullscreen Player middle click or press the tilde key to display the Gate UI and swipe east to display the Pick List Tools and Views tabs 2 Select the Tools tab 3 Select a tool preset to apply to the Player drag it outs...

Страница 161: ...yed as well as the playback options To set the Animation Editor options 1 With the cursor on the Animation Editor middle click or press the tilde key to display the Gate UI and go through the south gate The Animation Editor options appear in the Tool UI 2 Select the Display tab to set the guide options Pin Lock the time of the view to either Composition or Tool If you lock the time to Composition ...

Страница 162: ...omposition Deselect to update the proxy only when you stop playing the composition and only at the scrub frames when you scrub through the composition 5 Set the Frame Rate options Play All Frames Plays all frames in the composition regardless of whether it maintains the frame rate set for the composition Deselect to have the view maintain the frame rate for the composition at the expense of droppi...

Страница 163: ...oxy Displays the name of the image generator connected to the layer s source input if applicable Generator Displays the source name You can use the F2 hotkey to edit the source name If you create a source without a layer the text is red Source Displays the Layer name You can use the F2 hotkey to edit the layer name Layer Click to select the surface geometry type for the current layer Bicu bic Bili...

Страница 164: ...onto layers The Layer Editor s context menu also lets you access the Pick List select the layer s component nodes such as materials and other tool nodes associated with the selected layer When you select a Reaction node or tool the appropriate panel in the Tool UI is displayed so you can modify properties interactively For more information see Creating Sources and Layers on page 248 To add tools t...

Страница 165: ...of the viewer and is especially useful in the Schematic view View layouts are stored with the version of the composition This allows for example multiple Schematic viewers to share the same layouts It also allows the layouts to be persistent from one UI preset to another and one session to another To set a view layout in a viewer Do one of the following Zoom and pan to the layout you want and pres...

Страница 166: ... next time they go fullscreen they maintain the same zoom pan as before When exiting fullscreen the viewer s zoom pan will be reset to the previous values Color Picker There are two ways to launch the Color Picker You can display the color picker by pressing Alt P or by selecting a color for a color pot from the screen such as selecting a color for the Hue Shift color pot in the Color Curves tool ...

Страница 167: ...a color that appears on screen Examine the minimum maximum or average color value in a selection Select and store a color without launching the Color Picker Create delete and rename a color palette Adjust the colors in a color palette Revert a color palette to its original colors Working with the Color Picker 155 ...

Страница 168: ...selected color To select a color for a color pot 1 Click the color pot for which you want to select a color The Color Picker appears 2 At the bottom center of the Color Picker UI click the bit depth button and select a color depth for the Color Picker Select to work with percentage values 0 00 to 100 00 The default is Float 3 Do any of the following Use any of the color model areas to select a col...

Страница 169: ... an area of the screen The fields in the Selection area update to reflect the color values in that selection Displays the Field Currently selected color Current Previously selected color Previous Minimum color value in the current selection Minimum Average color value in the current selection Average Maximum color value in the current selection Maximum To select and store a color without launching...

Страница 170: ...use the RGB model use the slider bars to adjust the color On the HSV tab use the HSV wheel to pick a color Use the cursor to pick an on screen color Enter the numeric value of the color in the fields next to the RGB or HSV color models The color pot you clicked to enter the Color Picker updates to reflect the new color as does the color pot for the currently selected color in the Color Picker To e...

Страница 171: ...te a color palette Do one of the following Click the palette name button and select New from the menu Enter a palette name and click OK Open your User folder located at the top of the Library folder structure and open the Color Palettes folder Right click anywhere in the view and select New Palette A new palette is created Type in a name and press Enter Working with the Color Picker 159 ...

Страница 172: ...Delete from the menu Open your User folder located at the top of the Library folder structure and open the Color Palettes folder Right click the palette you want to remove and select Delete To modify colors in a color palette 1 In the Color Picker UI use the HSV and RGB areas or the color spectrum area to set the color you want to insert into the color palette 2 In the color palette click in the c...

Страница 173: ...eate expressions that generate values used in numerical fields a Expresso button Not all fields accept expressions Expressions can include composition parameters as variables In the Expresso calculator you can add comments to the expression allowing you to document what an expression does see Animation on page 659 To display the calculator or the Expresso calculator Do the following Press Shift cl...

Страница 174: ... cannot accept a value from the calculator You must use an alternative method to enter the value To close the calculator Click the x box in the upper right corner of the calculator To input a value from the calculator into a numerical field 1 Shift click in a numerical field The calculator appears 2 Type a new value into the calculator 3 Click in the numerical field again or press Enter The value ...

Страница 175: ...folder and shared with other users Like Color Palettes only one Catalog can be active at any time The active Catalog can be chosen through the Hotkey Editor When modifying hotkeys if no Catalog exist for the current user a new Catalog will be created automatically When starting Composite the default hotkeys are registered in the hotkey registry and organized into the specified domains If you have ...

Страница 176: ...otkey Editor The Hotkey Editor allows you to modify all the hotkeys described in the default Composite hotkey resource file Hotkey Editor Overview The Hotkey Editor is a browser displaying all the hotkeys grouped into domains Domains act as folders and hotkeys as leafs of these domains 164 Chapter 9 Getting Familiar with Your Workspace ...

Страница 177: ... displayed in the Catalog menu at the bottom of the Hotkey Editor NOTE You can manage the Catalogs from the File Browser in the hotkeys subfolder of the user home folder which is similar to how Color Palettes work The browser section of the Hotkey Editor is composed of four columns Name Represents the name of the domain or the hotkey action This cannot be modified Hotkey Editor 165 ...

Страница 178: ... Hotkey Editor can also be accessed through the Composite menu bar Edit Hotkeys Editing a Hotkey Editing hotkeys can be done in two ways To edit a hotkey Do one of the following Clicking on a VALUE cell representing the hotkey Clicking F2 after selecting the row representing the hotkey Either way the Hotkey Editor will switch to Learn Mode Every key pressed will be part of the new hotkey see Hotke...

Страница 179: ...t and Shift must come before any other keystrokes Modifiers must be entered in the above order A hotkey can be composed of one to three modifiers and one normal key You are limited to four keystrokes per hotkey operation Key strokes in a hotkey operation are pressed at the same time You cannot use a combination of keystrokes more than once The formatting will be handled by Composite automatically ...

Страница 180: ... is done automatically any time you make a change to your preferences In the File Browser there is a bookmark set to your User data Each user has a set of preferences When you login you can set these preferences to tailor the user interface to your liking There are two ways to access the user preferences from the menu bar at the top of the Composite application and from the taskbar at the bottom o...

Страница 181: ...ic overlay that appears when you swipe through the north gate of the Gate UI A value of 100 is completely transparent a value of 0 is completely opaque 5 Under Masking Menu Tools add masking tools to the Masking tab Create list 6 Under Timecode Frame display the composition in frames or timecode 7 Under Caching turn on or off Image Import intermediate results Rendered Result intermediate results a...

Страница 182: ... see the alpha channel of the media To change the color click the color pot and use the Color Picker that appears to select a new color Grid Size Set the size Small Medium or Large of the individual squares in the checkerboard pattern Fill Color Set the color of the Player by clicking the Override button Click the color picker and select a color 10 Under Selection History set history length up to ...

Страница 183: ...e selected item as you drag and drop it in the interface 15 Set the numeric input preferences Linear Motion Use a mouse or pen with a linear motion to increase or decrease numeric inputs when in a value editor This is the default setting Circular Motion Use a mouse or pen with a circular motion to increase or decrease numeric inputs when in a value editor 16 Set the paint preferences Commit on Pen...

Страница 184: ...t card and the graphics card as well as the host system CPU Composite can achieve real time previewing of 1920x1080 24P resolutions and below of 8 bit RGB or RGBA material Composite will only display 8 bit pixel formats on the video preview device To display 16 bit float and 32 bit float images you must convert them to 8 bits You can do this by using a display modifier in the Player that converts ...

Страница 185: ...y doing one of the following From the menu bar select Edit User Preferences In the taskbar click your user name 2 In the User Preferences window select the Video Preview tab 3 For the device select AJA Preview and click Show Settings Setting Up Video Previewing 173 ...

Страница 186: ...174 Chapter 9 Getting Familiar with Your Workspace ...

Страница 187: ...o edit the settings the next time you select the Video Preview tab Previewing Video When previewing a composition s video on a broadcast monitor you can work with multiple Players NOTE When you zoom out the Player to 0 5 the video image is resized To preview video on a broadcast monitor 1 Open a composition 2 Create import or link to material that is RGB or RGBA TIP If the material is 16 or 32 bit...

Страница 188: ...ave different information in the UDAs Project UDAs Project UDAs allow your facility to store job related information within the Composite workflow This could be used by an artist to find out who is responsible for a given shot or it could be used to store project information to be used in a Python script User UDAs User UDAs let you store information related to a specific user in Composite This cou...

Страница 189: ... be done in one of two ways through the metadata tab in the Tool Details Project Preferences or User Preferences or with the XML editor If you re using the XML editor you must specify a UDA in the XML file associated with the given data type Each UDA in the XML resource file will be created automatically in the database if not already present when the XML file is loaded see XML Resource Files on p...

Страница 190: ...a UDA is selected Add button clicking this button reveals four selections Toggle Menu Numerical and Text Modify button clicking this button modifies the information in the UDA field Remove button clicking this button disables the selected field and removes it from the list of UDAs but not from the Metadata tab If you remove a pre created UDA the control associated with that UDA in the Metadata tab...

Страница 191: ...merical UDA NOTE It is not necessary to fill out all the fields only the ones that apply to your project with the exception of the name field which must be filled Text this is a text field for data entry Create implements the changes Creating UDAs 179 ...

Страница 192: ...nce it is possible to have more than one data type visible in the browser UDAs that have the form Version Project User will not be displayed by default as individual columns in the browser If the UDA is created by use of the XML resource file it will be shown in the Metadata tab in the detail view area of the tool UI The UDA can be displayed by right clicking on the title bar and selecting the UDA...

Страница 193: ...ated by the user See Creating UDAs on page 177 To add a UDA to a render file name 1 Open the Project Preferences window by clicking on the project icon in the task bar then select the Render tab 2 Click open the Select UDA menu and select the UDA you want to add to the File Name string In this example the scoped Project Art Director UDA is selected loaded and ready to insert into the string Using ...

Страница 194: ...that does not already exist will be created These resource files are only used to create the layout to display and edit the UDAs within the application If you wish to modify these files and share them with other workstations running Composite there is a site preference called Shared Settings that indicates the path to these XML files This path or more specifically directory can be located on the n...

Страница 195: ...UdaTextField XML Resource Files 183 ...

Страница 196: ...UdaValueEditor UdaMenu 184 Chapter 9 Getting Familiar with Your Workspace ...

Страница 197: ...UdaPushedToggle XML Resource Files 185 ...

Страница 198: ...UDA Declaration 186 Chapter 9 Getting Familiar with Your Workspace ...

Страница 199: ...e UDA is read only If no read only tag is specified the UDA will be read write The XML tag is Read Only For example Read Only Read Only or just plain Read Only Don t forget the See the example above The read only tag is only for the UI element so that the user cannot modify its value Other Workspace Functions There are additional functions available in the workspace including hotkeys and zooming a...

Страница 200: ...188 ...

Страница 201: ...e for Playback on page 197 Setting the Real Time Playback Preference on page 198 Synchronizing or Separating Playback between Views on page 199 Setting the Playback Point when the Player Updates on page 200 Setting the Resolution for a Player on page 201 Setting the Grid in the Player on page 201 Setting a Region of Interest ROI in the Player on page 202 Displaying Masks and Guides on page 203 Sho...

Страница 202: ...erface Fundamentals chapter Player View Default Settings When you add a Player view to a viewport it has the following settings by default You can adjust all of these except for the repeat mode and f stop through the Player options You adjust the repeat mode in the Player controls see Using the Player Controls on page 36 in the Interface Fundamentals chapter Displays the output of the composition ...

Страница 203: ... the Target The target for the Player view is what it displays You set the target for an individual view in the Player options The target can be the output node of the dependency graph the input or output of a tool node a specific rendered output of the composition or a context point the output of a specific tool node see Setting the Target for the Player on page 194 You can specify the channels o...

Страница 204: ...t for each view so you can see different parts of the composition playing at the same time For example if you are creating a mask you might have two Players one in which to create the mask and one to preview what s ahead so you can take changes into account as you create the mask Master time always starts at frame 0 and has a duration equal to the length of the composition If a composition starts ...

Страница 205: ... image For example if you zoom in so that the Player displays only the top left corner of the frame it loads only the tiles needed to display that area of the frame Note that the resolution optimization performed during zooms may have an influence on the number of tiles see Resolution on page 193 A region of interest that contains only part of the image requires fewer tiles than a larger one or th...

Страница 206: ...re frame is always rendered The Region of Definition ROD is used to determine the area to render when you render an output Setting the Target for the Player You can set the target for a Player view or the fullscreen Player as well as set the channels of the target that the Player view or fullscreen Player displays see Setting the Channels for the Target on page 195 NOTE You can set the target and ...

Страница 207: ...output of the tool node When you select a tool node in the Schematic view the Player updates to display the output of that node Tool Out put The composition as it appears in the final node of the dependency graph the Output node in the Schematic view Composi tion One of the rendered outputs of the composition You use the Results tab of the Tool UI to select which rendered output the Player display...

Страница 208: ...d in the target For example if the target is the output of an RGBA composition it displays RGBA Chns RGB channels If the target is the output of an RGB composition it displays RGB channels The red green and blue channels RGB The red green blue and alpha channels RGBA The alpha channel A Any combination of RGBA channels Enter the combination you want as a four character string in which you specify ...

Страница 209: ...position tab 3 Edit the Mark In and Mark Out fields The Current Frame field in the Player controls updates to reflect the changes you make to the fields The area between the mark in and mark out points the playback area appears in light gray Setting the Repeat Mode You set the repeat mode in the Player controls see Using the Player Controls on page 36 Setting the Frame Rate for Playback You can se...

Страница 210: ...n the fullscreen Player you can set a Player preference that determines whether real time playback has priority over a playback that includes every frame or vice versa Real time playback is also influenced by the hardware on which you are running Composite and the load on that machine at the time you perform the playback NOTE You can set the real time playback preference for the fullscreen Player ...

Страница 211: ...dependency graph select the Stop on Drop button SynchronizingorSeparatingPlaybackbetween Views You can set a Player Schematic or Animation Editor view to use either master or standalone time Master time is used to synchronize playback among views see Playing Back in Multiple Views on page 192 To set a view to use master or standalone time 1 In the Player view or fullscreen Player go through the so...

Страница 212: ...when the Player Updates You can set the point when a Player view or the fullscreen Player updates its display NOTE You can set the playback point when the fullscreen Player updates only if you entered it through a Player view To set the playback point when the Player updates its display 1 In the Player view or fullscreen Player middle click or press the tilde key to display the Gate UI and go thro...

Страница 213: ...gate 2 In the Player options select the Display tab and locate the Streams area 3 Select the resolution you want the Player view to use The Player immediately updates to use the resolution you enable Things to Remember When you launch the fullscreen Player from a Player view it uses the resolution set for that Player view In all other cases it uses full resolution The mini Player always uses proxy...

Страница 214: ... one of the following to display the Player options In the Player view or fullscreen Player middle click or press the tilde key to display the Gate UI and go through the south gate In the Player view or fullscreen Player right click to display the Player menu 2 In the Display tab of the Player options click the ROI button to enable a region of interest Or in the Player menu select ROI The Player v...

Страница 215: ...ge 193 Displaying Masks and Guides You can use masks to preview the target of the Player view or the fullscreen Player in different film format aspect ratios You can use guides to show the frame outline as well as the safe areas within the frame for titles and action NOTE You can display masks and guides in the fullscreen Player only if you entered it through a Player view To display masks guides ...

Страница 216: ...ere is no risk of having Safe Title titles or graphics cropped by the device on which the shot is viewed The safe title area is inside the safe action area Safe action guide This guide indicates the area of the frame within which there is no risk of having any of the image cropped by the device Safe Action on which the shot is viewed The safe action area is larger than and encloses the safe title ...

Страница 217: ...urning Hardware Rendering On or Off If you are compositing with Reaction you can turn hardware rendering on or off for a Player view or the fullscreen Player For all other tool nodes switching to hardware rendering has no effect NOTE You can turn hardware rendering on or off in the fullscreen Player only if you entered it through a Player view To turn hardware rendering on or off in the Player 1 I...

Страница 218: ...in the fullscreen Player if you entered it through a Player view To set the pixel aspect ratio in a Player view 1 In the Player view or fullscreen Player middle click or press the tilde key to display the Gate UI and go through the south gate 2 In the Player options select the Display tab 3 Under Interaction select Aspect Ratio to use non square pixels In this case the Player displays the image us...

Страница 219: ...splay area of the Display tab of the Player options Targets are represented as follows Output indicates that the target is a composition toolname Out indicates the target is a Tool Output toolname In indicates the target is a Tool Input A context point is represented as the name of the context point followed by the name of the tool node on which it is set followed by either In for Input or Out for...

Страница 220: ...layback tab of the Player options see Synchronizing or Separating Playback between Views on page 199 Displaying Manipulators in the Player You must enable the display of manipulators in the Player view or in the fullscreen Player to see manipulators related to individual tools Manipulators for individual tools include the eyedropper for the Color Picker axes in the Reaction tool and control points...

Страница 221: ...ollowing In the Player press Up Arrow to zoom in or Down Arrow to zoom out Press Ctrl Spacebar for Windows and Linux or Cmd Spacebar for Mac OS and drag right to zoom in or left to zoom out To zoom a region Region zoom User drag out a box and the view is zoomed uniformly or not depending on the viewer to fit the viewer extents You can also use the Shift Spacebar drag hotkey combination Press Home ...

Страница 222: ...n Player only if you entered it through a Player view To apply a LUT or color conversion tool to the Player 1 In the Player view or fullscreen Player middle click or press the tilde key to display the Gate UI and swipe east to display the Pick List Tools and Views tabs 2 In the Tools tab select a tool to apply to the Player Drag it outside the Tools tab and do one of the following Pause over the P...

Страница 223: ...ifier set for the Player when the Interactivity option is selected The Mini Player The mini Player appears on the left in the Information tab area when you select a media file or composition in the File Browser The mini Player lets you preview compositions as well as media prior to importing You must have the Information tab selected to see the mini Player The mini Player contains a limited subset...

Страница 224: ... media To display a composition or piece of media in the mini Player In a File browser select a composition The composition is loaded in the mini Player To play the composition or media in the mini Player Use any of the playback controls To Click Play the composition forward Display the fullscreen Player Step backward one frame Step forward one frame Move to mark in frame Move to mark out frame To...

Страница 225: ... press Enter a Current Frame field The Fullscreen Player The fullscreen Player occupies the entire screen the taskbar is also hidden and is available from any Player view as well as from the mini Player When you enter the fullscreen Player it plays the composition or media forward from the frame at which you entered the fullscreen Player The Fullscreen Player 213 ...

Страница 226: ...rough the west gate NOTE When you set Player options in the fullscreen Player they are saved and applied to the Player view you were in when you entered the fullscreen Player For example if you set a region of interest while in the fullscreen Player when you exit that region of interest appears in the Player view Player Controls in the Fullscreen Player The fullscreen Player occupies the entire sc...

Страница 227: ... fullscreen Player from the mini Player you can only access the Player options from the Gate UI To enter the fullscreen Player In the playback controls click the Fullscreen button or press F To exit the fullscreen Player Press F To control the fullscreen Player 1 Press L to play forward press L again to stop 2 Press J to play backward press J again to stop NOTE When you enter fullscreen mode the P...

Страница 228: ...le click or press the tilde key to display the Gate UI and swipe right to display the Pick List Tools and Views tabs 2 In the Tools tab drag the tool you want to add to the composition outside the Tools tab but do not release it 3 Go through the north gate to display the Schematic overlay and drop the tool in the position in the dependency graph you want it to occupy To Navigate Views Press Ctrl T...

Страница 229: ...mpositions are stored in your file system What s in a Composition File A composition is stored as a file or a group of files depending on its state For a newly created composition a file named compname txcomposition will exist on the file system Within Composite you will see only the name part of the file not the extension Whenever a new version is created a new directory named compname txversions...

Страница 230: ...ct New Composition Type in a name for your composition Open your new composition by double clicking it or by selecting it and clicking Open An Output node appears in the Schematic view if you have one visible 2 In the Composition tab of the tool UI update the properties for the composition Some properties are editable Name The name of the composition Type Designate the composition as footage or as...

Страница 231: ...io The ratio is expressed as a fraction representing the proportion width height of the image This value together with width height pixel ratio and rate may correspond to a predefined format in which case the format is automatically selected Otherwise the format selected is Custom Image and pixel ratio are linked changing one updates the other Rate Frame rate expressed as frames per second fps For...

Страница 232: ...ened the same composition for modification This is indicated in the browser by a yellow read only icon a Read only icon To open a composition 1 Select File Open or press Ctrl O for Windows and Linux or Cmd O for Mac OS 2 In the File Browser do one of the following Double click a composition The composition is opened in Open mode read write If the composition is in use by another user it will open ...

Страница 233: ... open the following Gate UI is displayed Swipe through the east gate to open the composition If the composition is not in use and there is already an open composition the following Gate UI is displayed Swipe through the east gate to open the composition The composition opens in Open mode or View mode In the tool UI the Composition tab is displayed 3 The name of the currently open composition is di...

Страница 234: ...e than one version they are displayed in a list You can view any of these versions Select one or more compositions and drag them to the Schematic or Player In the Gate UI that appears swipe north to view the compositions The name of the composition you are viewing is displayed in the taskbar 3 Click the composition icon to view the list of opened or viewed compositions a Composition icon b List of...

Страница 235: ...ou are actually copying its nodes into the currently open composition The composition being inserted is not affected by the insert operation To insert a composition 1 Select File Open or press Ctrl O for Windows and Linux or Cmd O for Mac OS 2 In the File Browser that opens select a composition and drag it to the Player or Schematic view 3 In the Gate UI that appears swipe west to insert the selec...

Страница 236: ...es Rendering a Composition You can render a composition at any time to save the final output of a composition When you render a composition you choose the output s you wish to render and the way in which they will be rendered which is called the render action as either the foreground or one of the many background actions A progress bar displays the rendering of frames for all outputs The outputs a...

Страница 237: ...composition By default Composite has three render actions to the foreground background or backburner Foreground will perform the render while blocking further interaction with the Composite UI It will only use the local machine but is the fastest single machine rendering option Its disadvantage is that you cannot use Composite while rendering proceeds Background will also perform the render on the...

Страница 238: ...rames to include frames of all the currently selected outputs 9 Finally click the Start button to begin rendering or click the Cancel button To display the list of background tasks In the taskbar click the number representing the number of ongoing render tasks a Number of ongoing render tasks Caching Composite can keep track of previously computed images through an image cache called the media cac...

Страница 239: ...tool to your composition and set it to create intermediate results As you play the composition or scrub through the frames the glow is displayed as it processes At the same time the result is stored in your local media cache If you add another node after the glow Composite will not reprocess the frame Intermediate results are stored in the media cache as long as there is room When the media cache ...

Страница 240: ... new version of a composition 1 In the Tool Details area click the Versions tab 2 Click the New button located in the bottom left corner of the tab You can then see the new version in Versions tab window 3 Compositions always contain a working version and a primary version The working version is the one that is edited by default The primary version is other one that is linked to by default for com...

Страница 241: ...al values when the action is run Description Variable Composite root installation folder InstallDir Points to the resources bgTasks folder of the Composite in stallation BgTaskDir Points to the Python executable used by Composite PythonExec Folder on the network where shared data files are stored SharedDataDir The destination folder specified in the current project s Rendered settings DestinationP...

Страница 242: ...t is part of the render farm NOTE If you are using the Autodesk Backburner network rendering application ensure that one Backburner Manager is running on one workstation and one Backburner Server is running on each workstation that is part of the render farm In addition each Backburner Server should be connected to the Backburner Manager Viewing Rendered Versions of a Composition NOTE This procedu...

Страница 243: ... to which you are linking 1 In the Schematic view right click the Link Image node for the composition you are linking to and select Open The linked composition is opened 2 In the tool UI select the Versions tab The left side contains the list of all versions for the composition The right side shows the result of the selected version To open a version In the Versions tab select a version to open an...

Страница 244: ...e degree of data exchange between Autodesk Composite and Autodesk editing and effects products such as Autodesk Smoke and Autodesk Flame In a facility where Composite is used with one of these Wiretap compatible products rendering to Wiretap is an easy way for you to quickly make available the rendered result of a composition to the Flame or Smoke user see Navigating and Browsing on page 40 Render...

Страница 245: ...he text field the prefix Wiretap is stripped off if present because it is implicit For IFFFS the path must specify a writable folder which is either a library or a reel For example Wiretap belgium stonefs myProject myLibrary myReel The trailing slash is optional You can also set Wiretap rendering on existing compositions for each output Select an output node in the composition and click on the Ren...

Страница 246: ...nk to a composition and then choose the output you want to see Linking makes dependencies easy and efficient If your work depends on the result of another composition you can link to that composition and work on the composition that contains the link However you may be working on multiple compositions independently and each one will stay up to date or will detect if a more recent version is availa...

Страница 247: ...sion of the composition This is a common choice at the beginning of a project when compositors are experimenting with ideas and nothing is locked down yet you want to see the latest idea for a shot Working Link to the working version of the linked composition Explicit Link to any result Click the Browse button beside the text field In the Version browser that opens select the output to which you w...

Страница 248: ...to which you are linking is up to date by checking the linked node s tool UI Link Image tab The Link Image tab is common to all linked compositions you must click the node of a linked composition to see its information in the Link Image tab Linking to a Composition NOTE This procedure is aimed at advanced Composite users When linking to a composition you are actually linking to the primary version...

Страница 249: ...sition you want to close a Name of the current composition in the taskbar Alternatively in a File Browser click the composition you want to close 2 Select File Close or press Ctrl W for Windows or Linux or Cmd W for Mac OS Things to Remember All open compositions are automatically closed when you exit You cannot keep a composition open between sessions Closing a Composition 237 ...

Страница 250: ...238 ...

Страница 251: ...page 250 Working with Layers on page 251 Working with Geometric Surfaces on page 254 Using Parenting Axes on page 256 Working with Materials on page 257 Working with Lights on page 268 Working with Cameras on page 274 Camera Mapping on page 281 3D Displacement on page 283 Transforming Objects on page 288 Reaction Rendering Effects and Output Results on page 290 Setting up a Stereo Camera Rig on pa...

Страница 252: ...nctionality as needed to get your job done You may want to simply create a few layers where one layer is repositioned to place a character in a scene or create a 3D scene with lighting and texture effects Regardless the Reaction tool behaves like any other tool in Composite you can delete and connect a Reaction tool to other output nodes in the same manner As always the universal Tool Options pane...

Страница 253: ...s on page 254 Camera Each Reaction node includes a camera for viewing and rendering the scene By default the camera is set to perspective and positioned so that you can view your layers in 2D and immediately perform standard multilayer compositing although you may want to set the camera to orthographic You can add several cameras to a scene but you can only choose one to render called the render c...

Страница 254: ...s The following shows examples of a typical workflow you might follow when working with Reaction to perform multilayer compositing or to create and integrate compelling 3D effects into your compositions Basic Multilayer Compositing in Reaction 1 Add a Reaction tool to your composition and set the composition background optional 2 Add sources and create layers 3 Set layer priority and modify their ...

Страница 255: ...h materials and shaders You can use the hardware renderer for fast results or use software shaders to create special rendering effects such as flares fog and flames A shader modifies the behavior of the renderer while rendering an object in a scene Basic Compositing in Reaction Whether you want to quickly perform straightforward 2D compositing or create 3D effects the first thing you ll do is set ...

Страница 256: ...ol Output to view the results of your Reaction composition in the Player NOTE When you are working with a default Compositing task group preset Tool Output is enabled TIP You can set a context point for the Player to display the Reaction output This is useful when you are working with more than one player or you are editing a composition with Reaction using the Layer Editor and you always want to ...

Страница 257: ...see when working with the hardware renderer may differ slightly from the results achieved using the software renderer NOTE If you are planning to quickly composite a series of 2D layers without manipulating or transforming layers or adding 3D effects you do not need to enable Interactivity NOTE To work with lights and cameras you must also select Icons under Rendering in the Render tab of the Reac...

Страница 258: ...matic The background for the Reaction node is set Setting the Background Before you composite or add effects to a composition in Reaction you typically set the background The background is the rendering plane for your composition and sets the format If you connect a Reaction tool to an image or to a tool output in an existing dependency graph the background is set automatically You can change the ...

Страница 259: ...the background manually in the Schematic view Connect a media or tool node output to the background input connector To set or replace the background using the drop gate 1 Select the desired Reaction tool in the Schematic or Layer Editor In the Schematic view the Reaction tool is highlighted 2 Select the composition to use as the background and drag it to the Schematic Layer Editor or Player The Re...

Страница 260: ...ckly create a layer in a single step in the Layer Editor or Schematic by using the Reaction drop gate To substitute a 3D geometric surface as your layer support you can then simply choose a different geometric surface After creating the sources and layers you can publish a 2D composition if you are satisfied with the results To create one or more sources and layers in a single step 1 In the Schema...

Страница 261: ...er and a source are created By default the Bilinear surface is assigned to the layer To add a source 1 In the Schematic view right click the Reaction tool and select Add Source 2 A source input connector appears in the Schematic view You can connect media or a tool node to it To add a layer and link to its source In the Layer Editor right click a layer and select Add Linked Layer A layer is create...

Страница 262: ... You can add more than one layer to a source if you want to create multiple layers using the same source image If you have applied effects to the source image they will be propagated to the layers to which they are linked Working with Maya Pre Comps Once created you can automatically generate and update compositions based on Maya render layer and pass setups This accelerates and streamlines the 3D...

Страница 263: ...ties and visibility options And because layers are discrete objects you can also parent layers to axis objects in the Group Schematic Renaming Sources and Layers Renaming sources and layers lets you quickly identify a layer and its source in the Group Schematic You can rename sources and layers in the Layer Editor or the Tool Options at the right of the tool UI To rename a source or layer 1 In the...

Страница 264: ...ulators in the Player Options Duplicating Layers Duplicating a layer gives you an identical layer that includes the source material and surface type To duplicate a layer Select a layer from the Layer Editor and do one of the following At the bottom of the Layer Editor click the Duplicate Layer button Right click a layer and select Duplicate Layer Reordering Layers You can reorder layers interactiv...

Страница 265: ...field A higher value speeds up the blur effect for the layer a lower value slows it down Setting Layer Visibility Properties You can set layer visibility properties to specify how the layer is rendered or seen by the camera To set the visibility options Select any of the following in the Reaction tab Size in pixels Thumbnails The layer is visible to the camera If you hide the layer from the camera...

Страница 266: ...ypes available in Reaction bicubic bilinear box frustum geometry plane and sphere The bilinear surface is a planar surface with four vertices one at each corner The vertices are joined by straight line segments using linear interpolation The box frustum and sphere surfaces are 3D primitives meshes with no control vertices Modifying Surface Shape and Geometry You can change a surface s shape by sca...

Страница 267: ...ttom and height as well as the number of segments to increase or decrease the number of polygons Frustum Geometry You can change the number of segments to increase or decrease the number of polygons and change their shape Plane You can change the number of segments to increase or decrease the number of polygons and modify the smoothness of the sphere or Sphere change its shape When you reduce the ...

Страница 268: ...ion scale and pivot You can animate and set expressions for all transformation values as well as assign them to a tracker The axis is represented by a white cross in the Player which you can select and interactively move with the manipulator NOTE The axis icon is visible only if you have selected Icons in the Render tab of Reaction To add an axis from the Axes tab 1 In the Schematic view select th...

Страница 269: ...icating effort by having to assign the same material attributes to several surfaces You can quickly connect materials to layers from the Reaction Group Schematic and see which layers share materials About Materials Shaders and Textures A material defines how the layer and its associated surface object appears It defines how it interacts with lights how it reflects light back to the view and how it...

Страница 270: ...eate a layer a material is associated with it automatically By default the material displays the source image on the layer surface using the Standard shader which gives you immediate access to the full range of parameters in the Materials tab To access the Materials UI Do one of the following In the Layer Editor select a layer and then select the Materials tab In the Schematic view right click the...

Страница 271: ...s It does not consider lights in the scene but you can create lighting effects using environment maps Shadow Matte Used to blend shadows into a scene By adding objects to a scene you can create realistic shadow effects No Shade Lets you set parameters and texture mapping for the main material channel only You rely on the lighting effects in the source image to provide illumination Materials UI 259...

Страница 272: ...ded that you perform all transformations using the hardware renderer but verify your results using the software renderer Hardware Lets you select the blending modes used by the hardware renderer which can only reproduce a subset of the blending mode effects available to the software renderer HW SW Description Blending Mode X Set results to follow the hardware renderer Follow HW X X Maintains the n...

Страница 273: ...ultiply mode X Displays the image through a gel of the current layer It combines the colors of the current layer with those Overlay of the layers behind it to create new tints based on these results It boosts contrast and color saturation at the same time X Shines a soft diffuse light associated with the current layer onto the layers behind it It reduces the contrast levels in the image Soft Light...

Страница 274: ...e that of the layers behind it X Changes the hue and saturation of the current layer to the hue and saturation values of the layers behind it Color X Changes the luminance of the layers in the background of the composite to the luminance value of the current layer Luminance Basic Shading Parameters The basic shading parameters let you set a layer s opacity Depending on the shader type selected you...

Страница 275: ...t channel The Shadow Matte shader has no color factors NOTE You can choose to add a layer without a source to your composition For example if you want to add a colored ball to your scene you can simply create a layer and set its color in the Materials tab In this case the main color would be the color you set Description Color Sets a color to modulate the main material color The Main color is a di...

Страница 276: ...he Color Picker is displayed so you can set color values see Color Picker on page 154 Using Texture or Environment Maps to Control Surface Attributes The Main texture channel defines the surface s general appearance but if your main texture is not enough to give you the look you want you can add more texture maps Each Material node has five texture channels that you can use to apply texture and en...

Страница 277: ...ect s surface You can position the ma Main terial on the surface using the UV placement controls and tile the image in U and V A reflection map uses the source image to create realistic re flections You can use the color factor to set areas and the Reflection degree of reflectivity for the material You typically set a grayscale color value with white being completely reflective and black having no...

Страница 278: ...ing environment maps adds lighting effects to the associated objects only To set texture and environment map parameters 1 In the Materials UI select a layer from the Layer Editor 2 Select the Simple or Standard shader 3 Under Channels select a channel Main Radiosity Reflection Refraction or Bump 4 Adjust the parameters to control image brightness and texture quality and in the case of the Main and...

Страница 279: ...ter sharpness than the Gaussian filter but at the expense of ringing Similar to the sinc filter but with better isotropic qualities less ringing and same sharpening and anti aliasing Jinc 3 Offers better sharpness than the Gaussian and Jinc 2 filters but at the expense of even more ringing Similar to the Lanczos filter but with better isotropic qualities less ringing and same sharpening and anti a...

Страница 280: ...ow You would then select the Shadow Matte shader to use on the plane and set the Blending Mode to Multiply to mask out the plane except for the shadow You can then animate the sphere and the shadow will follow it To set Shadow Matte parameters 1 Select the Materials tab 2 Select a layer from the Layer Editor and then select the Shadow Matte shader 3 Set parameters to control how light or dark the ...

Страница 281: ...tioned at 0 0 0 so you may need to zoom out to view the light icon You can also set the light type and parameters as well as parent a light to an axis and animate its properties NOTE The light icon is visible only if you have selected Icons in the Render tab of Reaction To add a light from the Lights tab 1 Select the Lights tab 2 Under the Light list click Add A light is added to the Group Schemat...

Страница 282: ...ul for lighting a specific object or area and creating sharp edged shadows Directional Casts rays in a single direction from a geometric area and is useful for creating soft edged shadows with both an umbra a full shadow where an object blocks all rays from a light and a penumbra a partial shadow where an object blocks some of the rays To set attributes for a Spotlight 1 Select the Lights tab 2 Un...

Страница 283: ... color for the light Click the color pot to display the color picker choose a color and click Set see Working with the Color Picker on page 155 Color Sets the amount of light emitted by the source light Intensity Sets the light s intensity to diminish gradually using a linear or quadratic function Decay Represents the distance at which the light s intensity is reduced by half 1 2 Distance Modifies...

Страница 284: ...None The light does not cast a shadow Select the map size The default is 256 x 256 Map Size Experiment with self shadowing effects The default value is 1 00 and is intended to reduce self shadowing artifacts Offset Set the transparency of the shadows By default shadows are opaque Opacity Set the softness for the shadow Softness Click the color pot to display the color picker choose a color and cli...

Страница 285: ...brightness of the image texture up or down This is useful for setting the amount that a given texture affects the Multiplier object s overall look The default value is 1 but you can overdrive the brightness to achieve specific effects Sets the quality of the texture image When a texture is stretched onto an object it may depending on the camera position lose Filtering some of its crispness The ren...

Страница 286: ...better isotropic qualities less ringing and same sharpening and anti aliasing Lets you adjust the trade off between anti aliasing and blurriness AA Factor Set the repeat mode Choose from Transparent Edge Repeat and Mirror Tiling X Tiling Y Translates the texture in U and or V U Offset V Off set Lets you specify the number of times a texture is repeated over a surface You can use a non integer valu...

Страница 287: ...active camera s You can designate any number of cameras as active Active cameras contribute to the composition s output and is indicated by the white square under the A active column of the Cameras tab You can also set the visibility of each camera NOTE The camera icon is visible only if you have selected Icons in the Render tab of Reaction To add a camera from the Cameras tab 1 In the Schematic v...

Страница 288: ... and stabilization To set the render camera s 1 In the Schematic view select the Reaction node 2 Select the Cameras tab 3 From the Cameras list click the white square under the A active column beside the camera s you want to designate as the render camera s To set the visibility of a camera 1 In the Schematic view select the Reaction node 2 Select the Cameras tab 3 From the Cameras list click the ...

Страница 289: ...ing plane is very far away so that you can see the entire scene Far Plane Setting the far plane closer to the camera will hide objects farther away Modifies the motion blur that affects layers animated in the scene You can give the layer the appearance of moving at a different speed than is set for Motion Blur in the Render tab Time Dilation Lets you frame the scene making objects appear larger or...

Страница 290: ...he film gate either vertically if Film Fit is Horizontal or horizontally if Film Fit is Vertical Film Fit Offset has no effect if Film Fit is Fill or Overscan Film Fit Offset is measured in inches The default setting is 0 X Y Film Offset Vertically and horizontally offsets the resolution gate and the film gate relative to the scene Changing the X and Y Film Offset produces a two dimensional track ...

Страница 291: ...rm cameras interactively in the Player or set values in the transformation fields in the Cameras tab see Transforming Objects on page 288 NOTE The camera is initially positioned in Z according to the composition s format NOTE Interactive transformations are applied using the camera s local axis but its position is recorded using global coordinates Dollying Trucking and Orbiting the Camera You can ...

Страница 292: ...r and Depth of Field to a Scene on page 292 To modify the motion blur 1 Select the Cameras tab 2 From the Cameras list select the render camera s 3 Under Motion Blur modify the Time Dilation A higher value increases the blur effect giving the impression of faster motion and vice versa Resetting the Camera You can easily reset the camera to its default To reset the camera 1 In the Schematic view se...

Страница 293: ...dinates UV coordinates are 2D coordinates that you can apply to an object they are generated by the camera connected to the Camera Mapping tool UV coordinates are affected by the camera s parameters such as the field of view distance and so on To use the Camera Mapping tool 1 Create a new composition 2 From the Tools tab select Reaction and drag it to the Schematic view 3 Select a layer type from ...

Страница 294: ... 7 From the Tools tab select Camera Mapping from the Reaction folder and drag it to the Group Schematic 8 Connect the Layer Geometry output to the Camera Mapping input 9 Connect the Camera Mapping Geometry output to the bicubic node 282 Chapter 12 Multilayer Compositing and 3D Effects ...

Страница 295: ...lacement The 3D Displacement tool lets you add depth to meshes created in or imported into Composite The pixel values in an image are used to displace vertices This allows the illusion of perspective to be maintained as the camera is moved in 3D space You can also create a displacement that converges on an object such as a light Once created you can blur the displacement as well as set the tiling ...

Страница 296: ...width and height of segments in the Surfaces tab of Reaction To use the 3D Displacement tool 1 Select File New or press Ctrl N for Windows and Linux or Cmd N Mac OS to start a new composition 2 From the Tools tab select Camera from the Reaction folder and drag it to the Schematic view 3 You will need two sources one for the image to be displaced and another for the image that will do the displacin...

Страница 297: ...llowing example the Noise image generator is used to displace the character 6 Display the Group Schematic by double clicking the Reaction node or right clicking the Reaction node and selecting Edit Group 7 From the Tools tab select 3D Displacement from the Reaction folder and drag it to the Group Schematic 8 In the Layer Editor click Create to add a new layer 9 Delete the Source node and arrange t...

Страница 298: ... value that is subtracted from the displacement image values before it is interpreted as a displacement It is used to Offset determine the value of the displacement image that yields no displacement Type Surface Orients the displacement towards the surface normal Toward Target Orients the displacement towards a target which can be a light locator axis camera layer or 3D object RGB XYZ Specifies th...

Страница 299: ... Y 11 To make the displacement point towards a target set the Type to Toward Target Set Convergence parameter the displacement can converge on the target or be parallel to it 12 From the Tools tab select the Reaction folder and drag one of the following to the Group Schematic Axis Camera Layer Light or Locator 13 Connect the target to the Target tab of the 3D Displacement node In the following exa...

Страница 300: ... are applied using a light s local axis but its position is recorded using global coordinates To transform objects interactively 1 In the Schematic view display the Group Schematic by double clicking the Reaction node or right clicking the Reaction node and selecting Edit Group 2 Select a layer axis light or camera by doing one of the following Click an object in the Group Schematic In the Reactio...

Страница 301: ...s created its scale is automatically set to 1 0 NOTE Cameras cannot be scaled To transform objects using the tabs 1 In the Reaction tool UI select the tab of the object you want to transform and then select an item from the Layer Editor Axes Lights or Cameras list NOTE If you selected a light select Transform in the Lights tab under Parameters to display the fields 2 Transform objects by adjusting...

Страница 302: ...ing on whether you are using the hardware or software renderer you can set some rendering options and effects When you use the software renderer you can set the Depth of Field and Motion Blur effects and specify the number of samples to take and select a filter for anti aliasing To set Rendering and Effects Options 1 With the cursor over the Player press the tilde key or middle click to display th...

Страница 303: ...result Shading Turns on off shadows Shadows Applies image filtering Image Filter ing Enables surfaces to render in wireframe Wireframe Displays light camera and axis icons You must also enable Interactivity in the Player options to view the icons Icons 5 Under Fx set the effects options NOTE You must have software rendering enabled To enable software rendering deselect Interactivity in the Player ...

Страница 304: ...ure Description Property Used with motion blur The software calculates which sample should be considered most important and makes it appear brighter Importance Sampling Used with motion blur Sets the length of time the shutter is open A larger number yields a slower shutter speed and a greater amount of motion blur Camera Shutter Used with DOF Sets the size of the camera lens opening In creasing t...

Страница 305: ... in Reaction 1 Select the Reaction node in the Schematic view and then select the Cameras tab 2 Create three cameras and Rename them Center Left and Right 3 Make the Center camera parent of the Left Right cameras by double clicking the Reaction node in the schematic to access the Reaction sub schematic then connect the Center camera 3D Object input to the Left and Right cameras Output 3D object ou...

Страница 306: ...rameter to 1 7 From the Reaction Cameras list set the Left Right cameras to active by enabling the square button under the A column Set the Center camera as inactive by disabling the square button under the A column 8 From the Composition Browser drag drop the Left camera folder on the Right camera folder to link them together with expressions 294 Chapter 12 Multilayer Compositing and 3D Effects ...

Страница 307: ...ool UI right click on the Right camera X Film Offset parameter and choose Edit Expression option 10 In the text field type a minus sign in front of the expression and press Apply Setting up a Stereo Camera Rig 295 ...

Страница 308: ...ight click on the Right camera X Translation parameter and choose Edit Expression option 12 In the text field type a minus sign in front of the expression and press Apply 296 Chapter 12 Multilayer Compositing and 3D Effects ...

Страница 309: ...The stereo rig is ready to use You can adjust left and right eye convergence Setting up a Stereo Camera Rig 297 ...

Страница 310: ...298 ...

Страница 311: ...nd passes setup exported as a pre comp precomp file by 3D applications that support this file format such as Autodesk Maya and Autodesk 3ds Max Once imported into Composite a set of compositions is automatically created representing the render layer setup For example the left side of the following illustration shows the structure of a Maya scene and its render layers cameras and render passes The ...

Страница 312: ...ween Composite and the 3D application The Composite pre compositing interoperability supports having a different set of render passes for each render layer In our example Render Layer 1 has more passes than Render Layer 2 Render Layer 1 only has an Ambient pass and Render Layer 2 only has a Reflection pass For a given render layer the set of render passes produced by each camera can be different i...

Страница 313: ...Composite Dependency graphs of render passes produced by camera pairs are also created in the same render layer composition Finally render layers produced by camera pairs are stacked in the same scene composition This classification facilitates stereoscopic compositing once in Composite The dependency graph of the left camera can be manipulated next to the dependency graph of the right camera in t...

Страница 314: ... that they are self contained That is you don t need to have Maya installed and licensed on your system like you do for importing Maya files Before importing a Maya file see To Import an FBX File on page 324 To import a pre comp or Maya file 1 Select File Import or press Ctrl I for Windows and Linux or Cmd I for Mac OS The File Browser is displayed 2 Locate the folder that contains the pre comp fi...

Страница 315: ... performed in a background process NOTE For Maya files by default Maya expects the render files to be in the default location for the Maya project Place them there to avoid having to input the location or add the correct path in the dialog box On Windows the location is C My Documents maya projects default You will need to locate the My Documents folder as it could at a different location dependin...

Страница 316: ...after the scene anchor and camera s anchor is created in the folder you specified during import This folder contains a Layers folder and a Passes folder unless you specified a different name during import Render layer compositions are named after the scene anchor the camera s anchor and the layer anchor Render pass compositions are named after the scene anchor the camera s anchor the layer anchor ...

Страница 317: ...de Right click a link node and select Open In the File Browser open it from the Layers folder 8 To view a render pass composition open it from the Passes folder in the File Browser Click the Import Image node In the tool UI select the Import Image tab Pre Compositing Import 305 ...

Страница 318: ...ify how to handle existing compositions during import You can update or recreate the working version overwrite all versions Update Mode skip existing compositions no update or asked to be prompted for each composition Back up the working version of the composition when an update is required Backup Working Version Whether the default composition template should be used when no template is specified...

Страница 319: ...ed image files Render Directory Saves the current pre compositing import options in your project preferences see Setting Project Preferences on page 97 Save to Project Set tings About Anchors In a scene there are unique anchors for the following elements render layers render passes and cameras Anchors identify these elements in the resulting Composite composition that is created after importing a ...

Страница 320: ...date process so they should not be changed It is also important to have properly defined anchors in the composition templates see Using Pre Compositing Templates on page 310 To view a node s anchor 1 Place the cursor over a node or an output socket that has an anchor which is indicated by blue anchor tab and press the d lowercase key to turn on the Details mode Now you can place your cursor over a...

Страница 321: ... of the following to specify the type of anchor In the Type field type in the kind of anchor you are adding It can be anything you want Click the button below the Type field and select an anchor type Custom Render Pass Render Layer or Render Camera 4 Click OK 5 To view the anchor place your cursor over the node and press the d lowercase key Pre Compositing Anchors 309 ...

Страница 322: ...Remove To select a specific anchor to remove from the list To edit an anchor 1 Right click the node on which you want to edit an anchor and select Anchors Edit Anchor and select the anchor you want to edit The Edit Anchor dialog box displays 2 Edit the anchor name and type and click OK Using Pre Compositing Templates A pre compositing template is a Composite composition a txcomposition file There ...

Страница 323: ...Pre Compositing Import Options dialog box during import layer scene and merge Layer Template The layer template assembles passes from a single layer This is the default template provided with Composite For example the following shows the default Maya 2011 layer template provided with Composite Its link nodes have render pass anchors that match the default name of the standard render passes in Maya...

Страница 324: ...osite 2011 AutodeskComposite app Contents Resources precom templates Scene Template The scene template stacks the layers using Blend Comp nodes and assembles the layers in the same order as in the 3D scene This template assembles layers in the scene for a given camera view so the scene template composition must contain link nodes with a render layer anchor on them see Pre Compositing Anchors on pa...

Страница 325: ...hors see Pre Compositing Anchors on page 308 4 Option Clean up the template by selecting Composition Pre Compositing and one of the clean up options When cleaning up the template link nodes are reset their name is changed to match the anchors and unused anchors are removed from nodes and output sockets 5 Provide the pre comp file txcomposition to the 3D artist as the render layer template Pre Comp...

Страница 326: ... of a pre compositing template will not trigger an update as the Composite application does not detect when the template has changed In this case you should use the Recreate Working Version update mode in the Pre Compositing Import Options dialog box or project preferences Frame Rates Since Composite does not support all frame rates there may be cases where the time units in the 3D application suc...

Страница 327: ... the file sequences of each render camera are imported in the same render pass composition each with it own Import node and output node The name of the output nodes is suffixed by its corresponding camera name The camera anchor is set on the output node NOTE Unlike other footage compositions which have an Original Footage and a working version a render pass composition initially has only one versi...

Страница 328: ...yer composition in the same way as when no template is specified Without a Template If no template is specified the render layer composition is created with a single unconnected output node For each render pass composition there is an unconnected link node that points to it The render pass link nodes have their anchors automatically set to their corresponding render pass anchor name and the nodes ...

Страница 329: ...r pass is no longer in the render layer which could be because it was removed from the 3D scene or because the pre comp file update is partial its anchor link node is not deleted the render layer composition update is non destructive see Non Destructive Updates on page 314 The format and rate of a render layer composition is not modified on update However the start end of the render layer composit...

Страница 330: ...yer compositions time ranges Scene Composition Update A scene composition is updated when a new layer is added to the scene Deleting a layer will not trigger an update because it s non destructive Renaming a layer is equivalent to adding a new layer The working version of the scene composition is backed up if you set the Backup Version option Then in Update mode the working version is updated othe...

Страница 331: ...each camera of the stereo rig are imported and composited in the same composition at all levels pass layer and scene There are two modes in which you import a stereo scene either in multi stream mode or not see The Pre Compositing Import Options on page 306 In single stream the graph of the template is duplicated for each camera and placed within a group node to avoid name and expression clashes T...

Страница 332: ...emplate in the following dependency graph In Multi Stream mode the left and right outputs of each link node are merged together feeding only one instance of the dependency graph At the end each stream is extracted see Multi stream Compositing on page 371 320 Chapter 13 Pre Compositing ...

Страница 333: ...endency graphs of each layer in one scene composition To merge layers during import click the Single Composition button in the Pre Compositing Import Options dialog box The following shows what a scene composition would look like after merging layers Notice that each layer is represented by the same dependency graph because they all use the same default template Merging Layers 321 ...

Страница 334: ...position To merge in a composition In the Schematic view right click a Link Image node and select Merge and one of the following Non Recursive Bring in one level of the linked composition Recursive Apply the merge recursively on all link nodes found in the linked composition version Recursive Except Footage Stop recursion at footage compositions 322 Chapter 13 Pre Compositing ...

Страница 335: ...ne a new composition is created within a Reaction node with all 3D data The name of the created composition the one that contains the Reaction node is based on the name of the FBX file However 3D updates are not supported you can only overwrite the existing composition To update a composition you can transfer objects from one Reaction node to another by copying and pasting NOTE All FBX Geometry is...

Страница 336: ...s and Linux or Cmd I for Mac OS The File Browser is displayed 2 Locate the folder in which the FBX file fbx resides 3 Right click import or click the Import button to import and select Import 3D Scene NOTE Multiple FBX files can be imported into Composite at the same time 324 Chapter 14 Importing FBX Files ...

Страница 337: ...owser using the The Gate UI on page 12 or by pressing Ctrl O for Windows and Linux or Cmd O for Mac OS 5 Open the imported composition The composition name is based on the FBX file name but without its extension 6 Select the Reaction node to view the layers To Import an FBX File 325 ...

Страница 338: ...Z for Mac OS Pressing Reset will reset the values to the default settings of the identity matrix not to the original values of the object To view the imported objects in the Player 1 Right click and swipe south to display the Player options 2 Under the Reaction label select Interactivity Under the Display label select Tool Output Imported objects are now visible in the Player 326 Chapter 14 Import...

Страница 339: ...r Its properties are displayed in the Reaction tab 2 In the Player right click and select View From Perspective or press Shift 2 to view from the perspective camera To view locators and their properties Select the Reaction node in the Schematic view and then select the Locators tab To Import an FBX File 327 ...

Страница 340: ...mera01 The camera is selected in the Player and its properties are displayed in the Cameras tab To view the camera animation 1 In the Tool UI select the Animation tab 2 In the Composition Browser select the Reaction node which is named after the FBX file Select Camera Transform The Animation Editor displays the animation curves of the camera transformation To accurately represent the animation tha...

Страница 341: ...s recalculated into some other attributes or Composite paradigms Transformation Attributes Comments E S Attributes Group X X Translate Transform X X Rotate X X Scale Shear Recalculated in Composite trans form Expressions set on those will X Rotate Order interfere with the recalculation process X Rotate Axis Inherits Transform Recalculated in Composite trans form Expressions set on those will X Rot...

Страница 342: ...E S Attributes Group X X Position Local Trans form X X Scale X X Visibility Object Display Camera Comments E S Attributes Group Only free cameras in Composite X Controls Aim Aim Up Camera Attrib utes X X Focal Length Horizont al Angle of View Camera Scale Auto Clip Planes X X Near Clip Plane X X Far Clip Plane X X Film Gate Presets Film Back X X Camera Aperture 330 Chapter 14 Importing FBX Files ...

Страница 343: ...l Pivot Film Roll Value Film Roll Order Post Scale Camera is imported if renderable X Renderable Output Set tings Mask of the render current camera translates to Alpha chan X Mask nel in Reaction output format Affects all cameras Image Z channel not supported in Composite Depth Background Color Environment Display Film Gate Display Op tions Player setting X Display Resolution Gate Display Field Ch...

Страница 344: ...ibility Object Display Camera Image Plane Once imported into Composite an FBX image plane loses part of its relationship with its camera It is imported as a normal plane layer parented to the camera transformation but it does not rescale itself automatically when its depth or the camera view frustum changes Comments E S Attributes Group Display Mode RGB RGBA A Luminance etc Image Plane Attributes ...

Страница 345: ...lculated into plane layer transformation according to Depth and camera Focal Length X Size Offset Recalculated into plane layer transformation X Depth X Rotate Recalculated into plane layer transformation inverse of camera Lens Squeeze Ratio X Squeeze Correction Could be translated into a chain of Composite Crop and Resize nodes at the Reaction source Coverage Width Placement Ex tras Coverage Heig...

Страница 346: ...on the render settings of the default camera The camera image plane distance its size on aperture the camera focal length and the horizontal scale are all animatable values in FBX but the transformation of the imported plane layer in Composite is not animated The image plane offset values which controls how much the center of the image plane is offset from the centre of the viewing frustum of the ...

Страница 347: ...the cam era view just a simple image plane parented by the camera and properly scaled for the current depth of the plane Current Limitations 335 ...

Страница 348: ...336 ...

Страница 349: ...nnel image in which the red green and blue channels have already been multiplied by the integrated matte channel Typically images from a 3D renderer are premultiplied which means that the transparent areas are black in both the RGB channels and the alpha channel As such in premultiplied images the RGB channels never have a higher value than the alpha channel When to Premultiply You should consider...

Страница 350: ...levels Additionally when the premultiplied state of an image is ignored there may also be unwanted fringing around a masked object or the unwanted side effects that may occur when a node affects parts of an image that it should not A possible result of compositing with a premultiplied image would be slight lightening or darkening of the composite areas where the foreground matte is semitransparent...

Страница 351: ...escribes the 2D compositing tools available to you in Composite They are described in the order in which they appear in the Tools tab 2D Compositor The 2D Compositor tool lets you create multilayer compositions It allows you to stack four layers over a background Each layer becomes the foundation for the subsequent layer starting with the background and moving up the stack You must use a Matte ima...

Страница 352: ...sitor tool to the dependency graph in the Schematic view and connect an image or tool output to the Layer 1 Back input tab This is the background for the first layer NOTE If you drop a 2D Compositor tool onto an existing connection between two nodes the existing composition becomes the Layer 1 background input 2 Connect a composition to the Layer 1 Front input This is the image you want to have on...

Страница 353: ... to achieve the desired result Adjusting the Matte s Luminance Curves You can adjust the luminance curves of the front and back mattes of your composite by selecting the layer from the 2D Compositor tool The 2D Compositor tool UI is divided into four areas a Layer Browser b Layer tools c Blending modes d Luminance curve controls Adjusting the Matte s Luminance Curves 341 ...

Страница 354: ...Tool For matte cleanup tasks during the keying process see Alpha Levels on page 343 Alpha Levels Blends two mattes together under the optional control of a third matte see Blend Alpha on page 344 Blend Alpha Softens the alpha channel of its primary input see Blur Alpha on page 348 Blur Alpha Brings the alpha channel of the primary input within a predeter mined range see Clamp Alpha on page 349 Cla...

Страница 355: ...g process When used as a tool defined by the keyer tool s dependency graph the Alpha Levels tool applies its effect to the alpha component of the keyer s output You can clean up the matte by manipulating the input output luma remapping curve by adjusting the input and output luma fields or sliders or by adjusting the lift and gain The Alpha Levels tool also allows you to invert the matte The Alpha...

Страница 356: ...n this curve Maximum Input slider Drag to the left to remap light grays as white Maximum Output slider Drag to the left to remap output whites to light gray Blend Alpha The Blend Alpha tool is used to blend two mattes together under the optional control of a third matte It has front back and matte inputs It extracts a matte from the front image and composites it over the alpha channel of the back ...

Страница 357: ...g it default is off Back Intensity Specifies the intensity of the back layer default is 100 range is 0 10 Matte Channel Selects which channel to use for the matte Channel selections include Luma Red Green Blue and Alpha default is Alpha Matte Invert Inverts the matte before using it default is off Matte Ignore Determines whether or not the matte input is used to modulate the blend The default is f...

Страница 358: ...ocation and selects the darker of the two Darken Multiplies the color values of the back input pixels and the front input pixels producing a darker color Multiply Colorizes darker back input pixels with the front input color Color Burn Same as Color Burn but with less contrast Linear Burn Blend modes that lighten Blend Result Mode Compares the pixels of the front and back inputs at a given locatio...

Страница 359: ...Pin Light front color are replaced And vice versa if the front color is darker than mid gray back colors lighter than the front color are replaced Produces either white or black depending on similarities between front and back Hard Mix Difference Modes Blend Result Mode Looks at the front and back inputs and subtracts the less bright from the brighter one Difference Similar to Difference but with ...

Страница 360: ...he cursor in the curve window press minus sign and click the control point you want to delete from the curve To remove the Add or Delete control point mode Press Esc To reset a single curve Select the curve and click Reset To reset both curves at the same time Hold down the Ctrl key and select both curves then select Reset NOTE Blend Curves can be animated Blur Alpha The Blur Alpha tool lets you s...

Страница 361: ... the 0 1 range in order to prepare the alpha channel for use in compositing operators This is necessary because Composite does not force alpha values to be in the 0 1 range The Clamp Alpha tool contains the following parameters Minimum Alpha Set Largest negative float point By default Min is 0 Maximum Alpha Set Largest positive float point By default Max is 1 0 NOTE Min and Max Alpha are animatabl...

Страница 362: ...hen this is used as a mask to preserve input values in the filled region The Cleanup Alpha tool has the following parameters To Use Enable the black or white or both clean up controls Enable Control the number of pixels of edges to preserve Edge Width Control the blend between the preserved edge region and the interior filled in region Edge Softness Specify black or white or both thresholds White ...

Страница 363: ...nd you will start seeing the back through it Default is 100 range is 0 1 Back Channel Selects which channel to use for the back default is alpha Back Invert Inverts the back before using it default is off Back Intensity Specifies the intensity of the back layer Default is 100 range is 0 1 Comp Mode Determines which compositing mode will be used default is Over see Compositing Operators on page 352...

Страница 364: ...he output will be equal to the front except that the part of the front overlapping the back image will be missing No part of the back will be visible in the output in any case Outside The output will be equal to the back except that the part of the back covered by the front image will be missing No part of the front will be Cutout visible in the output in any case Basically this operator is equal ...

Страница 365: ...ontrol the width and offset of the inner edges Inner Dis tance Link the Outer and Inner Distance sliders so that the alpha edges are thickened by an amount of twice the slider value centered about their Link Distance original position in the input image By default the Link button is en abled Add blur to the outside extremities of edges Outer soft ness Add blur to the inside extremities of edges In...

Страница 366: ...cts You can apply the Detect Edge tool to a color or monochrome image This tool has many applications the most useful include Delimiting a portion of the matte to perform color corrections on the front image Creating special effects by using it directly on the front or back image The Detect Edge tool replaces the source alpha channel with an edge map of the source alpha The Detect Edge tool has th...

Страница 367: ...in the input image By default the Link button is en abled Link the Outer and Inner Softness sliders By default the Link button is enabled Link Softness Create negatives of Edge Mattes by simply inverting the output alpha Invert Remap the alpha as the last step in the internal pipeline Remap Alpha Curve Reset the alpha remapping curve Reset a Front input Image b Alpha c Detect Edge applied a Outer ...

Страница 368: ...d is applied to the output of a keyer tool such as the Luma Keyer or the Diamond Keyer your dependency graph should include as a minimum a source and a keyer The Edge tool contains the following parameters To Use Isolates the edge of the key The numeric field takes values representing the width of the detected edge based on a 0 to 100 float Edge width can depend on image size Edge Detect Invert th...

Страница 369: ... into an alpha only image The Extract Alpha tool is just a more convenient and readable tool to use when the selected channel is always the input alpha channel Fade Tool The Fade tool provides a convenient way to modify the transparency of an image The usual case will be to fade an image without having to do it at the same time as compositing This tool fades an image by reducing the value of its a...

Страница 370: ...ffect target and makes the Schematic easier to understand Median Alpha The Median Alpha tool is almost identical to the Median Tool see Median Tool on page 406 and is excellent for removing impulse noise but is designed to operate on the alpha channel of the input image It has all the parameters of the Median tool except for the Criteria parameter which is not needed because this tool always compu...

Страница 371: ...ll have an alpha channel properly modified by the curve remapping For more detailed curve manipulation control points can be added to or deleted from the curve To add a control point to the curve With the cursor in the curve window press plus sign to enter a mode where each click on the curve creates a control vertex at that location To delete a control point from the curve With the cursor in the ...

Страница 372: ...on a component from a second image image B The selected component from image B may also be blended with the alpha component from image A To set a new or replace an existing alpha channel in an image 1 To view the results of this operation set the Channels selection to RGBA in the Composition tab of the Tool UI or in Player Display Options select Tool Output in the Display field and Channels RGB in...

Страница 373: ...ls are in the Channel folder There are five channel processing tools Description Tool Remove the red blue green or alpha channel from an image see Channel Extract Tool on page 362 Channel Extract Analyze the channels of an image based on a specified thresholds see Out of Range Tool on page 362 Out of Range Remap the channels in one image by those in another image see Channel Replace Tool on page 3...

Страница 374: ...he channel you want to extract from the image NOTE The Channel Extract tool has a masking input see Pixel Masking on page 560 Out of Range Tool The Out of Range tool uses pseudo colors to display pixels above or below user specified threshold It is also capable of outputting a mask of the out of range pixels or its inverse so that corrective action can be taken by other tools downstream The Out of...

Страница 375: ...ified threshold Above Range Select color to display pixels above the specified threshold Examples The following examples show you how the Out of Range tool can be used Viewing out of range alpha in a player Set the display modifier as a range display tool An alpha below range will show up as opaque blue an alpha above range will show up as opaque red and all others will have their original alpha v...

Страница 376: ... Channel Replace tool has a masking input and its attributes are also animatable see Pixel Masking on page 560 and Animation Concepts on page 660 Channel Rewire Tool The Channel Rewire tool lets you create an output image that is generated by copying component values of the input image to possibly different component values of the output image For each component of the output image a selection lis...

Страница 377: ...s Use the Composition tools to combine front back and matte images using a combination of blending modes and compositing methods There are five composition tools Description Tool Blend two images using a simple blend factor see Blend on page 366 Blend Composite front and back RGBA images with blend modes and compos iting operators see Blend Comp on page 367 Blend Comp Combine two images using a ma...

Страница 378: ...nimated making it easy to use this tool to create a blending transition between compositions To blend two images 1 Drag the Blend tool from the Composition folder in the Tools tab to the dependency graph in the Schematic view 2 Connect the A and B images to the tool 3 Set the Blend factor If you set a value of 0 you see 100 percent of the image connected to the A input If you set a value of 100 yo...

Страница 379: ...efault is 100 the range is 0 10 Front Gain Control the opacity of the front in the compositing If the opacity is less than one the front will be more transparent and you will start seeing the back through it The default is 100 the range is 0 1 Front Opa city Multiply the back by a color factor prior to using it in the blend The default is 100 the range is 0 10 Back Gain Control the opacity of the ...

Страница 380: ...e Ignore Alpha Resets the Gain settings to default values Reset NOTE The Blend and Comp tool also has a Blend Curves tab see Blending Curves on page 347 Blend Matte The Blend Matte tool lets you mix two images using a matte image to define the areas of visibility between the front and back images To blend two images using a matte 1 Drag a Blend Matte tool from the Composition folder in the Tools t...

Страница 381: ...ct a source image to input A and another source image into input B of the Comp Ops node 3 Click the Operator button and select a compositing operator To Select Place input A on top of input B according to the alpha of the foreground image A over B Place input B on top of input A according to the alpha of the foreground image B over A Place the RGBA of input A into the alpha of input B A in B Place...

Страница 382: ...its attributes are also animatable see Pixel Masking on page 560 and Animation Concepts on page 660 Math Ops The Math Ops tool lets you apply mathematical blending operations to the RGBA values of two source images Use the following procedure to apply mathematical blending operations To apply mathematical blending operations to an image 1 Drag the Math Ops tool from the Tools tab to the dependency...

Страница 383: ...and finally the results are inverted back Screen Subtract from the RGBA of input A a percentage using the Blend value of the RGBA of input B Sub 4 Blend the images The blend factor controls the blend between the result of the math operation and the original input NOTE The Math Ops tool has a masking input and its attributes are also animatable see Pixel Masking on page 560 and Animation Concepts o...

Страница 384: ... a color picker is used in the player it will pick stream 0 If you pick a color in the Keyer it will pick the color from stream 0 If you click Fit to Source in a warp tool it will fit to stream 0 NOTE Paint strokes will only be applied to stream 0 Performing Multi stream Processing You can perform identical processing on multiple image streams The following example workflow applies a blur to five ...

Страница 385: ...ition 4 Connect all layers to the inputs of the Merge Streams node 5 Drop a Blur tool into the composition and connect the Merge Streams output socket to its input then change the blur parameters The blur is applied identically to all five streams Performing Multi stream Processing 373 ...

Страница 386: ...c motion or still picture in which the right component of a composite image usually red in color is superposed on the left component in a contrasting color to produce a three dimensional effect when viewed through correspondingly colored filters in the form of glasses Anaglyph mode is applied after the display modifier For example if the display modifier performs gamma encoding or tone mapping the...

Страница 387: ...review device that matches your stereo viewing hardware from the Video Preview device list in the User Preferences window The default video preview device is None To Select keep the default setting Use None when you do not want a video preview device to be active None view a video preview device that is just a window that shows one stream You can put the window on another monitor if you have Mono ...

Страница 388: ...and right streams To view stereo pairs in video preview devices other than the Player 1 Select the Video Preview device from the Device list from the User Preferences tab If your video preview device is None a Stereo video preview device will show nothing If you switch to a stereo video preview device and you don t have a stereo pair the stereo video preview device will show the same image in the ...

Страница 389: ...ards As per the Dual DVI output plus single DVI output graphics cards descriptions above Supported Technologies The following section describes both the viewing glasses and type of stereoscopic display monitors used with the glasses that are supported by Composite NOTE If your stereo video preview device only support 8 bits per color component consider using a player view display modifier that can...

Страница 390: ...sses Devices that use this technology include projectors and monitors Examples of these devices are DLP monitors DLP monitors that support active shutter glasses The left and right images are shown at double update rate 120 Hz using a checkerboard pattern Their disadvantage is half horizontal resolution Passive Colored Glasses Anaglyph Left and right images are tinted red and cyan and viewed using...

Страница 391: ...e Processing Tools This chapter describes the image processing tools available to you in Composite They are described in the order in which they appear in the Tools tab Filtering Tools You can use Filtering tools to apply a range of looks feels and transitions to your composites Description Tool Removes dust dirt hair and scratch artifacts from sequences of im ages see Remove Dust Tool on page 380...

Страница 392: ...ach frame of film or video This tool provides you with a means to automate this task as much as possible and to easily tweak the results manually The tool automatically detects dust and scratches and automatically repairs them You can view the results of the detection phase and easily correct anything using a simple mouse stroke The Remove Dust tool detects dust in images and removes the dust from...

Страница 393: ...step 1 manual correction of the defect matte can be performed by drawing appropriate shapes on the dust matte These locally change the detection and repair parameters within the geometric region of the shape Each object drawn has its own dust detection parameters which overrides the global automatic values used in step 1 In addition each object has other parameters to control how correction is per...

Страница 394: ... avoid dust detection Otherwise the dust channel will be the union of the scanner matte and the de tected matte If the Tolerance is set to 100 then all pixels are dust A value of 100 might be used with a shape to label all pixels within a small region as dust control into which regions the dust is expanded A value less than or equal to Tolerance means do not expand Size Tolerance control how expan...

Страница 395: ...are no parameters for the Temporal repair method When the Temporal repair method is selected the Radius Distance and Smoothing parameters will be grayed out set how large a texture patch to use for matching areas around the dust Spatial Radius set how far to search from the dust to find a pixel to put in place of the dust Spatial Distance set how smooth to make the infilling of the dust Spatial Sm...

Страница 396: ...ng global automatic parameter in the area of the shape To Use override the global detection tolerance Tolerance override the global size tolerance Size Tolerance override the global dust expansion amount Size override the global repair method The default is Temporal You would only switch to Spatial Repair in areas where the motion is Repair Method so complicated that the motion vectors are incorre...

Страница 397: ... defect matte after dust detection has been applied You can get the second output node from the Utilities folder in the Tools tab About Blurs Use the Blur tool to finish shots that require directional radial modulated and vectors blurs This includes shots that require some amount of depth of field or motion blurs In modulated blurs you can vary the amount of blur from pixel to pixel The ability to...

Страница 398: ...rs Blur on page 395 Vectors Settings affecting the image output by the tool see Output Controls on page 399 Output Directional Gaussian and Radial Blur The Directional Gaussian blur filter lets you scale and rotate its elliptical shape This allows you to blur an image by a certain amount in a given direction and by a different amount in a direction perpendicular to it Each pixel is blurred by the ...

Страница 399: ...About Blurs 387 ...

Страница 400: ...ortion Link Rotate the X and Y axis of the Gaussian by a given angle The angle is specified in degrees Rotation Mute the Directional Gaussian Blur contribution of the Blur tool The other blurs are still applied if not also muted Mute The Radial Blur simulates the effect of motion blur that would be generated by the movement of the camera due to zooming and spinning around a given point The zooming...

Страница 401: ... vector The size of the major axis matches the length of the displacement vector The size of the minor axis is kept fixed at a small value That value is chosen to keep aliasing artifacts at an acceptable level while not introducing too much blurriness About Blurs 389 ...

Страница 402: ...l or the tangential direction Set the amount of blur to apply in the tangential direction before taking into account the rotation parameter The amount of blur Spin is specified in degrees the further a pixel is located from the center of the radial blur the more it is blurred Controls how the strength of the blur relates to distance from the center of the effect Increasing the amount of focus keep...

Страница 403: ...e modulation image will apply a varying amount of scaling at each pixel The elliptical shape of the blur filter is scaled uniformly by this modulation amount The Modulation blur tool has the following parameters To Use Set the amount of blur to apply in direction of the X axis before taking into account the rotation parameter X Radius Set the amount of blur to apply in direction of the Y axis befo...

Страница 404: ...ffset output image will be in focus where the modulation channel is equal to the modulation offset it will be progressively blurrier for values of the modulation channel above and below the modulation image When the modulation tab is displayed and the Player is in Display Tool output mode selecting the offset picker tool then clicking anywhere in the player will set the Offset parameter to the val...

Страница 405: ...blur Z Depth modulation image closer objects appear as lighter shades of gray farther objects appear darker Luma channel offset value of sphere is 0 011 and matches that of the modulation image retaining focus About Blurs 393 ...

Страница 406: ... the foreground When an object becomes out of focus one starts to see parts of the scene that were not visible before through the blurred edge To replicate that effect as a 2D post process the depth of field tool must guess what the background pixels might look like behind foreground objects To do this segmenting and matting out foreground objects and then reconstructing the background using in fi...

Страница 407: ...Blur tool to specify the length and the width of the blur ellipses The blur ellipses are then oriented independently for each pixel in the direction of the vectors of the Forward Vector input image and uniformly scaled by the length of the vectors You can also apply an extra constant rotation to all the blur ellipses Using this definition of vector blurs you can blur only in the direction of the v...

Страница 408: ...ference Position is subtracted from all forwards vectors Reference in the image The result is that the pixel at the reference pos ition will not be blurred and so will pixels with similar forward vectors Set the amount of blur to apply at the reference position A value of zero means that no blur should be applied This is Weight the default A value of one means to blur by the same amount as the for...

Страница 409: ...e Min Alpha and Max Radius parameters of the Vectors blur tool to extend the motion vectors field to get more realistic motion blur effects To Use Select at which alpha value to start generating the missing vector in formation Min Alpha Increase the radius in pixels of the vector field generation Increase this value until the artifacts are removed Note that increasing the Max Max Radius Radius val...

Страница 410: ... alpha channel you should copy it from your diffuse beauty pass in Composite using a SetAlpha node This should give you the desired result You can see the effect of extending the motion vectors outside of the moving object by turning on the view vectors option in the Vectors tab of the Blur tool The Blur node interprets the alpha channel of the Input Image input differently than the alpha of the m...

Страница 411: ...Output Controls The Output UI allows you to control the following parameters About Blurs 399 ...

Страница 412: ...addition of an Auto Crop mode When in Auto Crop mode the Left Right Bottom and Top controls are greyed out Instead the output ROD is computed automatically based on the following as sumptions only the parameters of the Gaussian Blur are used to determ ine the output ROD This includes the Gaussian X radius Y radius and Rotation the Input ROD is enlarged by an amount proportional to the rotated X an...

Страница 413: ...n parameter to greater than 0 will make the radius different for each of the three color planes introducing color fringes Aberration Set the radial aberration Setting the radial aberration greater than 0 will scale the image about the center differently for each color Radial Aberration plane producing color fringes that are offset radially simulating transverse aberration Select either regular pol...

Страница 414: ...types of effects you can generate using the main blur controls Input image some single pixels not visible Pentagon blur with softness set at 2 pixels Pentagon blur with softness set to 20 pixels 402 Chapter 17 Image Processing Tools ...

Страница 415: ...ance range to increase the bloom appearance of the blur This is especially useful for 8 bit images which cannot represent values greater than 1 With bloom you can remap the values to make it seem like an HDR image giving you more realistic blooms around bright light sources and reflections Lens Blur Tool 403 ...

Страница 416: ...also set a seed value to choose a particular sequence of lines The effect of adding flares will be somewhat like the linear patterns in the right image below Original image The halo is a ring of brightness of a specified radius from the center of bright lights and with a specified width If the radii differ among the color channels the effect is a rainbow halo like in the following right image This...

Страница 417: ...age 391 You can choose what channel of the modulation image is used and apply an offset to the modulation image The modulation can affect the X and Y radius or the rotation of the polygonal or ellipse shape Output Tab The Output tab is the same as that of the Blur tool but without the Min Radius parameter see Output Controls on page 399 Lens Blur Tool 405 ...

Страница 418: ... of the luminance of each pixel under the kernel This approach is fast and does not introduce new colors in the original image however luminance is not the best criteria for similarity in a color image RGB Vector does not really rank the pixels under the kernel but rather it chooses as the median the one pixel with the smallest sum of square distances in RGB space to all the other ones under the k...

Страница 419: ...o Use Control the choice of filter used Filter Median default Hybrid Median Control the size of the filter Size 3x3 default 5x5 7x7 9x9 11x11 Control how the median value is chosen Criteria Component wise Luminance RGB Vector default Control how the result of one median iteration is combined with the original input This parameter can vary between 0 and 100 default Blend Control the number of times...

Страница 420: ...he Sharpen tool s Amount value is animatable by setting keyframes or using expressions see Setting Keys Manually on page 676 and Validating and Applying the Expression String on page 729 Unsharp Mask The Unsharp Mask tool lets you sharpen the edges and other fine details in the input image Unsharp masking provides more control on the sharpening process and will generally produce better results tha...

Страница 421: ...percent default 100 Threshold Defines how large the difference between the original image and unsharp mask must be before the original pixels are changed A pixel is changed if the difference in any of its components is larger than or equal to the threshold in 0 to 100 default is 0 NOTE This tool can either affect the RGB components or the Alpha component but not both at the same time Formatting To...

Страница 422: ... you change the color depth of an input image To change the color depth of an image 1 Drag the Convert Depth tool from the Tools tab to the dependency graph in the Schematic view 2 Select the target color depth from the color depth list Crop Tool The Crop tool lets you change the size of an image When you perform a crop adjacent rows or columns of pixels next to the edges of the input image are re...

Страница 423: ...mensions Cropped image Original image You can also animate the Crop tool s parameters by setting keyframes or using expressions see Setting Keys Manually on page 676 and Validating and Applying the Expression String on page 729 To crop an image 1 Drag the Crop tool from the Tools tab to the dependency graph in the Schematic view Crop Tool 411 ...

Страница 424: ...ight Bottom and Top Absolute Crop Specify how the input image should be extended outside its region of definition ROD The supported tiling modes are Transparent default Edge Repeat and Mirror Tiling 3 Crop the image by doing any of the following Enter values in the Crop fields Manipulate the crop box in the Player by dragging it Adjust the red crop lines or crop handles in the Player Resize the im...

Страница 425: ...re disabled Floating Windows The Floating Windows tool allows you to Premultiply Tool The Premultiply tool allows you to take an input image and create an image where each pixel s color component is multiplied by the pixel s alpha component The multiplication result is clamped to the color range of the output image To premultiply an image using the Premultiply tool Drag the Premultiply tool from t...

Страница 426: ... consists of a foreground composited over a solid color background if the background is a color other than black you can explicitly specify this background color so that the tool can correctly separate the foreground layer from this background and output the foreground layer alone Optionally your can ask the tool to guess the background color The Unpremultiplied tool has a single parameter To Use ...

Страница 427: ...tools except this one assumes unpremultiplied data Resize Tool The Resize tool lets you change the resolution of an image and its frame bit depth when working with images of different resolutions Resize Tool UI The Resize tool UI is divided into three areas Destination settings area Reference area to modify crop box properties Resize area Destination Settings Area Use this area to select format re...

Страница 428: ...age aspect ratio Image Aspect Ratio Change the pixel aspect ratio Pixel Aspect Ratio Select the output depth Depth Reference Area Use the Reference area to set crop box properties To Select Change the color of the crop box By default the crop box is red If there is a lot of red in the image you are resizing you may want to Color change the color of the crop box to see it better Clicking the color ...

Страница 429: ...ttempt to smooth the transformed pixels When an image is being resampled to a different resolution the old pixel map needs to be interpolated to a new one This requires some form of image interpolation and a number of interpolation methods can be used To Use Select a filter type You can choose from Box Triangle Bell B spline Lanczos3 or Mitchell These filters range in quality from the Box filter F...

Страница 430: ...t the Crop Edges fit method 5 Select Center and Keep Aspect buttons 6 Select the Fit To Source button in the Reference area to make the crop box the same size as the source frame 7 Go to the first frame 8 Make sure Autokey is selected so you can create position keyframes for the crop box automatically 9 Scrub through the clip to identify areas where the area of interest includes the left and right...

Страница 431: ... The composition is resized Image Generation Tools There are seven image generation tools that let you create images with a wide range of properties Description Tool Creates a multi color four quadrant image based on RGBA values see Bilinear Ramp Tool on page 421 Bilinear Ramp Creates a multi color checkerboard image based on RGBA values see Checkerboard Tool on page 423 Checker board Creates a si...

Страница 432: ... Property Provides a selection of film formats Format Sets the width and height of the image produced by the generator node Image Width Height Sets the image aspect ratio of the image produced by the generator mode Image As pect Ratio Sets the pixel aspect ratio of the image produced by the generator mode Pixel Aspect Ratio Sets the rate of the stream produced by the generator node Rate Sets the n...

Страница 433: ...ra tion NOTE Height and Width are animatable attributes see Setting Keys Manually on page 676 and Validating and Applying the Expression String on page 729 Bilinear Ramp Tool The Bilinear Ramp tool lets you create images with a variety of properties and in several formats The Bilinear Ramp tool is comprised of five sets of color channel value fields that let you to generate a multi color image bas...

Страница 434: ...eneration Properties and Formats on page 420 3 Adjust the color values in the Fill Lower Left Lower Right Upper Left and Upper Right 4 Modify the location and direction of the X and Y ramps NOTE You can also manipulate the linear ramp by clicking and dragging the horizontal and vertical bars NOTE You can also type values directly into the value fields and press Enter 422 Chapter 17 Image Processin...

Страница 435: ...l color and two sets are for generating X and Y colors residing in the region of definition ROD The fill color is defined as those pixels residing outside the ROD Two other controls let you adjust the size and look of the checkerboard in the X and Y directions To create an image using the Checkerboard tool 1 Drag the Checkerboard tool from the Tools tab to the dependency graph in the Schematic vie...

Страница 436: ...ematic and a Player view open To create an image using the Color Source tool 1 Drag the Color Source tool from the Tools tab to the dependency graph in the Schematic view and attach it to the Output node The Color Source tool UI appears 2 Apply image properties see Setting Image Generation Properties and Formats on page 420 3 Adjust the Fill and Color values by dragging inside the value fields NOT...

Страница 437: ...ls allow you to position the center of the ramp at any vertical or horizontal point in the image NOTE The following procedure assumes that you have a Schematic and a Player view open To create a linear ramped image 1 Drag the Linear Ramp tool from the Tools tab to the dependency graph in the Schematic and attach it to the Output node The Linear Ramp UI appears 2 Apply image properties see Setting ...

Страница 438: ...GBA values One set of values is for generating the fill color and two sets are for generating start and end radially ramped colors arranged around a central axis region of definition ROD The fill color is defined as those pixels residing outside the ROD Other controls let you to position the X and Y axes of the central ramp at any location stretch the ramp vertically or horizontally and define the...

Страница 439: ...pe values into the value fields and press Enter NOTE The Radial Ramp tool s Fill Start End and all associated Radial Ramp parameters are animatable by setting keyframes or using expressions see Setting Keys Manually on page 676 and Validating and Applying the Expression String on page 729 Noise Tool The Noise generating tool lets you add realism to computer generated images or to simulate or match...

Страница 440: ...ise tool from the Tools tab to the dependency graph in the Schematic view and attach it to the Output node 2 Apply image properties see Setting Image Generation Properties and Formats on page 420 3 Adjust the color values in the Fill Start and End fields 4 Adjust the noise seed NOTE You can also type values into the value fields and press Enter NOTE The Noise tool s Fill Start End and associated S...

Страница 441: ... use variables for the composition s name date time frame number timecode and length You can also enter your own information about the composition such as the project title camera lens film stock and so on NOTE The following procedure assumes that you have a Schematic and a Player view open To add production information to a composition 1 Drag the Slate tool from Image Generation folder in the Too...

Страница 442: ... select the type of information you want to add and click Add UDA You can add as much or as little information as needed The field appears in the text box but not in the Player 5 Place the cursor inside the text field and edit the information 6 Format the text and modify its location TIP To scroll the list of fonts use your mouse wheel or the scroll bar beside the list 430 Chapter 17 Image Process...

Страница 443: ...tools to move reorient and animate images There are four image transformation tools Description Tool Apply chains of 2D transformations on images see 2D Transform Tool on page 432 2D Trans form Flips pixels left to right top to bottom or both see Flip Tool on page 435 Flip Rotates an image see Orient Tool on page 436 Orient Repositions an image in the X and Y directions see Panner Tool on page 437...

Страница 444: ...ing a transform then un soloing it does not lose state The main reset button in the Tools Options is the equival ent of deleting and re adding the tool all values are reset and additional transform generators are deleted The tool maintains the selection of the transforms Adding a new transform selects the new transform and deselects the rest Set the type of transform You can choose from 1 point 2 ...

Страница 445: ...t angle 4 Press the Insert key again and use the scale widgets to shear the image NOTE Each transform influences transforms which follow it The more it influences the more global it is or conversely the fewer it influences the more local it is The pivot is independent within each transform Adding Motion Blur and Filters Controls on the 2D Transform tool Output tab lets you add motion blur filterin...

Страница 446: ...in the dependency graph if one is not already there 2 Select the 2D Transform tool 3 Right click in the X or Y value editor and select Set Expression The Expresso calculator appears 4 Select Random then Noise and type the following expression noise t 50 15 This expression can be broken down as follows Returns Where A value between 1 and 1 noise t A value between 1 and 1 and where 50 represents fre...

Страница 447: ...on blur to the output for a more realistic effect Flip Tool The Flip tool lets you take an image and flip the pixels left to right top to bottom or both when the Link button is enabled The default setting is vertical flip Flip Tool 435 ...

Страница 448: ... Manually on page 676 and Validating and Applying the Expression String on page 729 Orient Tool The Orient tool lets you rotate its input by 0 90 180 and 270 degrees with the rotation parameter being an enumeration and further flip the result vertically and or horizontally The vertical and horizontal directions refer to the image after the rotation has been applied NOTE When possible use this tool...

Страница 449: ... reposition an image using the Panner tool 1 Drag the Panner tool from the Tools tab to the dependency graph in the Schematic view 2 Select the desired reposition parameters X Y or both and select the desired offset of the X and Y axes 3 Select the filtering option 4 Select the anti aliasing factor NOTE The Panner tool s X and Y axes attributes are both animatable by setting keyframes or using exp...

Страница 450: ...438 ...

Страница 451: ... s pixel expression tools to create customized effects and apply color management solutions There are two pixel expression tools Description Tool Use the powerful PXL language to create your own plug in tools see PXL Tool on page 440 PXL Tool Use the CTL tool to facilitate color transforms and other pixel based procedures see CTL Tool on page 463 CTL Tool 18 439 ...

Страница 452: ...d One use case is for quick creation of a short non reusable PXL program for simple image generation or transformation Another will be to write longer scripts to create customized effects that are not supplied by Composite which will be shared by many users Examples might include Image generators Warping Transitions fade dissolve Blur convolution Tone mapping Noise generators Filters Masking Conve...

Страница 453: ...PXL script who are interested in changing the parameters to the script but not necessarily the script itself Develop mode also has parameter controls as in User mode but has a UI to edit the script using the Composite internal editor or read the script directly from a file to support a developer who wishes to edit the script using an external editor and view script compilation errors The PXL User ...

Страница 454: ...imum increment to be used when changing the value in the UI Additionally clicking the Hidden button means that a particular parameter will only appear in Develop mode This modal dialog also includes a Cancel button Clicking the Delete button pops up a menu where you select the parameter to be removed The Develop controls are to the right of the Parameter controls The File and Edit radio buttons co...

Страница 455: ...ternal file Export replace the contents of the Composite internal editor with the currently applied script thereby reverting the edited script back to what it was when previously applied Revert The script status and the applied script display share the right portion of the PXL UI Push toggle buttons on the top of that column to determine which text viewer is shown Both text views are read only vie...

Страница 456: ...t and Revert buttons of the Develop controls are not relevant as they pertain to the Composite internal editor and are therefore not shown Output Tab Because the PXL tool can be an image generation tool it requires an Output tab to define the output properties To define output properties it uses the same tab as found in Composite image generators If the primary input is connected all options in th...

Страница 457: ...r important use case is where a PXL script will be written by an experienced developer and distributed to others to be used in User mode In such a case an easy means of distribution is important Distributing the PXL script alone is insufficient as parameter names and min max default values will not be available Tool presets allow users to name save persistently and distribute presets for any given...

Страница 458: ... several PXL tool presets installed with Composite and they are described below Blur 5 x 5 A simple 5 x 5 blur kernel with hard coded weights Blurred Original Clouds Creates a cloud texture 446 Chapter 18 Pixel Expressions ...

Страница 459: ...nsformation to place the image based on the corners By setting expressions to link the eight parameters to a garbage mask rectangle a simple interactive corner pinner can be made Directional Blur Performs an anti aliased blur using a rotated rectangle to achieve a blur in a particular direction PXL Presets 447 ...

Страница 460: ...Blurred Original Emboss Simple emboss based on gradients of luminance Embossed Original Erode Alpha Erodes alpha using a simple square kernel 448 Chapter 18 Pixel Expressions ...

Страница 461: ...applied Original Lattice Adds a lattice of shaded tubular bars to the image channels Lens Flare Provides 1 to 5 lines of flares centered on bright points on the image You can control the weight of the lines relative to the weight of the source pixel at the center of the blur There is also a falloff gamma PXL Presets 449 ...

Страница 462: ...e weight of the lines as they get more distant from the centre of the blur Lens flare applied Original Marble Creates a marble texture Mandelbrot Generates a mandelbrot fractal image 450 Chapter 18 Pixel Expressions ...

Страница 463: ... Noise Wipe Performs a wipe transition between two images where each pixel switches at a random time Noise Creates a pattern of random noise PXL Presets 451 ...

Страница 464: ...te images with banding It can also add dithering noise to reduce the banding NumColors 2 Dither 1 NumColors 6 Dither 0 Out of Range Marks pixels outside of a specified range with a specified color such as red in the following image 452 Chapter 18 Pixel Expressions ...

Страница 465: ...simple anti aliased polygon blur to simulate a lens effect You can choose the number of sides the radius and rotation angle Polygon Blur applied Original image Ripple Twirl A twirl effect with some extra ripples PXL Presets 453 ...

Страница 466: ...plied Original image Sharpen 5 x 5 A simple 5x5 sharpening kernel with hard coded weights Sharpened Original image Spherical Mapping Applies spherical mapping to the current selection 454 Chapter 18 Pixel Expressions ...

Страница 467: ... single Red Blue glasses image left image and one method for cross eyed viewing right image Cross eyed viewing Red Blue glasses Wood Frame Creates a wood frame You can specify the frame s thickness and lighting qualities Wood Creates a wood texture You can specify the scale size and fineness of the grain PXL Presets 455 ...

Страница 468: ...lowing example PXL script and procedure multiplies the input pixel R G and B components by 3 To multiply the input pixel R G and B components by 3 1 Add a PXL tool to the dependency graph 2 Click the Edit button and type the script into the script editor The pixels in the image are multiplied by a factor of 3 456 Chapter 18 Pixel Expressions ...

Страница 469: ...rations but not scatter operations Fundamental Types PXL supports a specific set of fundamental types It is case sensitive Like C all the variables must be declared before they can be used in an expression statement unless the variable is a built in variable or a function argument Unlike the C language it is not possible to define new types with objects or structures Here is the list of supported ...

Страница 470: ...ill be issued if a const variable is modified after initialization As previously described function arguments can be qualified as input or output These are currently only used by the PXL tool to pass in data to the main function and read out the output pixel value The initial value of an output argument is undefined Comments Comments use the same syntax as C Two consecutive slashes Comment are use...

Страница 471: ...ote are the lack of bitwise manipulation operators as well as the lack of a modulo operator however the modulo is available through the built in mod function see Built in Functions on page 460 NOTE Operations on color vec4 are done on a per channel basis PXL the Pixel eXpression Language 459 ...

Страница 472: ...e x y and t The first two are the floating point normalized image reference frame x y coordinates of the pixel being computed see Calculating Image Size in Composite on page 191 t is the floating point current time in seconds All built in variables are declared constant by the system so they cannot be assigned to PXL exposes the IRF coordinates of each pixel in its x and y built in variables This ...

Страница 473: ...e sample function to provide two implementations one with a single argument the other with 3 arguments NOTE In the following table all references to type color also refer to vec4 and vice versa PXL the Pixel eXpression Language 461 ...

Страница 474: ...s and are matched by name and type with the input parameters of the PXL tool For example a float parameter named Gain would be passed in the main function as input float Gain Arguments to main of type color with the output qualifier are the pixel outputs The first version of the PXL tool supports a single pixel output which must be called Out The return type is limited to void and the return state...

Страница 475: ...ctl sourceforge net CtlManual pdf The main function of the script will be called for each pixel of the output image Before applying a script several conventions must be respected The entry point of the script is the main function This function must be present in every script The main function return value is ignored The main function must have four parameters for each input image They correspond t...

Страница 476: ...t rOut output varying float gOut output varying float bOut output varying float aOut 1 parameter of the main function must be present for each input parameter They must be the same name and type as the parameter of the UI Ex input uniform float P1 The following is a sample script and procedure that blends two images To blend two images 1 Connect a CTL tool node into an output node in the Schematic...

Страница 477: ...ent You may set the CTL_MODULE_PATH in the Tool panel of the Project Preferences panel Accelerating CTL Transforms Because CTL is an interpreted language the performance may be slow Composite gives you the option of accelerating a CTL program by converting it to a 3d lut This will be faster but may contain errors relative to the original CTL program To enable acceleration click the 3D LUT Enable s...

Страница 478: ...466 ...

Страница 479: ...page 484 About Warping The Warping tools let you distort the physical shapes and contours of images Warp 2D The Warp 2D tool lets you Warp an image to change the geometry of some elements Correct slight perspective errors in shots Provide customized stylistic distortion effects like twirl or ripple but with much more control over the animation of the geometry 19 467 ...

Страница 480: ...e in the Garbage Mask and Remove Dust tool Splines open or closed Rectangles and Ellipses After drawing the shapes which define the transformation you can set or animate an interpolation parameter which controls the amount of warping To create a static warp of an image you will just set this to 1 Sometimes you may want the image to smoothly change from its original shape to a warped shape and will...

Страница 481: ... is warped accordingly Once you have dragged all the destination shapes to their desired final positions you may want to add another shape pair or fence shape to refine the warp You will have to switch to source space to draw the starting position then back to destination space to move the shape around and see the result Warp 2D UI The Warp 2D UI consists of three tabs Shape Drawing Output and Opt...

Страница 482: ... parameter which controls the smoothing across its boundaries named Smoothing For open shapes this can have one of two values None or Bidirectional The setting None means that each side of the shape is smoothed independently and there can be discontinuities in the warp across the shape The setting of Bidirectional means that smoothing is applied across the shape and there will be no discontinuity ...

Страница 483: ...e Fence shapes you will usually want to set the Smoothing attribute of the Fence shape to None to ensure that there is no motion crossing the border of the fence Each shape has an Interpolation parameter which is only relevant if the Timing mode is set to Shape described in the Output tab section Each shape also has a Mute switch to disable its effect on the warp and a Lock switch that locks the p...

Страница 484: ...ut image and the second output in order to view the source and destination spaces Shapes are displayed in the viewer with a color that depends on its type e g source destination fence links or interpolated shapes Color Shape Red Source Blue Destination Green Fence Cyan Links Magenta Interpolated You can distinguish between and edit source and or destination shapes by toggling on off the visibility...

Страница 485: ...se Give the selected shape a name Select the default name in the text field and type in a new name then either press Enter or click outside the text field to apply the name Name Control how much warp is applied to the image see Output Tab on page 475 Interpolation Enable disable the shape as a fence Fence Apply smoothing across the shape s boundaries Smoothing You can also adjust control points of...

Страница 486: ...ons you can also edit the correspondence between two linked shapes In the image below red curves depict source shapes blue curves depict destination shapes and cyan lines represent the correspondence between the pairs of linked curves These lines show the direction the warped image will move as the interpolation parameter is animated from 0 to 1 You can add link points on either curve using the Ct...

Страница 487: ...elow or you can select the timing to be on a per shape basis allowing you to deform various features on differing schedules Define how much of the warp is applied in the final rendering A value of 0 means that the image is Interpolation passed through unchanged A value of 50 means that the image is deformed 50 of the distance toward the destination shapes Send the warp backwards Used in the morphi...

Страница 488: ...ld in crease the Quality setting The warp of the image is computed to satisfy the constraints defined by the drawn shapes and still be as smooth as possible The choice of smoothing criteria is Rigid or Skew To Use Select the smoothing criteria skew is a mode where the image transformation is locally constrained towards a 2D affine transform Smoothing ation and the image is allowed to skew as it tr...

Страница 489: ... Mask the Warp 2D tool s Output tab contains a crop tool and user settings controls see Output Tab Settings on page 558 Options Tab The Options tab contains the same options and User Settings as the Garbage Mask Options tab see Options Tab Settings on page 559 with the exception of the Links View parameter which allows you to change the spacing of the links between source and destination shapes Op...

Страница 490: ...warps image A toward B 5 Copy the Warp tool select the Invert Warp button and connect Image B as its input This will warp Image B backwards towards A 6 Add a Blend tool node between the two warp outputs and animate it from 0 to 1 2D Transforms With the exception of Lens Distort and the Warp 2D tool all warping tools let you translate rotate scale and change the center of the input effect and outpu...

Страница 491: ...he lost information could never be recovered Affine transforms allow integration with the tracker because the affine transforms are expressed using socket names that the tracker recognizes The tracker can be accessed by right clicking on the value editors or the Input Output Effect UI Container label Since Warping tools can be keyframed you can create dramatic changes in image shapes when animated...

Страница 492: ...uare The vertical and horizontal arrows extending further from the square act on the Y and X image axis respectively To rotate the input image warp effect or output image Do one of the following Type values into the Z Rotation value editors and press Enter Move the curve at the upper right of the direct manipulator 480 Chapter 19 Warping ...

Страница 493: ...ove the right angle in the centre of the direct manipulator The arrowheads at each end restrict the scale to the respective axis To set the pivot point Press the Backspace key to activate the pivot manipulator then do one of the following Type values into the X and Y Pivot value editors and press Enter Note that the scale manipulator is not available The rotation manipulator is used to shear an im...

Страница 494: ...d the fastest way to resample an image since it only samples a single pixel of the input image to determine the value of a given pixel in the result image Produces significant amount of aliasing Nearest A separable triangular filter that takes into account more area when resampling Bilinear de fault Considered as one of the best magnification filters for images has a good balance between ringing a...

Страница 495: ...mple illustrates the sharpening and ringing effects of the six filters The next example illustrates the anti aliasing and blurring effects of the six filters These examples were created with a checkerboard and polar tool to provide variance in frequencies in all directions Cropping and Filtering the Output 483 ...

Страница 496: ...ols that let you distort the shape of your images Description Tool For creating creases kinks and wrinkles in an image see Crumple on page 485 Crumple Offsets pixels in an image using pixel values of another image see Displace on page 485 Displace Rectifies or creates lens distortion see Lens Distort on page 487 Lens Distort Enlarges a portion of an image in either the X Y or both axes see Magnify...

Страница 497: ...eters To Use Control the overall strength of the filter Amplitude Make modifications to the fractal patterns yielding random results Time Slice Control the turbulence Increase the octaves to get more iterations therefore a more turbulent crumpling effect Octaves Displace The Displace tool lets you use a control image to drive the displacement used to warp the primary input image There are two ways...

Страница 498: ...ngle and the displacement increases or decreases by the intensity of the channels Red Green Blue Alpha or Luma of the modulation image To Use Specify the distance of displacement in pixels Distance Specify the angle of displacement all pixels in the image will be rotated by in degrees Angle Select which channel from the modulation image will be used to displace the image in a fixed direction as sp...

Страница 499: ...y a rotation to all motion vectors of the forward vectors image The rotation is expressed in degrees Rotation Input image TIP Decreasing the opacity of the Modulation or Forward Vectors image will decrease the distance of the displacement Lens Distort The Lens Distort tool lets you create or correct lens distortion that may be present in image sequences Barrel distortion is associated with wide an...

Страница 500: ...do with the pixel aspect ratio of the captured image Anamorphism Set the X and Y coordinates of the center of the distortion Those parameters are expressed in pixels The lens center can also be Center changed by clicking directly in the player The center manipulator is always active in the player The look of the manipulator is a cross The cross can be manipulated by selecting it and moving it To d...

Страница 501: ...torted composition or composited layers producing interesting animated effects Analysis of Radial Distortion Analysis of radial distortion computes the magnitude and adjustment parameter from a three point spline created in the player to identify distortion The analysis is only available when the lens mode is set to Correct All parameters except the magnitude and adjustment are used to compute the...

Страница 502: ...Modify the existing spline 4 Click the Analyze button to analyze radial distortion from the created spline The image is corrected and the Magnitude and Adjustment fields are updated 490 Chapter 19 Warping ...

Страница 503: ... Linux or Cmd Z for Mac OS Output The Lens Distort tool has an Output tab with the following parameters To Use Change the size of an image see Cropping and Filtering the Output on page 482 Crop Smooth the transformed pixels see Cropping and Filtering the Output on page 482 Filtering Magnify The Magnify tool lets you magnify a region of an image Original image The Magnify tool has the following par...

Страница 504: ...et to Both resulting in a circular magnification region such as a magnifying glass Default setting is Both Mirror Tool This tool mirrors the image along the Y 0 axis There are no additional controls in this tool beyond the standard warping controls Original image Pinch Tool The Pinch tool lets you pinch or squeeze an image either inward or outward from a defined center point Original image The Pin...

Страница 505: ...en using Cartesian to Polar the effect bends an image around its center so that it appears round An option menu is used to choose if the transformation is from Cartesian to Polar or Polar to Cartesian Original image The Polar to Rectangular tool has the following parameters To Use To switch between Polar to Cartesian and Cartesian to Polar de fault is Cartesian to Polar Mode Rotate the result of t...

Страница 506: ...reate ripples with a 45 degree offset Out from Center pushes the ripples away from the center extending the first half and compressing the second half of each ripple Around Center rotates the crest of each ripple in a clockwise direction around the center To Use Scale the amount of warping distortion Increase for more severe distortion Amplitude Set the number of waves per frame Frequency 494 Chap...

Страница 507: ...the same amplitude specified by the amplitude parameter Use Linear so the amplitude of the waves at the center has the specified amplitude and decrease linearly to 0 at the image extremities Use Quadratic so the amplitude of the waves at the center has the specified amplitude and decrease quadratically to 0 at the image extremities Twirl Tool The Twirl tool lets you spin twirl and rotate the image...

Страница 508: ...nd in Ripple Original image The Wave tool has the following parameters To Use Scale the amount of warping distortion Increase for more severe distortion Amplitude Warp pixels parallel to the wave direction Compression Set the number of waves per frame Increase for more waves decrease for fewer Frequency Shift the position of the waves along the direction of wave motion Phase 496 Chapter 19 Warping...

Страница 509: ... your images There are two effects tools available Description Tool Adds a drop shadow to an image see Drop Shadow on page 497 Drop Shadow Generates subtle gradations of light in your composition see Glow on page 498 Glow Drop Shadow The Drop Shadow tool takes an input image and adds a drop shadow to it by taking the alpha channel of the input image blurring it offsetting it and 20 497 ...

Страница 510: ...e radius of the blur just like in the Blur tool By default the X and Y radii are linked and set to 0 otherwise their range is the same as that in the Blur tool Offset X and Offset Y Controls the offset of the shadow with respect to the input image by default the offsets are 0 The Drop Shadow tool supports non integer shadow offsets so that animating those parameters will still produce a smooth res...

Страница 511: ...ing with either the composite of the image you are working with or just the glow applied to it If you select Composite it applies the blend mode selected Blend Select the blend mode you want to apply to the glow Select Blend to display available blend modes To set the threshold Do one of the following Drag the trackball towards the color you want to set as the threshold Drag any of the red R green...

Страница 512: ...to the right of the channel then increase or decrease the gain The other channels are not affected However the overall luminance field updates to reflect the change Select the Reset button to return all values to 0 Type values into the channel fields and press Enter In the case of modifying all channels uniformly when values are typed into any field the other fields update The luminance field will...

Страница 513: ...5 Saving and Loading Grain Profiles on page 507 About Managing Grain Grain is a basic characteristic of film Film grain consists of individual silver halide crystals that are randomly distributed across an image The random distribution of the crystals creates the visual impression of graininess Grain adds a distinctive look to film and different film stocks have different grain signatures 21 501 ...

Страница 514: ...th footage originally shot on film that was transferred to video you may want to remove the grain if you want to mix film material with video material Working with CG generated elements you may want a film look result Adding Grain to a Composition The Add Grain tool lets you sample the grain from one image the reference image and apply it to another image the input image or sequence In the followi...

Страница 515: ...or the gain and size of the grain To add grain to a composition 1 From the Tools tab drag the Add Grain tool from the Grain Management folder to the dependency graph in the Schematic view 2 Connect a reference image and an input image to the Add Grain tool 3 Optional Add a mask to your input image to restrict the grain to a portion of the image see Creating Masks on page 540 4 In the Add Grain tab...

Страница 516: ...e cases it may also introduce motion artifacts if used without motion vectors or with bad motion vectors especially in scenes with a lot of non uniform motion The Remove Grain node has two secondary inputs for receiving forward and or backward motion vector data When motion vectors are connected to these inputs the forward and backward frames are first warped appropriately to remove motion before ...

Страница 517: ...to use and click Calculate Motion The motion vectors in the forward and backward frames is used to analyze the type of grain present in the composition Grain is removed from the composition Response curves are generated and displayed in the Animation Editor You can now fine tune the resulting curves see Fine tuning the Grain on page 505 Fine tuning the Grain Once you have generated or removed grai...

Страница 518: ...between the grain present in different color channels There may be some statistical correlations between the Correlations grain present in different color channels depending on the film properties and development process Adjust the discrepancies between pixel aspect ratio and grain aspect ratio Pixel Ratio Viewing the Response Curves You can determine how to display the response curves in the Anim...

Страница 519: ...ted only the parameters at the current time are saved in a grain profile When saving or loading a grain profile using the Remove Grain tool the number of forward and backward motion vectors and the state of the automatic motion vector computation are saved The Add Grain tool does not use these values when you load a grain profile but does put in some reasonable values when you save a grain profile...

Страница 520: ...508 ...

Страница 521: ...pts Understanding the concepts that are fundamental to the workflow and tools used for keying will help you work efficiently and effectively producing the cleanest most convincing result You can create composites by defining transparent regions in a foreground image based on a specific range of color to reveal a background image This keying process is usually performed on footage with a subject in...

Страница 522: ... objects or the creation and manipulation of splines rotoscoping see Masking Concepts on page 538 Mattes A matte is an image used to define or control the transparency of another image When you pull a key you generate a matte that defines the transparency of the front source There are several types of mattes Articulate matte A matte whose shape changes over time and is designed to accurately follo...

Страница 523: ...r purity of a given color For example the difference between a pastel and a pure color is defined by the amount of saturation Chrominance Chrominance is an image processing property that defines the hue and saturation of a pixel Luminance Luminance is an image processing property that defines the brightness of a pixel Expressed in percentages 0 luminance is black and 100 luminance is white Values ...

Страница 524: ...orking with and on the complexity of the task For example sources shot under ideal lighting conditions with good contrast between the key in and key out content can be done very quickly Other sources with varying lighting conditions fine detail at the edges of the key dramatic camera movement and other problem areas can take much longer to produce a clean result Make sure you understand what keyin...

Страница 525: ...or remove color spill from a shot You may also need to generate more than one key to achieve the desired result To access the Keying tools 1 Press the tilde key or middle click to display the Gate UI 2 Swipe through the east gate to display the Tools tab 3 Expand the Keying tool folder to access the Keying tools Selecting Keying Tools 513 ...

Страница 526: ... the mouse The keyer tool is added to the process tree Extracting a Key Using the Diamond Keyer The Diamond Keyer lets you extract keys in several different ways You can pull a key based on Pixel luminance values Shadows midtones or highlights Color channels Pixel color The Diamond Keyer The Diamond Keyer tool is divided into four areas a Keyer Tools b Channel Range Definition c Hue Cube d Luminan...

Страница 527: ...ixel or range of pixels Softness The Define area contains the following tools a Color Channels select b SMH select To Click Remove that color from the image RGB or CMY but tons Key a luminance range Use these controls to extract a key based on an element s Z depth information grayscale value Shadows Midtones or High lights buttons The Hue Cube allows you to visualize and manipulate color tolerance...

Страница 528: ...r next to the softness parameter and sample the image In all cases the values sampled are added to the current softness range The corresponding hue and luma ranges are sampled This range is indicated by yellow wireframe lines in the hue spectrum You can adjust the softness in the hue spectrum by dragging the three control points of the softness line to cover more or less of the hue spectrum To sol...

Страница 529: ...ing sharpness reduces softness decreasing sharpness increases softness NOTE Tolerance Softness and Sharpness are animatable attributes see Marking Attributes for Keyframing on page 674 Creating a Difference Matte Using the Difference Tool The Difference tool lets you generate a matte image from two source images with the same background but different foreground elements This allows you to remove a...

Страница 530: ...tte when the Softness is zero Use a high Softness value to increase the gray Choose one or more color channels to use for the difference matte and then set the tolerance softness gain and lift Extracting a Key Using the Luma Keyer The Luma Keyer computes the luminance of the image and removes pixels based on a threshold value affecting the alpha channel The softness value can be added to set some ...

Страница 531: ...the hue of a color range to a sampled hue shift target Each curve in Color Curves is a hue gradient When you change the shape of a curve the colors along the curve s gradient change to reflect the result For example if your hue shift target is magenta as you raise the green portion of the default hue shift curve it gradually becomes magenta becoming fully magenta when you reach the full value 75 B...

Страница 532: ...ession channels Shifting the Hue of a Color Range to a Sampled Hue Shift Target You can use Hue Shift to compensate for colors in an image that are too hot or too cool or to correct undesired tones present in the image Shift the Hue of a Color Range to a Sampled Hue Shift Target by using the Hue toggle button in the Channels area to activate the hue shift curve Use the Hue Shift color pot in the C...

Страница 533: ...a buttons to activate their corresponding curves Manipulate the shape of each curve over the source hue range that you want to affect The value of the parameter that corresponds with the curve changes relative to the height of the point along the curve in the curve editing area Each curve is a hue gradient and as the shape of the curve changes the colors along the curve s gradient change to reflec...

Страница 534: ...ides you with an envelope to perform all keying tasks The Keyer super tool also provides increased flexibility with the option of adding more tools or removing existing ones from the super tool schematic About the Keyer Super Tool The Keyer is a super tool that combines a Screen Degrain Master Keyer matte generator Cleanup Alpha tool Edge tool Garbage Mask and a Spill Blend operator in one tool Us...

Страница 535: ...tion of Keyer nodes Adding and changing tools in the Keyer schematic Master Keyer matte generator with on screen manipulation Unlimited patches Screen Degrain Spill suppression and Blend Compositing of foreground and background via generated matte Inputs and Outputs The Keyer super tool has three image inputs and three outputs Double click the Keyer super tool node or right click the node and sele...

Страница 536: ... is sent to the Back input of the Comp tool node an instance of the Blend Comp tool The Comp tool node provides a composite of the spill suppressed front over the back through the processed matte both as a user convenience and also as output on the Comp Output Image output Workflow The following sequence of actions is a recommended workflow for keying an image with the Keyer supertool You may not ...

Страница 537: ...er Screen Degrain and Spill Blend are all available as separate tools and there you can set colors separately for all three Keyer Supertool UI The Keyer super tool UI is composed of five areas a Quick Selection of Keyer nodes b Master Keyer matte generator controls and Sample menu c Patch controls d Screen Degrain controls e Spill and Blend controls To reset the Keyer tool Click on the Reset butto...

Страница 538: ...e first can be defined or redefined to select other nodes and their UIs in the Keyer schematic by clicking them with the Control key pressed This will assign the button to the currently selected node For example if you selected the CC Basics node you would then CTRL click the node select button you wish to assign to it Generating a Matte with the Master Keyer Using the Master Keyer controls you ca...

Страница 539: ...rag to sample a larger area 4 Click the Secondary Sample color pot and then sample the image Sample an area where you do not want any softness in the matte 5 Drag in the Mix field to adjust the mix between the primary and secondary sample Drag right to include more of the secondary sample or left to include less 6 Gesturally refine the matte In the image window click an area of the matte that you ...

Страница 540: ...nt to adjust drag the slider 8 When you are finished modifying the displayed parameters click another area of the image without highlighting a parameter to hide them Alternatively you can press Esc The parameters are no longer displayed 9 Repeat steps 6 to 8 in other parts of the matte to further refine it Only the parameters that apply to the problem area will appear 10 To scroll through the imag...

Страница 541: ...u can use patches to isolate a range of colors to be included in or excluded from the key NOTE Patch parameters are animatable To remove unwanted grays using patches 1 Set a Player view to Tool Output and with the selection on Keyer super tool node cycle to the alpha output see Cycling Through Inputs and Outputs on page 71 2 Select Patch from the Sample menu or press Shift the number associated wi...

Страница 542: ... to sample the Patch button is selected and the appropriate patch mode appears in the Patch box and is applied to the image Is applied to Selected Patch Areas of the image to be included in the black part of the matte Black Areas of the image to be included in the white part of the matte White Areas of the image that are along the edge of the key Edge Analysis is useful when there is a specific ed...

Страница 543: ...atch parameters click the Reset button under the Master Keyer UI Degraining the Key In Image Graininess can make it difficult to pull a clean and effective key With the Screen Degrain controls you can remove film grain modify the size of the grain and desharpen the edges of the key The front image is not affected when you apply Screen Degrain to the Front input image NOTE Screen Degrain parameters...

Страница 544: ...ain in the image Grain Size Unsharpen the edge of the image By default Degrain sharpens the edges Use the Edges field to restore the natural look of the edges in the image Edges 5 If you are not satisfied with the result you can start over with a new sample and then adjust the Screen Degrain fields To resample an area of the image Ctrl Alt drag the image NOTE You can also reset Screen Degrain para...

Страница 545: ...removal of color spill along the edges of the key Drag right to soften the edge and remove color spill further into the key Drag left to harden or create a thinner edge Range Modify and suppress colors that are adjacent to the primary sample Hue NOTE To reset Spill and Blend parameters click the Reset button below the Edge Balance trackball Modifying Blend Using the Blend parameters you can gestur...

Страница 546: ... the front and back image Click anywhere in the image window and modify the parameters that appear by dragging the sliders you do not need to click a specific area To Drag Darken or lighten the edge of the key Luminance only affects the luma of the edge Luminance Set the range for the blend Drag right to soften the edge and blend further into the key Drag left to harden or create a thinner edge Ed...

Страница 547: ... area of the image without highlighting a parameter to hide them or press the Esc key 6 To add a cast to the edge of the key and improve the overall look by matching the edge with a color cast in the back image drag the Edge Balance trackball toward the color you want to add The trackball only affects the chroma of the edge Modifications made using the trackball are cumulative each movement of the...

Страница 548: ...536 ...

Страница 549: ... page 554 User Settings on page 555 Output Tab Settings on page 558 Options Tab Settings on page 559 Pixel Masking on page 560 Masking Parameters on page 561 About Masking Masking is the process of hiding a region of an image You can use masks to remove the area outside the mask shape and keep the area inside the mask shape or you can use masks to remove the area inside the mask shape and keep the...

Страница 550: ...are also referred to as garbage masks Auto Tangent When selected the mask is created with tangents Intensity Defines the alpha value defined by the mask Opacity Defines the transparency of the mask Invert The area outside of the mask is covered by the garbage mask settings Edge Distance The inner or outer offset from the edge of the mask Edge Position The position of the edge handle from the first...

Страница 551: ...lo flag to isolate a mask Only one mask can be isolated at a time Activate the Visible flag Activate the Lock flag Locking a mask locks the points shape edges tangents and composite parameters Change the name of a mask With the cursor in the text field press F2 type in a new name and press Enter Set the opacity of the mask Set the intensity of the mask Invert the mask Select a compositing operator...

Страница 552: ...tion Tools Use the following Creation tools to draw garbage masks To Use Create freeform Bézier spline shapes Create freehand shape Create rectangular shapes These shapes can be a square fixed size proportional or unconstrained Create elliptical shapes These shapes can be a circle fixed size proportional or unconstrained Creating Masks When you select a Creation tool default values for future mask...

Страница 553: ...d portion of their outline you should indicate if they are Adjacent or Superposed By default the correlation mode is None assuming that normally the input mattes are not correlated Mask Color and Auto Mask Color toggle Initial In Out Edge distance Edge Color To create a shape using the Freeform tool 1 Select the Freeform tool button or press D 2 Set initial mask parameters if necessary 3 Click and...

Страница 554: ...l button or press S 2 Set initial mask parameters if necessary 3 Select Rectangle Options settings if necessary These options include To Use Click and drag the cursor to draw the mask from the center of the first mouse pen click From Center Create an unconstrained mask Click and drag to draw and change the shape of the mask Unconstrained Click and drag to draw a perfect square Square Create a rect...

Страница 555: ...n width and height values you set Once the values are set click the location in the image you want the shape to appear Fixed Size Create an elliptical mask based on width and height proportions you set Once the values are set click and drag to create the shape Proportional Editing Masks Once you create a mask you can use different tools to modify it As the portion of the image that you are masking...

Страница 556: ... pixel by holding down the Shift key and pressing the arrow keys on the keyboard To nudge the position of control points selected shapes and edge handles in increments of 10 pixels hold Ctrl Shift and press the arrow keys on the keyboard The following mask point parameters for each point can be animated They are accessible from the animation timeline and expressions can be assigned to all of them ...

Страница 557: ...f the following Click and drag a control point Hold Ctrl Alt while moving the point to move in Auto Tangent mode Click or drag a bounding box around a point to select the point Type the position values into the X and Y value editor under the Position label and press Enter Click or drag a bounding box around a point to select the point Click drag inside the value editor Editing Masks 545 ...

Страница 558: ...st the tangents Press and hold the Ctrl key and click on the control point a second time to delete them To adjust the length of a single unbroken tangent handle Do one of the following Click and drag the handle Type the distance value into the In Dist or Out Dist value editor under the Tangent label and press Enter Click drag inside the value editor 546 Chapter 23 Masking ...

Страница 559: ... the handle When you press Alt and drag an unbroken tangent handle both tangent handles are automatically given the same length To break a tangent handle Press Ctrl then click and drag the handle Press Ctrl then click and drag the handle again to make the handle continuous Editing Masks 547 ...

Страница 560: ...e then drag the curve The curve and tangents adjust accordingly based on the location of the cursor Transforming Masks Once your mask is created use the Transform tool to fine tune its position shape and size You can manipulate the mask inside the player These settings 548 Chapter 23 Masking ...

Страница 561: ... parameters can be animated They are accessible from the animation timeline and expressions can be assigned to all of them Translation X Translation Y Rotation R Scale X Scale Y Pivot X Pivot Y Pivot R NOTE Tracking information can be assigned to shape transformation see Tracking and Stabilizing on page 753 Transforming Masks 549 ...

Страница 562: ...nter of rotation scaling Use the Center button to set the pivot point to the center of the mask s bounding box Pivot Reset all the transform parameters to their initial values Reset To translate the mask Do one of the following Place the cursor inside the mask s bounding box and click hold and then drag the mask to translate in any direction Type the position into the X Y value editors and press E...

Страница 563: ...To add an offset to the translation of a mask Do one of the following Type the offset position into the X Y value editors and press Enter Click drag inside the value editor Transforming Masks 551 ...

Страница 564: ...nto the Rotation value editor and press Enter Click drag inside the value editor To scale a mask Do one of the following With the cursor over the one of the mask s resize handles click drag the mask Type the X and Y scale values into the X and Y Scale value editors and press Enter Click drag inside the value editor 552 Chapter 23 Masking ...

Страница 565: ...ask s center of rotation pivot point Do one of the following With the cursor over the mask s pivot handle click drag the mask Type the X and Y pivot position values into the X and Y Pivot value editors and press Enter Transforming Masks 553 ...

Страница 566: ... in edit mode The following mask In and Out Edge point parameters for each edge point can be animated They are accessible from the animation timeline and expressions can be assigned to all of them Position Distance To create an edge point Hold down Ctrl and click on the mask curve and drag the point An edge point with two handles is created 554 Chapter 23 Masking ...

Страница 567: ...ne edge by the same value 2 Press Alt to lock the position of the edge while changing its distance To change the color of an edge handle 1 Select any shape 2 Click the color pot under Edge Settings 3 Select a new color from the Color Picker UI and click Set NOTE This operation changes the color of every edge handle in the mask To set the edge handle visibility to not visible Click the Visible defa...

Страница 568: ...se the User Settings buttons To Use Save initial mask parameters as a user favorite Reset mask parameters to a previously saved user favorite Reset mask parameters to factory default settings Reset mask parameters to those of a selected mask in the Mask List Example User Settings Workflow The following example procedure demonstrates the User Settings workflow where an artist needs to create the fo...

Страница 569: ... W 3 Change the name to Red and press Enter 4 Select a red color and turn Auto Color off 5 Set the fixed size dimensions 6 Select Save As User Favorite 7 Click once in the Player to create the mask 8 Select the Rectangle tool or press S 9 Change the name to Green and press Enter 10 Change the color to a green 11 Toggle From Center 12 Click and drag in the image to create the mask 13 Select the Fre...

Страница 570: ... Mask named Green from the Mask List 20 Select the Rectangle tool or press S 21 Select Reset To Selected 22 Click and drag in the image to create the mask Output Tab Settings Use the Global Composite settings to specify how all masks combined together using their individual modes affect the alpha channel for the selected input source image 558 Chapter 23 Masking ...

Страница 571: ...tion mode is None assuming that normally the input mattes are not correl ated Change the size of an image see Crop Tool on page 410 Crop Store initial mask parameters that can be reused during the rotoscoping process see User Settings on page 555 User Settings Options Tab Settings Use the Options tab to set default settings for creating and editing masks To Use Set the visibility mode of Bezier ta...

Страница 572: ... the Default Tool tool will revert back to the Creation tool Freeform Rectangle or Ellipse that created the shape If Edit is selected the tool will revert to edit mode If Current is selected the tool will revert back to the current setting Store initial mask parameters that can be reused during the rotoscoping process see User Settings on page 555 Options tab User Set tings Pixel Masking Pixel Mas...

Страница 573: ...o effect That is no masking is applied in any case Active Invert the mask prior to using it in the blend operation By default Invert is off Invert Select one of R G B A This is the channel of the Mask image to be used for masking By default Channel is A Channel Scale the mask after optional inversion prior to using it in the blend operation By default Intensity is 1 full intensity Intensity The li...

Страница 574: ... with no image input such as a mask generator takes its output format and resolution from the composition settings The Active Invert Channel and Intensity controls in the masking tab correspond to the Masking structured input The Image text field shows the name of the node connected to the masking input if any Pixel Masking Example The following example illustrates how you can use several masking ...

Страница 575: ... The output will cover any area covered by either the front Over or the back Where the front and back overlap the output will show the front Completely replaces the previously composited masks with the generated mask Replace Similar to the Over operator but the output will cover the same area covered by the previously composited masks Atop Composites the generated mask front over the previously co...

Страница 576: ... the previously composited masks front over the input image back The output will cover any area covered by either the front or the back Where the front and back overlap the output will show the front Over Completely replaces the input image alpha channel with the previously composited masks Replace Similar to the Over operator but the output will cover the same area covered by the input image alph...

Страница 577: ...rator is equal to the Outside operator with the front and back roles reversed Both previously composited masks front and input image alpha channel back are copied to the output except for the part where they overlap Xor Pixel Masking Example 565 ...

Страница 578: ...566 ...

Страница 579: ...78 Stroke Operations on page 582 About Raster Paint The raster paint module in Composite is represented by a supertool node The Paint node lets you work at any resolution with any number of layers and bit depths The paint node contains one or many layers of raster images and the compositing operators combine them to produce a single output image All operations including painting can be carried out...

Страница 580: ...of the strokes created with this brush are erased On the other hand if you press Spacebar between each stroke and then click Ctrl Z for Windows and Linux or Cmd Z for Mac OS the strokes will be erased one at a time Paint UI The Paint tool UI consists of three areas a Layer editor b Paint brush controls c Stroke controls Layer Editor The Layer Editor lets you create layers and reorder them For each...

Страница 581: ...end Modes on page 345 Blend Mode Navigate through raster layers and copy add and delete layers Layer controls Clear the last committed stroke from the canvas or wipe a new color onto the current canvas To select a color for the Layer Canvas controls wipe operation click the color pot select a color from the color picker and click Set Paint Brush Controls and Attributes The brushes define the look ...

Страница 582: ... grayscale tiff images but any file format and size supported by Composite will be accepted Color Define the color of the paint stroke Click a color pot and select a color from the color picker You can store two colors and use the toggle button to reverse them or press X Opacity Set the opacity transparency of the brush A value of 100 applies a fully opaque color Use a lower value to apply a more ...

Страница 583: ...alue produces a smooth continuous stroke and a low value produces a less continuous stroke with larger gaps between brush images Constant The stamping process can be configured by specifying the stamping rate and forcing constant distance between stamps a Rate value 100 b Rate value 20 c Rate value 20 constant Paint Brush Controls and Attributes 571 ...

Страница 584: ...hile drawing Blend The blending modes define how the stroke is blended with the current drawing see Blend Modes on page 345 Matte Off Invert You can use stencils to apply paint strokes to an image see Using Stencils on page 592 Working with Layers A raster paint layer is a canvas into which you draw strokes The strokes are merged together as they are drawn to produce the resulting raster image Eac...

Страница 585: ...e layer To change the layer s format double click the paint node then click to highlight the raster layer node You can adjust the settings in the Raster Layer tab However once a paint stroke is committed to the layer the following settings cannot be changed Format Width and height Image aspect ratio Rate Channels Depth Repeat mode Raster Layer Format 573 ...

Страница 586: ...t originates with the Paint node A common reason for adding an external layer is to touch up an image s front or alpha When you paint on an external layer you are compositing strokes onto the incoming image This makes it possible to change the incoming image without losing your strokes When you add either an internal or external layer it goes to the top of the Layers list The order in the Layers l...

Страница 587: ...layer front b Internal layer alpha a External layer front b External layer with its alpha To add an internal layer Click the Add Layer button at the bottom of the Layer Editor a Add Layer button Adding a Layer 575 ...

Страница 588: ...a tool or files that can be imported In that case the new layer is created using the composition format NOTE To rename a layer node double click the Paint tool node Once inside select the raster layer node to rename In the Tool Options of the node s UI type the new name in the Name field and press Enter Deleting Layers You can delete the layers you no longer need NOTE You cannot use the Delete key...

Страница 589: ...y You cannot clear more than one layer at a time If you select two layers to clear and then select the Clear button the front input of the first layer you selected will be cleared The act of clearing only clears strokes for the current frame It does not clear the incoming front and alpha of an external layer To clear a layer 1 Select either the front or alpha input from the layer you want to clear...

Страница 590: ...he layer from the Layers list Select either the Front or the Alpha input to wipe 2 Pick the wipe color by clicking the color pot next to the Wipe button see Color Picker on page 154 3 Select the Wipe button to apply the color to the layer Front or layer Alpha depending on which one is currently selected Layer Behavior Raster layer behavior is constrained based on the alpha of the layer being manip...

Страница 591: ...c of the Layer Editor The following graphic displays the result of painting a black stroke across the front input image Note that the alpha channel is not affected as represented in the proxy image in the Layer Editor because its input was not selected for a paint operation The following images show the result of selecting then painting the alpha of the same image Layer Behavior 579 ...

Страница 592: ...alpha If a color other than black or white were used varying transparencies would occur on the front image and varying shades of gray would result on the alpha The next example illustrates layer behavior when the front input image is combined with its own alpha channel In this case a Diamond Keyer is added to the dependency graph and the blue screen is keyed out of the image 580 Chapter 24 Raster ...

Страница 593: ...the stroke is constrained to the white part of the alpha and since the alpha was not selected no change to the alpha was made a Black stroke contained within boundaries set by alpha When the alpha is painted with a black stroke the resulting output image is also altered more of it becomes transparent Layer Behavior 581 ...

Страница 594: ...age on page 586 Reveal Lets you copy a region of a layer and paint it on a destination area see Cloning a Region of an Image on page 589 Clone Lets you erase paint strokes see Erasing Paint Strokes on page 592 Erase Paint The Paint stroke operation lets you paint on a selected layer s front or alpha Each raster layer has a front image and an alpha which you can apply strokes to In the following ex...

Страница 595: ...o hide the lower half of the sun so that it lines up with the horizon a sharp edged square stroke was used and the stroke operation was changed from Paint to Erase The sun was then painted out Paint 583 ...

Страница 596: ...The last step is to add the sun s reflection to the water 584 Chapter 24 Raster Paint ...

Страница 597: ...shed in one of two ways implicitly or explicitly Implicit alpha strokes are added when you paint on the layer front For every stroke added to the layer front a corresponding stroke is added to the layer alpha Explicit alpha strokes are added when painting directly on the layer alpha Painting on the alpha of an external layer can only be accomplished explicitly When you add strokes to the layer fro...

Страница 598: ...bicycle appears at the left on one layer but you want to paint it onto the right side of another layer you can offset the reveal destination To reveal one or more layers 1 Under Stroke select the Reveal operation The brush changes from white to red 2 Set Pressure and Blend attributes see Blend Modes on page 345 3 Set the brush attributes see Paint Brush Controls and Attributes on page 569 4 For ea...

Страница 599: ...he V view option and adjust the opacity The Preview option offers a more intuitive way of previewing the effects of the reveal When you enable Preview the layer is superimposed over the layer or layers selected for reveal and the Opacity field is activated to allow for transparency adjustments This lets you see exactly what your brush strokes will reveal 8 Click and drag on the canvas to apply str...

Страница 600: ...k the canvas the red brush is anchored and the green brush reappears Setting destination Setting source area 3 Position the green brush over the destination area and click the canvas The offsets are made and immediately shown in the X and Y Offset fields The green and red brushes are now locked into positions relative to each other and move in tandem 588 Chapter 24 Raster Paint ...

Страница 601: ...the selected layers Revealed portion of layer using Average blend method Cloning a Region of an Image The Clone tool lets you copy a region of the layer and paint it on a destination area For example if your clone source includes a sailboat when you paint on the destination area the sailboat will be replicated The clone source and Cloning a Region of an Image 589 ...

Страница 602: ...han the one you are currently viewing enter its frame number in the Slip field In this example the sailboat will be cloned to a location further to the right 5 Set the source area of the clone and the target destination for the clone by pressing Ctrl and clicking once When you click the canvas the red brush is anchored and the green brush reappears NOTE The Preview option offers a more intuitive w...

Страница 603: ...fsets are made and immediately shown in the X and Y Offset fields The green and red brushes are now locked into positions relative to each other and move in tandem 7 To set precise coordinates for the reveal offset use the X and Y Offset fields Cloning of a sailboat in preview mode Cloning a Region of an Image 591 ...

Страница 604: ...er on which you want to erase strokes 3 Set a brush type and size see Paint Brush Controls and Attributes on page 569 4 Click and drag on the canvas to erase Using Stencils You can enable disable a stencil to paint without or through a stencil on a per stroke basis The stencil is applied transiently only the part of the strokes that pass through it are kept There are three stencil modes 592 Chapte...

Страница 605: ...ing no stencils are used Matte Off Strokes will be constrained by the matte inputted into the layer Use Layer Forms a stencil from what is currently available in that layer Use Stroke Inverts the stencil Invert Using Stencils 593 ...

Страница 606: ...594 ...

Страница 607: ... created in Vector Paint you can edit its parameters to change the shape s location and orientation for example using a tracker to animate the shape If the shape is a Bézier you can edit individual points changing their opacity or their tangents for example You can do this using the same key frame animation techniques you use in other Composite tools All the shapes drawn in a given Vector Paint to...

Страница 608: ...ckground or black if the background is also unconnected Shape Properties When you draw using the Vector Paint tool you are creating shapes on the canvas All shapes share basic properties such as Translation Pivot Point Rotation Scale Shear Other shared properties control how the shape is drawn on the canvas and are described in the following sections These properties can be edited and animated ove...

Страница 609: ...r on the left and on the right a column with shape creation and editing tools Bézier creation controls and pen pressure controls All controls in the Vector Paint UI feature tool tips to provide information about their use Shape Browser The shape browser displays all shapes created in the current Vector Paint tool By default the shape browser presents shapes in bottom to top compositing order with ...

Страница 610: ...to the shape browser display by right clicking on the title row of any existing column To Use Lock When enabled prevents any change to the shape through the browser or in the player L Blend mode of the shape with the compos ited shapes and or background image be hind it Blend Set stream in which the shape will be drawn for multi stream or stereo painting Stream Draw Mode for the shape stroked or f...

Страница 611: ...ne strip shape s into shapes Make Bézier Move selected shape s to the back of the compositing order Move to Back Move selected shape s one position down towards the back of the compositing order Move Down Move selected shape s one position up towards the front of the compositing order Move Up Move selected shape s to the front of the compositing order Move to Front Duplicate selected shape s Dupli...

Страница 612: ...rm of a shape Clone Reveal Transform NOTE Notice that the Rectangle Ellipse Line and Bézier shape tools all create Bézier shapes Immediately below the shape creation and editing tools are the Erase controls Contrary to many other drawing packages Vector Paint does not have dedicated erasing tools Instead you choose the erase mode you want erase to background to transparent or to background color a...

Страница 613: ...eftmost section in the main tab contains the basic shape controls Its title shows the currently selected shape s name or New Shape if a creation tool is selected To Use Set the two colors named front and back used by shapes drawn with the Color Paint operation see Operation below The front color is used for drawing and the back color is used for erasing Another use for the back color is to toggle ...

Страница 614: ...r stream Set the shape s draw mode Stroked shapes will stamp the brush image along the Draw Mode shape s path Filled shapes will fill the polygon defined by the shape Set whether the shape is considered to be an open or closed shape Closed Enable rendering for this shape whether or not it is visible Visible Set the shape to Paint Clone or Reveal Paint will draw using the solid foreground Operation...

Страница 615: ...eration is Paint To Use Select the image source that will be cloned or revealed into the shape The menu offers Source the images that are connected to the node s Clone Reveal Sources input as well as the background image labeled as Background Set the X Y translation for the clone reveal image source Translation X Y Set the rotation for the clone reveal image source Rotation R Select which frame to...

Страница 616: ...ty at far slower speeds See Cropping and Filtering the Output on page 482 Control drawing the clone reveal image source overlay to ease placement of the Preview source This can be very useful in combin ation with the clone reveal transform tool Control the opacity of the clone reveal image source overlay Preview Opacity Reset all parameters described in this sec tion Reset Point and Gradient Attri...

Страница 617: ...y don t need it Control the incoming and outgoing tan gent angle in degrees and length Tangent Gradients can be added to any Bézier shape but not to line strips Gradients will only be rendered on filled shapes not on stroked shapes Shapes don t need to be closed for gradient to render This is a good way to have a stroke with detailed falloff control Edge gradients can be added by adding a gradient...

Страница 618: ...sform controls the shape s position and aspect This section is only enabled when an editing tool is selected For more information about the shape transform see Transforming Masks on page 548 in the Masking chapter The Clone Reveal Transform controls the transform of images used in clone reveal shapes These controls only have an effect if the shape s current operation is Clone or Reveal The Paint o...

Страница 619: ...eveal mode all parts of the transform are absolute with scale rotation and shear with respect to pivot as expected The x Shape toggle controls are not used The examples below display the rotation attribute for rectangle and clone reveal areas Default rotation position Rectangle rotation at 30 Transform Tab 607 ...

Страница 620: ...Rectangle rotation at 30 x Shape button enabled Clone Reveal rotation at 20 x Shape button enabled 608 Chapter 25 Vector Paint ...

Страница 621: ...rom left to right are the following columns Brush Attributes Brush Profile Editor Brush Preview Brush Palette Brush Palette Controls Brush attributes control how new or existing stroked shapes will be rendered To Use Control brush base shape elliptical or rectangular Type Control brush size in nominal pixels Result is independent of pixel aspect ratio Size Control spacing between stamps in per cen...

Страница 622: ... to create a complex profile for artistic effect Click profile control points to select them and click and drag control points or tangent points to change the profile Alt click will add a profile control point Use Ctrl Alt Click to break tangents At the bottom of the Brush Profile Editor are controls to modify your profile To Use Flip brush profile vertically along with its animation Flip Vertical...

Страница 623: ...tom 1 is top Y Display brush center indicator in preview x Brush Palette and Brush Palette Controls The brush palette displays a preview of all brushes in the current brush set Click on a brush to use it with the current shape Shift click to use only the brush profile Click in an empty location to create a brush Once a brush is selected you can use the brush palette controls to replace copy paste ...

Страница 624: ...ttings tab provides controls to change default shape durations colors for symbols drawn in the player Bézier tangent settings keyframing settings and post shape creation tool selection For Bézier tangent settings Keyframing settings and Default Tool settings see Options Tab Settings on page 559 in the Masking chapter To Use Set the default duration for newly created shapes using the Paint Clone an...

Страница 625: ...re not listed in the hotkey editor as they are fixed and cannot be changed These are Alt for creating lines constrained to multiples of 45 degree angles Alt for constraining shape rotation to multiples of 45 degree angles Alt for creating centered ellipses rectangles Shift for keeping 1 1 proportions when creating ellipses and rectangles thus creating circles and squares Ctrl alt click in the brus...

Страница 626: ...s interactively you can connect a Pass Through tool node to Vector Paint s output and set a context point on the Pass Through to view Vector Paint s output When rendering large numbers of strokes on large images this will produce the highest throughput The quality and pixel accuracy of both rendering methods is identical Clone Reveal Filtering Bilinear filtering has an optimization for situations ...

Страница 627: ... for detailed information about shape transform manipulation Point Editing Manipulators When the Edit tool is active the selected shape s curve points edge gradient if any are drawn on top of the rendered shape The color used to draw these symbols can be changed in the Settings tab and applies to all the shapes in the currently selected Vector Paint node The curve and edge gradient symbols can be ...

Страница 628: ...m is being edited This tool has two editing modes one for editing the translation rotation scale and one for editing the pivot and its rotation You can toggle between the two using the Set Clone Reveal Pivot hotkey which defaults to Ins When the pivot is being edited the text Pivot appears after the shape s name close to the manipulator This manipulation tool is the same as the one found in the 2D...

Страница 629: ... Basics on page 630 CC Histogram on page 639 Clamp Color Tool on page 644 Color Space Tool on page 645 Processing Images with Photo Lab on page 646 Inverting an Image on page 649 Remap Color on page 649 Set Fill Color on page 654 Solarizing an Image on page 654 Creating a Monochrome Image on page 655 Modifying a Display With the Pass Through Tool on page 656 Setting the Amount of Gray in an Image ...

Страница 630: ...s the luma range in equal intervals from black to white Because the algorithms are optimized for linear data a look up table LUT can be used to convert the logarithmic data for a linear data environment A LUT is an ASCII file that describes specific pixel values used for image data conversion both on import and export For example you can use a LUT to convert a 10 bit logarithmic film image to a 16...

Страница 631: ...iginal shot NOTE You can use 1D LUTs created outside the environment However to be recognized the 1D or 3D LUT file must be in the correct format and be named correctly Comment lines are permitted Using 1D LUTs Created Using Third Party Software You can use 1D LUTs created in other applications as long as they are in the recognized format All 1D LUT files must have the lut extension You should sav...

Страница 632: ...comment lines starting with a number sign are ignored Comment lines are useful for indicating the end of one table and the beginning of another or for describing how the script or program works Floating Point 1D LUT File Format Floating point LUTs are supported and are reversely compatible in most cases You can specify your own floating point 1D LUT using an ASCII editor as long as it is in the co...

Страница 633: ...d in a folder within the application or on a network you should store LUTs created externally in the same folder for ease of use Three formats are supported 8 bit unsigned integer 16 bit signed float 32 bit signed float Working with 1D LUTs 621 ...

Страница 634: ...atable attribute see Setting Keys Manually on page 676 and Validating and Applying the Expression String on page 729 Modifying a 1D LUT You can modify a 1D LUT by changing values in its ASCII file without having to reset the 1D LUT field To modify a 1D LUT 1 Open the ASCII file of the 1D LUT and make the necessary modifications 2 Save the LUT 3 Click Refresh The image is refreshed with the modifie...

Страница 635: ... complete information on the Lustre Color LUTs refer to the Lustre Color Management User s Guide on the Composite Web Portal Applying a 3D Display LUT Display LUTs provide a simulation of the final output for a given film stock and display device without rendering All display LUTs have an accompanying gamut warning LUT which displays in magenta all out of gamut colors That is those colors that are...

Страница 636: ...can Society of Cinematographers in a unique collaboration between manufacturers cinematographers and colorists The ASC CDL was developed to ensure that basic color grading adjustments can be shared amongst different manufacturer s systems from on set through post production The American Society of Cinematographers CDL color specification defines a common language for primary color correction A CDL...

Страница 637: ...e used in the context of log images being previewed through a print film simulation transform If a custom 3D LUT is not provided to you one of the 3D LUTs from the Lustre Color collection may get you close To apply a CDL 1 From the Tools tab drag the 3D LUT tool from the Color Correction folder to the dependency graph in the Schematic 2 In the 3D LUT tab click the CDL Browser button a CDL Browser ...

Страница 638: ...ges In some cases colors can cause interference with broadcasting which is referred to as NTSC illegal colors Broadcast Safe Color Controls The Broadcast Safe Colors tool automatically reduces the luminance or saturation of portions of the image or isolates unsafe or safe colors that you can then adjust manually To Select Set the unsafe colors as NTSC or PAL Format Determine how the unsafe colors ...

Страница 639: ...s Key Out Un safe Cut out the safe colors from the image leaving only the unsafe color regions Key Out Safe Fill the unsafe portion of the image with the selected color Replace Color NOTE Use the Key Out Unsafe and Key Out Safe options to see any problem colors in your image immediately For example you can fix the problems in the Color Corrector by adding the output of the Broadcast Safe tool as t...

Страница 640: ...ed as the Cineon reference is transformed to the value specified as the linear reference For example you may want to base the transformation on the 90 white card and specify a Cineon reference code of 685 and a corresponding linear reference value of 90 NOTE All Delog and Log parameters are animatable see Setting Keys Manually on page 676 and Validating and Applying the Expression String on page 7...

Страница 641: ...all allows you to modify levels with a more freestyle intuitive approach The trackball emulates a typical 360 degree color wheel that can be dynamically changed by dragging the center of the color wheel Consequently the effect on the red blue and green channels is predictable For example dragging the trackball towards the red portion of the color wheel increases the value of the red channel but de...

Страница 642: ...l Match colors Perform color suppression NOTE Many of the CC Basics fields are animatable attributes see Setting Keys Manually on page 676 and Validating and Applying the Expression String on page 729 Determining the Sequence of Corrections After you have analyzed the image it is important to determine what sequence to use to make the color corrections Some corrections may interfere with previous ...

Страница 643: ...range to modify To Modify Click The entire image Modifications made in the Master range are applied after individual range modifications Master Dark areas in the image Shadows Midlevel areas in the image Midtones Light areas in the image Highlights Rewiring Controls Rewiring color channels redirects the information contained in one channel to another and in some cases makes adjustments to that inf...

Страница 644: ...tions are available To Select Use color values for the red channel Replace color values of the red channel with those of the green channel Replace color values of the red channel with those of the blue channel Replace color values of the red channel with the luma of all channels Replace color values of the red channel with its inverse For example 1 corresponds to the maximum value of the given col...

Страница 645: ...tion The Color Wheel The color wheel acts as a reference and monitoring guide or template You can see how the colors that are 180 degrees apart are complements and how the RGB and CMYK points are distributed around the wheel Because RGB is an additive color model magenta cyan and yellow are expressed as combinations of two other colors The default display of the color wheel is the following Red is...

Страница 646: ... Shift field by either dragging inside the field or typing in a value Place your mouse on the outer ring of the color wheel and drag in a circular motion Setting Saturation Saturation indicates how concentrated the color is a saturated color has very little gray while a desaturated one is dampened with more gray For example a pastel blue has a very low saturation level while a blue screen is heavi...

Страница 647: ...r typing in a value Drag the center of the wheel Repeat to set a different range shadows midtones or highlights of colors Pure red is the 0 degree point for hue on the color wheel When you increase the hue value you move counterclockwise on the color wheel When you decrease the hue you move clockwise on the color wheel The center of the color wheel represents 0 gain As you increase the value of ga...

Страница 648: ...and Blue Gain fields M G Set gain using a scale from dark 0 to bright 200 It affects the Red Green and Blue Gain fields Value To modify the image using the Quick Gain controls Drag the field to set the gain You may also type values into the field and press Enter NOTE You can reset all fields simultaneously by clicking Reset in the Tool Options area located on the right side of the UI Setting the G...

Страница 649: ...lues are clipped at the minimum value of 0 Gain is expressed as a percentage value The default value of 100 has no effect on the image since the color values are multiplied by 1 NOTE You can set the gain for individual ranges or across all ranges simultaneously by using the Gain fields in the global controls To boost or reduce the colors in the image 1 Select the range that you want to modify 2 Dr...

Страница 650: ...atch option will almost certainly work better than all others for each particular shot but it may take trial and error to determine which option works best Not all color match options use all sample values Match All and Match SMH Shadows Midtones Highlights use all of the four pairs but Match Gain and Match Offset only match the Master pair of colors In this second case the gamma gain and offset o...

Страница 651: ...hlights from source to reference Match All Match shadows midtones and highlights from source to reference Match SMH Apply gain to the source to match it to the reference of the master color sample pair Match Gain Apply Offset to the source to match it to the reference of the Master sample pair Match Offset The Result field updates to reflect the changes made to match the color CC Histogram The His...

Страница 652: ... channel as well as the histogram for the selected channel The Ranges tab also displays the histogram for the selected channel as well as the Shadows Midtones and Highlights curves The four Tonal Ranges selectors select the tonal range to operate on namely Master all pixels Shadows Midtones and Highlights The four channel selectors select the channel to operate on namely luminance labelled Main Re...

Страница 653: ...red green or blue All main tab values are shown in the range 0 to 1 The input slider controls the values that are clamped to 0 below the minimum and to 1 above the maximum Values in between are scaled from 0 to 1 You can also use this to increase contrast You can set the maximum and minimum limits for the color range by entering the values in the Input fields on either side of the histogram NOTE I...

Страница 654: ...these controls to set the range of colors in the image The white slider on the right sets the maximum value for the range The black slider on the left sets the minimum value for the range The Output slider remaps pixel values produced by the input level Values at 0 are remapped to the minimum values at 1 are remapped to the maximum and values in between are linearly interpolated The output slider ...

Страница 655: ... the color range appears in the Maximum field The brightness in the highlight areas is decreased 5 To cancel the changes select Reset in Tools Options Ranges Controls When using a CC Basics or CC Histo tool you can redefine what constitutes a shadow midtone or highlight a Shadows curve b Midtones curve c Highlights curve To display the curves for the three tonal ranges Select the Ranges tab To red...

Страница 656: ...ertain esoteric blend modes in a composite or when you want to clamp negative color components before using other color correction tools Most of the time you will want to clamp colors against the conventional 0 1 range so this is the default behavior of the tool This tool is an image modifier it can be masked and muted and can only affect the RGB channels The Clamp color tool has the following par...

Страница 657: ... tools but you may want to look at them in the Player by cycling through the tool outputs by pressing the 6 hotkey Original image NOTE Secondary outputs can be neither masked nor muted Color Space Tool The Color Space tool lets you convert to and from a variety of common color spaces as well as invert the color space conversion without having to change selections in the source and destination spac...

Страница 658: ...tually relative uniform changes in luminance Photo development adjustments can produce images with different color distribution Photo Lab Processing With the Photo Lab tool you can set the exposure gamma pivot and lift of each color channel independently and in a variety of units such as F stops or printer lights for exposure The input image is first subjected to a gain adjustment then to a gamma ...

Страница 659: ...ontrast and Pivot Gamma correction is applied about a pivot value In other words pixel values equal to the pivot value are left unchanged This is useful when you want to use gamma correction to change the contrast of an image but do not want to affect a particular luminance level The amount of gamma correction can be expressed in terms of contrast or in terms of the usual gamma exponent Increasing...

Страница 660: ...ecrease the values of the channel You may also enter a value into any channel s field and press Enter The other two channel fields and the overall luminance field update to reflect the change Using the Trackball to Modify the Levels of an Image The trackball allows you to modify values with a more freestyle intuitive approach The trackball emulates a typical 360 degree color wheel that can be dyna...

Страница 661: ...ns To invert an image From the Tools tab drag the Invert tool from the Color Correction folder to the dependency graph in the Schematic view The image is inverted Remap Color The Remap Color tool lets you view High Dynamic Range HDR images on a limited dynamic range display such as a computer monitor You can also use the Remap Color tool as a 1D LUT tool to remap an image s color output using inte...

Страница 662: ... interpolated for the entire range EXRDisplay Popular among Open EXR users compresses a large portion of the high dynamic range into the gamut of the display without introducing clamping artifacts 3 Under Output Depth set the depth at which you want to output the image 4 In the Remap Color UI adjust the parameters for the mode you selected To Use Mode Set the minimum and maximum input color values...

Страница 663: ...is mapped to the maximum in tensity of the display Set the gray values Increase Gamma to brighten and decrease to darken Working with the Histogram Controls on the left side of the histogram curve viewer let you control how you want to view the histogram The source histogram is white and the result histogram is black By default both the source and result histogram are displayed in gray You can vie...

Страница 664: ...t press the Down Arrow key To zoom in out press Ctrl Spacebar and drag for Windows and Linux or Cmd Spacebar for Mac OS To pan the histogram curve viewer Press the Spacebar and drag Setting the Source Color If you have a specific color in mind you can set the source color by picking it from the remap color input image Once you select a source color the result color is automatically generated and t...

Страница 665: ...esult of the mode you selected and is displayed as a dashed line The adjusted curve is the result of any changes you made to the curve itself this is the only curve you can directly manipulate It is displayed as a white line The final curve is a combination of the basic and adjusted curves and is displayed as a heavy white line By default the final curve is always displayed but you can view the ba...

Страница 666: ... Remap Color tool click the Reset button in the Tool UI Area Set Fill Color This tool lets you set the fill color RGBA of an image without affecting any of the other characteristics of the image This tool in an image modifier since it only affects the fill color and does not change the pixels of the input image this tool cannot be masked it can be muted it affects the color and alpha of the fill c...

Страница 667: ...e threshold field by selecting Reset in Tool Options NOTE The Solarizing tool s Threshold field is an animatable attribute see Setting Keys Manually on page 676 and Validating and Applying the Expression String on page 729 Creating a Monochrome Image You can convert a color image into a monochrome image by using the Mono tool To create a monochrome image From the Tools tab drag the Mono tool from ...

Страница 668: ...h in the Schematic view The Gray tool UI appears with the Gray Amount field at its default of 100 2 Adjust the Amount field to change the amount of gray in the image Things to Remember You can reset the Amount field by selecting Reset in Tool Options NOTE The Gray tool s Amount field is an animatable attribute see Setting Keys Manually on page 676 and Validating and Applying the Expression String ...

Страница 669: ...rection folder to the dependency graph in the Schematic view 2 Select the output depth and set the exposure NOTE The sRGB tool s Exposure field is an animatable attribute see Setting Keys Manually on page 676 and Validating and Applying the Expression String on page 729 Converting an Image to sRGB 657 ...

Страница 670: ...658 ...

Страница 671: ...es for Keyframing on page 674 Setting Keys Manually on page 676 Setting Keyframes Automatically on page 680 Editing Keyframes in the Tool UI on page 681 Editing Keyframes in the Animation Editor on page 682 Adding and Deleting Keyframes on page 683 Modifying Interpolation on page 687 Modifying Extrapolation on page 688 Temporarily Modifying Attribute Values on page 688 Customizing the Layout when ...

Страница 672: ...etting Keyframes on page 660 Keyframing and Interpolation When you keyframe you determine what an object looks like at specific points in time while algorithms fill the frames in between the keyframes This technique is called in betweening The intermediate values between the keyframes are computed by interpolation Extrapolation is used to determine the behavior of a channel before the first or aft...

Страница 673: ...es views and functions see The Animation Property Area on page 666 Property Area To access the Animation tab Select the Animation tab in the tool UI The Animation tab UI appears Composition Browser The Composition Browser is the area where you select one or more specific curves to be displayed and edited in the timeline It is located on the left of the Animation tab It also exists as a standalone ...

Страница 674: ...he Animation Property Area on page 666 NOTE You can access the same options available in the Animation Property Area from the Animation tab in the Tool UI Curves View Animation curves provide an accurate representation of a tool s relative behavior over time You can work with animation curves either from the Animation tab UI or in the Animation browser which can be accessed by swiping east through...

Страница 675: ...he attribute values using the value editor which is located on the right side of the Tracks view you must select the keyframe to edit In track mode each channel displays all of its keyframe positions Each channel group and each tool displays a track that corresponds to the start and end of all included channels For example the following graphic shows the tracks view displaying a composition that i...

Страница 676: ...on Browser to the left or right 3 To reset a separator to its previous location you can move it manually or press Ctrl click 4 You can also use your mouse wheel to resize the editor Animation Editor Feedback To help simplify large and complex animations the Animation Editor provides contextual roll over feedback The following list displays the various roll over feedback and their meanings Attribut...

Страница 677: ...ll the translation offset from the beginning of the manipulation a Moved keyframe b Key position c Key offset d Attribute Keyframe feedback Rolling over a keyframe in the Animation Editor will evoke different feedback depending on the state of the keyframe a Cursor over keyframe b Cursor over keyframe with Auto tangent on indicated by the lower case a c Cursor over keyframe tangent with Auto tange...

Страница 678: ...it the selected cue mark s name Cue Name Edit the selected cue mark s time in frames Cue Time Frame and fit the selected keyframe s in the Animation Editor Frame Selec ted Frame and fit all visible keyframes contained in the Animation Editor Frame All Select from a list of math operations enabling you to modify a keyframe or group of keyframes Curve Opera tions Select from three different layout o...

Страница 679: ... next keyframe Delete keyframe Add keyframe Modify the time X axis of the graph of the currently selected keyframe Time Modify the value Y axis of the graph of the currently selected keyframe Value Player Controls The Player Controls are located along the top of the Animation tab and contain several animation controls located on the far left To Select Select a playback mode Move to previous cue ma...

Страница 680: ...e positions of the cue marks give them names and even add notes to them You can also set keyframes based on these marks by navigating from one mark to another using the Next Cue Mark and Previous Cue Mark buttons Setting keys links the temporal position of the keyframe to the cue mark at that time as you move the cue marks the keyframes follow If you move a keyframe in time the link to the cue mar...

Страница 681: ...d set is a more interactive method of adding cue marks 3 Repeat steps 1 and 2 to add more cue marks NOTE You can also add a cue mark by right clicking in any Animation Editor and selecting Add at Select Time or Add From Current Time from the Cue Marks sub menu To delete a cue mark 1 Select the Cue Marks tab in the tool UI 2 Select a cue mark 3 Right click and select Delete To delete a cue mark usi...

Страница 682: ... in a name for the cue mark and press Enter 4 Repeat steps 1 to 3 to add a description to or set a new frame for the cue mark To rename a cue mark using the Cue Name field in the Animation tab Properties area 1 Select the existing name in the Cue Name field NOTE The cue mark must be selected before the text edit is allowed 2 Type in the new name 3 Press Enter Contextual Menus You can access many o...

Страница 683: ...t Keyframes Move the time cursor to the previous keyframe among the selected curves Previous Key frames Cue Marks Move the time cursor to the next cue mark Next Cue Marks Move the time cursor to the previous cue mark Previous Cue Marks Move the time cursor to the first keyframe among the selected curves First Keyframes Move the time cursor to the last keyframe among the selected curves Last Keyfra...

Страница 684: ...arks Delete all Cue Marks Local Controls You can navigate through a set of keyframes using the Previous Keyframe and Next Keyframe buttons in the Tool Options located on the right side of the tool UI Player controls tool bar or by using the contextual navigation menu in any Animation Editor When using the Next Keyframe and Previous Keyframe buttons in the Tool Options keyframe navigation is restri...

Страница 685: ...Setting Zoom and Pan Placing the mouse cursor over the View Layout sub menu displays selections you can use to store up to four zoom and pan settings This is useful when you want to jump back and forth between different points on an animation curve see View Layouts on page 153 To set a zoom and pan view 1 Zoom and pan to the area of the animation curve you want to set as a view layout 2 Right clic...

Страница 686: ...s for Keyframing The workflow for keyframing using marking consists of the following 1 Selecting attributes to be marked 2 Changing values 3 Setting keyframes for all marked values So the first step in setting keyframes for animation is marking which attributes you wish to animate Almost all attributes can be marked for keyframing You can mark attributes for keyframing in either the tool UI Compos...

Страница 687: ... Expres sion Reset the values to default state Reset To mark an attribute for keyframing in the Composition Browser 1 Expand the tool channel to the attribute level in this example the Hue and Saturation attribute of the Master range of the CC Basics tool 2 Select the radio button of each attribute that you wish to mark in the M mark column The Hue and Saturation attributes are now marked for keyf...

Страница 688: ...tool UI Setting Keys Manually You can set keyframes for any animatable parameter at any time and in any order When you add a keyframe the interpolation between the previous and the next keyframe is computed automatically Setting a keyframe over another keyframe replaces the old keyframe You can set keyframes the following ways The Keyframe button in the Player controls which only sets keyframes on...

Страница 689: ... same behavior as the Set Keyframe buttons mentioned above It will set keyframes for all the marked attributes of the currently selected tool The K hotkey on the other hand can only be used in an Animation Editor context Example Animating Using the Tool UI In this example you ll be creating a simple animation that would change the amount of gray in an image over the span of 96 frames You ll be man...

Страница 690: ... the attribute is animated but has no keyframe at the current frame 5 Change the value in the Amount field to 50000 6 Select the Set Keyframe button The green line changes back to red Again this indicates that a new keyframe has been added to the timeline 7 Repeat steps 3 to 6 as required 8 Select the Gray attribute in the Composition browser 9 Select Frame or Frame All to view the curves in a Ani...

Страница 691: ...n image using the Gray tool in the Composition Browser 1 Expand the Gray tool in the Composition Browser 2 Mark the Amount attribute for keyframing by selecting its radio button in the M column 3 At the first frame leave the initial value as is 4 Select the Set Keyframe button to set a keyframe on the Amount attribute A green line appears over the attribute s value indicating a keyframe has been a...

Страница 692: ...bute values This process is called AutoKey AutoKey lets you to skip the steps of marking attributes and pressing a button or hotkey every time you want to set a keyframe When AutoKey is on and you modify an attribute value in any way using the tool UI direct manipulation or scripting a keyframe for the modified attribute value is set at the current time whether or not the attribute is marked for a...

Страница 693: ...yframe has been copied or cut Paste frame Remove the keyframe from the timeline Delete Keyrame Navigate to the first keyframe in the timeline First frame Navigate to the previous keyframe Previous frame Navigate to the next keyframe Next frame Navigate to the last keyframe in the timeline Last frame Copy the animation of the selected channel Copy Animation Remove the animation from the selected ch...

Страница 694: ...a channel all its keyframes are displayed NOTE To select several channels for editing draw a selection box around the channels you want to select or Ctrl click each one The curve appears in the editor 3 Select the keyframe s that you want to edit 4 Select and drag a keyframe up or down to change its value Drag left or right to move it in time 5 Drag a tangent handle to change the shape of the curv...

Страница 695: ... delete a single keyframe from an animation curve 1 Press and hold the Alt key 2 Move the cursor over an existing keyframe K will be shown next to the cursor 3 If needed enlarge radius of eraser by pressing Ctrl click and moving the cursor to the right to increase or to the left to decrease 4 Place the cursor on the curve at the point at which you want to remove the keyframe Note that the cursor b...

Страница 696: ...large the cursor so that it encircles several keyframes 6 Click once All keyframes within the area of the cursor are deleted To quickly delete a series of keyframes along an animation curve 1 Press and hold Alt Shift 2 Drag the mouse along the curve The keyframes are deleted 684 Chapter 27 Animation ...

Страница 697: ...m of hotkeys The following section lists the hotkeys their function and how the keyframe appears in the editor see Animation Editor on page 662 Keyframe in Animation Editor Hotkey and Function Shift T Locks keyframe time Shift V Locks keyframe value Shift L Locks tangent length Precision Keyframe Editing 685 ...

Страница 698: ...ws and Linux or Cmd Shift L Mac OS Unifies tangent length Ctrl Shift O Windows and Linux or Cmd Shift O Mac OS Unifies tangent orientation NOTE To return the keyframe to its previous state press the hotkey again Other hotkeys are available for keyframing see Hotkeys on page 817 686 Chapter 27 Animation ...

Страница 699: ...lowing interpolation methods are supported Constant key values do not change in time between keys tangents are absent Linear straight interpolation between keys tangents are absent Bezier spline interpolation you can edit the tangent length and orientation a Bezier b Linear c Constant NOTE The default interpolation setting is Bezier To set the interpolation method for an individual keyframe or an ...

Страница 700: ...ears between the first and last keyframe Ping Pong Cycles the animation as it appears between the first and last keyframes forward then backward Relative Cycles the animation as it appears between the first and last keyframe This is similar to Loop but the relative offset is based on the channel value derived from either the first or last keyframe Key Linear Continues the curve in a linear fashion...

Страница 701: ...ns is the presence of time offsets which can result in multiple instances of the same object being processed In this context modifying attribute values can affect the attribute by modifying it at more than one time This is dealt with by maintaining an attribute modifying curve and not just a modifying value These curves are not visible and are not displayed in the curve viewer Customizing the Layo...

Страница 702: ...ions area of the Tool UI to see the local time of the tool see Converting the Frame Rate on page 695 and Offsetting Time on page 696 The Time Offset tool lets you adjust the timing relationship between two branches of the dependency graph For example if you need to synchronize action in two separate shots you can create a composition with a branch for each shot and use a Time Offset tool along one...

Страница 703: ...vailable to perform the retiming the Warp interpolation mode which uses motion estimation to generate intermediate frames and the Blend interpolation mode which generates a weighted average of adjacent frames The Warp mode provides significantly better quality Additionally motion blur temporal anti aliasing can be added so that moving objects appear blurred as they would when filmed with a real ca...

Страница 704: ...ming Animation editor a steeper timing curve results in a faster playback rate Adjusting the clip s speed has different results Setting the speed to 2 0 doubles the playback rate A speed value of 5 plays the clip at half speed or in slow motion A negative speed value corresponds to playing the clip in reverse where a 1 0 speed value creates a clip that plays back at the normal rate but backward NO...

Страница 705: ...he clip Seconds is accelerated When output input yet is increasing the clip is slowed When output stays constant a constant frame is shown When output decreases time reverses To Use To control the mapping of input time to output time When speed 1 the clip has normal speed When speed 1 the clip is accel Speed erated When 0 speed 1 the clip is slowed down When speed 0 a constant frame is shown time ...

Страница 706: ... vector offset is used If reference is set the motion vector at the Reference Position is subtracted Reference from all motion vectors in the image The result is that the pixel at the reference position will appear to be motionless and so will pixels with similar motion vectors Conversely pixels which were motionless will appear to move with the subtracted Reference Position motion vector This ref...

Страница 707: ...next and previous frames to blend Mix Converting the Frame Rate You can convert the frame rate of an input source with the Rate Convert tool To convert the frame rate of input source footage 1 In the Tools tab drag the Rate Convert tool to the Schematic view and connect it to the dependency graph The Rate Convert tool UI appears 2 Select a frame rate to convert to Converting the Frame Rate 695 ...

Страница 708: ... graph The Time Offset tool UI appears 2 Adjust the offset by the value in the Frames field If you have an Animation Editor open you can view both the global time and tool time as they appear on the same animation curve Setting the Animation editor display parameters to Tool will set global time frame markers To view global time frame markers in an Animation Editor 1 While focused in the Animation...

Страница 709: ... option Note that the animation curve changes to reflect the time offset that has been applied and global time frame markers appear a Global time cursor as shown when Animation editor display is set to Composition Offsetting Time 697 ...

Страница 710: ... a Tool time cursor b Global time frame markers 698 Chapter 28 Time Tools ...

Страница 711: ...hapter The Macro Super Tool on page 699 The Macro Super Tool The Macro super tool lets you design your own tool You can drag tools from the Tools tab directly into the Macro super tool in order to customize it for your composition 29 699 ...

Страница 712: ...press the tilde key to open the Gate UI Swipe to the east to open the Tools tab From the Tools tab select the Macro super tool or select a Macro super tool preset if you have previously created one Drag the Macro super tool into the Schematic view 700 Chapter 29 Customization Tools ...

Страница 713: ...the Macro super tool right click and then select Create Macro 2 Click the Macro super tool to display the Macro tab in the Tool UI Notice that most of the tab is empty You ll customize the tab with the tool inputs that you add to the Macro super tool The Macro Super Tool 701 ...

Страница 714: ...ool you can assign each of these buttons to a tool Select a tool in the Schematic and then click a button while holding down the Ctrl key to assign it to a tool NOTE When the Customize UI button is pressed these six buttons are disabled In order to customize the Macro super tool you must be in edit mode Right click on the Macro super tool and select Edit or double click on it This allows you to en...

Страница 715: ...at represent the Macro s potential connections outside of edit mode If the Macro super tool is connected to a dependency graph then the two nodes that it is connected to will be displayed instead of the input and output images Next you can decide what tools you want to add to the Macro super tool Open the Gate UI and swipe to the east to open the Tools tab Now you can drag tools from the Tools tab...

Страница 716: ...ustomize the Macro super tool 1 Once you have added tools to the Macro super tool click the Customize UI button 2 Open a Composition view Middle click your mouse or press the tilde key to open the Gate UI Then swipe east 3 Click the View tab From the View tab drag a Composition view into a viewport Once the Composition view is open you will see a Macro sub menu 704 Chapter 29 Customization Tools ...

Страница 717: ...ro sub menu to reveal the tools that you added to the Macro super tool 5 Now you can open each tool individually and load the tool inputs that you want into the Tool UI of the Macro super tool The Macro Super Tool 705 ...

Страница 718: ...to the Tool UI either a green arrow or a red x will appear indicating whether it is possible to drag the input into the Tool UI or not NOTE Animation data and other nodes cannot be dragged into the Tool UI You can add as many inputs as you like however if there are too many inputs some of them will be hidden at the bottom of the pane 706 Chapter 29 Customization Tools ...

Страница 719: ...ou have determined which inputs you want to include in the Macro super tool you can save it as a preset by clicking the Save button in the Tool options area You will be required to give the preset a name You can access this preset through the Tools menu Middle click your mouse or press the tilde key to open the Gate UI then swipe to the east to open The Macro Super Tool 707 ...

Страница 720: ...ab Select the Macro super tool In the lower menu right click the Macro super tool and select Presets To use a preset in a composition click it and drag it into the Schematic view 708 Chapter 29 Customization Tools ...

Страница 721: ...ontinue to add or remove tool inputs from the Macro preset and modify its UI However these changes will not be reflected in the composition that the preset has been added to since there is no direct link between the preset and the composition that it is added to The Macro Super Tool 709 ...

Страница 722: ...710 ...

Страница 723: ...rendered by a 3D application when dealing with synthetic images or produced through image analysis when images come from live action footage The Motio tool lets you generate forward and backward motion vectors with an image source Motion vectors can be used as inputs for a wide variety of image transformation analysis or restoration tools In Composite Motion Vectors can be used as inputs to the Re...

Страница 724: ...k when it is created If you render your motion vectors in Maya using the 2D Motion Vector render pass the motion vectors data is kept intact Furthermore you don t need to set any motion vector options on import in Composite The Normalized 2D Motion Vector appears as mv2dnormremap when it is created If you render your motion vectors in Maya using the Normalized 2D Motion Vector render pass the moti...

Страница 725: ...uble clicking the render pass in the Render Settings window By default the Max Displacement value is set to 256 To set the Motion Vector options after importing the render pass 1 Select the import node in your composition 2 From the tool UI enable the Motion Vectors button 3 Set the Type menu to ReelSmart 4 Finally set the Max Displacement to the value that it was set in Maya Importing 2D Motion V...

Страница 726: ...ors with a Motio node Once this is done you can connect the adjusted vectors to a Retimer tool and use your original image as the input If no motion vectors have been imported you can compute them inside a composition by adding a Motio node Certain tool nodes such as the Retimer will detect the absence of motion vector inputs and will trigger the use of its internal Motio engine to automatically c...

Страница 727: ...6 Connect the three Motio outputs to the corresponding inputs of the HalfSpeed Retimer 7 Set the target of a Player to context point C1 see Setting the Target on page 191 8 Add a second Retimer to Schematic and change its name to QuarterSpeed and enter 0 25 into its Speed value editor 9 Set the Retimer s context point to C2 see Setting Context Points on page 191 10 Connect the three Motio outputs ...

Страница 728: ...e red and green channels in the vector image the blue and alpha channels are unused The Show Vectors tool makes viewing 2D vector images far more intuitive Instead of showing a red green yellow mix of red and green or black negative components image actual arrows are shown indicating the origin direction and amplitude of motion for either the forward vector input image the backward vector input im...

Страница 729: ...Backward vectors Forward and backward vectors The Show Vectors tool has the following parameters Show Vectors 717 ...

Страница 730: ...ick the color pot to display the color picker see Color Picker on page 154 Forward Backward vectors color pots To display motion vector overlays on an image with the Show Vectors tool 1 Drop a Show Vectors tool node onto a composition 2 Connect the Show Vectors primary image input to the footage node 3 Connect the Show Vectors Forward Vectors input and or the Backward Vectors input to vector image...

Страница 731: ...page 729 Associating Comments with an Expression on page 730 Editing an Expression on page 731 Removing an Expression on page 732 Setting Expressions Examples on page 733 Expression Reference Tables on page 745 Arithmetic Operators on page 746 Comparison Operators on page 746 Operator Precedence on page 747 Math Functions on page 747 Vector Functions on page 748 Random Number Functions on page 749...

Страница 732: ...d tokens representing functions or constants For example to constrain object A s Y rotation to object B s X translation you might set an expression on A Transform Rotation Y consisting of the string B Transform Position X Expressions are created by using the Expresso Calculator which is an extension of the regular Calculators on page 161 To set an expression you need to access the calculator by ri...

Страница 733: ...f image attributes such as height and width Short Expressions In cases where you may not want to type the full name of an attribute that is at the same level as the attribute being expressed you can enter expressions that refer to an input by its short name For example if you want to add an expression to the Gaussian Rotation based on the value of the Gaussian X Radius instead of writing out the l...

Страница 734: ...on expressions is used to quickly make a connection between nodes or inputs without having to manually set expressions through the Expresso Calculator You can link simple or structured inputs Linking structured inputs links individual inputs in a single operation Its purpose is to quickly define a link between two attributes It does so by defining a B A expression B being the link target and A the...

Страница 735: ...referring to the Red channel attribute without ever displaying the Expresso Calculator In the same way you can link inputs belonging to separate groups setting an expression in the target attribute referring to the source input Visual Linking in the Composition Browser You can perform visual linking operations within the Composition Browser Linking Simple Inputs Linking simple inputs in the Compos...

Страница 736: ...nce the visual link has been established the target attribute s value assumes that of the reference attribute A green E then appears in the A column of the Composition Browser 724 Chapter 31 Expressions ...

Страница 737: ... s topology doesn t match the source one the drop is not accepted i e the drop feedback is not given to you while dragging the pointer The graphic below illustrates how an attribute with structured inputs Master Gamma can be visually linked with another attribute with structured attributes Master Gain Visual Linking in the Composition Browser 725 ...

Страница 738: ...When the source and target structured inputs match that is when they have the same number of inputs an expression per input is set linking inputs individually 726 Chapter 31 Expressions ...

Страница 739: ...owserand the Tool UI You can initiate a drag from the Composition Browser and drop it on a label on the tool UI linking the source and target attributes with an expression Visual Linking between the Composition Browser and the Tool UI 727 ...

Страница 740: ...ollowing local position in the string This lets you simply tap with a pen and insert expression tokens without having to move the cursor position manually Expression functions and operators are grouped by categories The Math category of functions is available by default Although you can type into the text field directly showing the buttons helps you to memorize the available functions Clicking the...

Страница 741: ...ion node to it Viewing the Expression You can view a valid expression in a graph view by clicking the Graph button The graph view displays the shape of the expression curve plotted over time The initial time extents are the same as those of the composition You can also display the expression curve in the Animation Editor Viewer with other animation curves The expression curve is visually different...

Страница 742: ... Spacebar click Mac OS You can also pan the view by simultaneously holding down the Spacebar on the keyboard and the left mouse button NOTE To return to the main Expresso Calculator view select the Graph button again Associating Comments with an Expression You can associate comments with an expression by clicking the Comment button 730 Chapter 31 Expressions ...

Страница 743: ...n Expression You can easily edit an expression To edit an expression 1 Right click the parameter field that contains the expression you want to edit 2 From the menu select Edit Expression The Expresso Calculator appears with the expression highlighted in the text field Editing an Expression 731 ...

Страница 744: ...ou are not sure of the exact sequence or writing convention of the expression string Removing an Expression You can remove expressions from any attribute To remove an expression node from an attribute 1 Right click the value field of the parameter that contains the expression you want to remove 2 From the menu select Remove Expression The expression node is removed 732 Chapter 31 Expressions ...

Страница 745: ...e 426 and Processing Images with Photo Lab on page 646 NOTE It is assumed that you currently have the Player Schematic and Composition Browsers open With the focus on Schematic use Ctrl N Windows and Linux or Cmd N Mac OS to create a new composition To create an animation where the Photo Lab s red channel Gain attribute drives the Radial Ramp s Y Center position attribute 1 From the Tools tab drag...

Страница 746: ... Setting Attribute 0 500 Start Color Green G channel 30 X Radius 16 Y Radius 85 X Falloff 116 Y Falloff The Radial Ramp should look like this You can now set an expression for the Y Center attribute that enables it to be driven by the Photo Lab s Gain Red channel attribute 734 Chapter 31 Expressions ...

Страница 747: ... field And select Set Expression The Expresso Calculator appears along with a dashed green line at the top of the Y Center value field This indicates that an expression has been applied Example Using Linked Attributes to Drive Animation 735 ...

Страница 748: ...controls in the Photo Lab tool and links them If you are familiar with expressions you can simply type the expression into the text field using the correct syntax and order but if you are not sure of the exact sequence or writing convention you can cycle through the various expression tokens that make up the string by using Alt slash on the keyboard NOTE Both Alt keys work but only the slash that ...

Страница 749: ...hey should look in the expression NOTE When cycling through and selecting a tool s attribute levels you must separate each level with a period 8 Open the Photo Lab tool UI 9 Select Autokey 10 Change the exposure units to Gain 11 Mark the red R channel of the Gain for keyframing by clicking the R label see Marking Attributes for Keyframing on page 674 Example Using Linked Attributes to Drive Animat...

Страница 750: ...using periodic keyframes However a more simple approach is to use a random number function In this case the TrueRand function is used NOTE It is assumed that you currently have the Player Schematic and Composition Browsers open With the focus on Schematic use Ctrl N Windows and Linux or Cmd N Mac OS to create a new composition To create random noise using a random number function 1 From the Tools ...

Страница 751: ...long with a dashed green line at the top of the Noise Seed value field This indicates that an expression is about to be applied or has already been applied a Dashed green line appears 5 Select the Random button if it is not already selected 6 Select the TrueRand button Example Using Functions to Drive Animation 739 ...

Страница 752: ... values with a comma 8 Play the composition NOTE You can view the expression in a graph view at any time by right clicking the attribute s value field containing the expression and then selecting Edit Expression from the menu The Expresso Calculator appears Select the Graph button to view the expression in a graph There are other expressions and combinations of expressions that you can use to achi...

Страница 753: ...he sine wave created by the current time t It is then multiplied by a frequency of 50 The expression would still be valid if the Abs math function were not part of the string Example Animating Layers in Reaction This example is somewhat more involved in that it uses the Eval time function within a Reaction node see Time Functions on page 751 and Basic Compositing in Reaction on page 243 Example An...

Страница 754: ...and options 2 Select Tool Output to view the results of the Reaction composition in the Player 3 Under Guides select Frame Outline 4 Under Reaction select Interactivity To create an animation in Reaction using expressions 1 From the Tools tab drag the Reaction tool to the dependency graph in the Schematic view and connect it to the Output node NOTE Usually before you composite or add effects such ...

Страница 755: ...o view the box you have created most likely takes up the entire Player view 5 Select the Reaction tab a Translate tool NOTE To help you create an appropriate view of the animation you can modify the Player view by adjusting the zoom see Zooming and Panning on page 39 6 Use the Translate tool to move the box to the bottom left corner of the view by grabbing the X or Y axis with the cursor If you do...

Страница 756: ... second box Box2 layer by following steps 5 through 8 12 Right click in Box2 s X Position attribute value field and select Set Expression The Expresso Calculator appears 13 Insert the following expression 14 Repeat steps 12 and 13 for Box2 s Y Position attribute but make sure the Position token is replaced with a Y 15 Play the animation This expression indicates that the X and Y Position attribute...

Страница 757: ...al functions see Arithmetic Operators on page 746 Arithmetic Operators Compare two values with each other see Comparison Operators on page 746 Comparison Operat ors Operations are performed in a specific order see Operator Precedence on page 747 Operator Precedence Advanced math functions see Math Functions on page 747 Math Functions Operators that are based on vector behavior see Vector Func tion...

Страница 758: ...to perform basic mathematical operations Description Arithmetic Operator Addition Subtraction Multiplication Division Integer Modulo Exponentiation Comparison Operators Use the following operators to compare two values with each other When two values are compared using these operators the result is 1 if the comparison is true and 0 if the comparison is false Description Comparison Operator Equal t...

Страница 759: ...ption Operator Order Boolean NOT 1 Negation as in 1 2 Multiplication division exponentiation and modulus and 3 Addition and subtraction and 4 Comparison and 5 Equivalence and 6 Boolean AND 7 Boolean OR 8 Math Functions Description Function Returns the absolute value of a given number Abs number Returns the sign of the given number Sign number Returns a number to the power of an exponent Pow number...

Страница 760: ...umber2 Vector Functions Description Function Returns a vector composed of the evaluation of the individual component expression expr1 expr2 expr3 Returns the dot product of two vectors Dot vector1 vector2 Returns a vector the cross product of two vectors Cross vector1 vec tor2 Returns the length of a given vector Length vector Returns a rotation vector based on a target position an observ er posit...

Страница 761: ...Description Function Returns a random value between 0 0 and 1 0 based on the given seed Rand seed Returns a truly random value between two given numbers The sequence of returned values constantly changes never producing past results TrueRand low high Returns a random value between 1 and 1 based on a given seed Noise seed Returns a random value between 1 and 1 based on a given vector and with the a...

Страница 762: ...angle units from degrees into radians Radians angle Returns the cosine of a given angle in degrees Cos angle Returns the sine of a given angle in degrees Sin angle Returns the tangent of a given angle in degrees Tan angle Returns the arc cosine in degrees from 0 to 180 of a given number Acos number Returns the arcsine in degrees from 90 to 90 of a given number Asin number Returns the arctangent in...

Страница 763: ... also known as a bell shaped or bell curve based on the center time height and half height width of the curve Bell center height width Returns an increasing Hermite like transition S curve between two given times EaseIn start time end time Returns a decreasing Hermite like transition S curve between two given times EaseOut start time end time Returns a sinus profile curve based on the given period...

Страница 764: ...evaluation of the first one if expr1 evaluates to If expr1 expr2 expr3 true returns to expr2 returns expr3 otherwise Expr1 is a boolean expression Expr2 and expr3 can be two values two vectors or two boolean expressions This enables users to piece together snippets along the time domain 752 Chapter 31 Expressions ...

Страница 765: ... on page 764 Resetting the Reference Box on page 766 Resetting the Tracker Box on page 767 Changing the Color of a Tracker on page 768 How the Tracker Works on page 769 Tracking Position on page 770 Tracking the Scale of an Object on page 773 Tracking the Rotation of an Object on page 775 4 Point Tracking on page 777 Tracking Difficult Shots on page 780 Correcting Errors on page 782 Stabilizing on...

Страница 766: ...page 432 Tracking Concepts The Tracker is a tool for following and capturing the motion of an on screen feature and then applying that stored motion to a second element so that the two appear to be locked together You can track any number of features in a length of footage 1 point tracking Tracks a single feature for position 2 point tracking Tracks two features using the relationship between the ...

Страница 767: ... number of features in a composition 1 point stabilizing The positional location in X and Y motion you want to eliminate is vertical horizontal or both vertical and horizontal 2 point stabilizing The motion you want to remove involves scaling rotation It may also involve vertical horizontal shifts With stabilizing the shift values are inverted for example 3 2 would become 3 2 before they are appli...

Страница 768: ...reference boxes by clicking the color pot then selecting a new color from the color picker Display Color Run the analysis forward Click again to turn tracking on and off Analyze Forward Run the analysis backward Click again to turn tracking on and off Analyze Backward Advance the analysis forward by one frame Analyze Forward one frame Advance the analysis backward by one frame Analyze Backward one...

Страница 769: ...he reference box at the current frame Snap Change the size and position of the reference box Reference Change the size and position of the tracker box Tracker B Change or reset the shift values Shift Tracking Workflow Tracking workflow usually consists of the following steps Choosing a reference point Positioning the reference box Resizing the reference and tracker boxes Resetting the reference an...

Страница 770: ...rols These tools include the Panner 2D Transform Reaction Warp 2D Garbage Mask and Remove Dust Furthermore shape tools Warp 2D Garbage Mask and Remove Dust also let you create Trackers on a per point basis The Create Trackers toggle button is found in the Tracker Selection Dialog It only applies if you are going to press the Link button Ordinarily the Tracker Selector Dialog allows you to select a...

Страница 771: ...re 1 Add a 2D Transform tool to the dependency graph 2 Select 4 Point from the Transform Type menu 3 Right click the Source label and select Set Trackers The Tracker Selector window is displayed 4 Toggle the Create Trackers button and click Link Adding a Tracker Tool to the Dependency Graph 759 ...

Страница 772: ...lyzers is created in the dependency graph To add a Tracker and Tracker Analyzer for a single point in a shape Warp 2D Remove Dust Garbage Mask 1 Select the point you want tracked in the Player 760 Chapter 32 Tracking and Stabilizing ...

Страница 773: ...pes while your cursor is in the player 2 Right click the point and select Set Trackers The Tracker Selector window is displayed NOTE You can also right click the Position label under the Point label to display the Tracker Selector window Adding a Tracker Tool to the Dependency Graph 761 ...

Страница 774: ... to find a pattern that is present in every frame However this is not always possible and you may have to track two different features such as object that disappears behind another one or an object that moves out of the frame The reference frame the frame on which you place the reference box should be the frame where the reference point is most representative in terms of shape size and rotation Ge...

Страница 775: ...box 2 If the tracker you want to position does not appear on the image click the appropriate Tracker in the File Browser and enable Active a Active column b Selected Tracker Analyzer set to Active NOTE Each tracker is automatically assigned a different color However you can customize the color at any time see Changing the Color of a Tracker on page 768 3 Position the cursor to the center of the re...

Страница 776: ...is magnified to make it easier to select a position By default the tracker box stays with the reference box Resizing the Reference and Tracker Boxes You can resize the reference box to make it surround the feature you chose to track more closely By only including the recognizable feature in the box 764 Chapter 32 Tracking and Stabilizing ...

Страница 777: ...e the tracker box so that it is large enough to accommodate the most frame to frame movement of the reference point For example if the movement of the reference point is mostly horizontal you can increase the width and reduce the height of the tracker box If there is a large amount of movement both horizontally and vertically increase both the width and the height of the tracker box a Reference bo...

Страница 778: ...e box to the desired dimension To use the Tracker or Tracker Analyzer menu to move or resize the reference or tracker box for the current tracker enter values in the appropriate fields a Reference box position and size fields b Tracker box position and size fields Resetting the Reference Box If you decide to choose a different reference point you can reset the reference box 766 Chapter 32 Tracking...

Страница 779: ...ox stays with the reference box as you position it Generally you do not need to move the tracker box separately from the reference box If you separated the tracker box from the reference box and want to reposition it over the reference box you can reset the tracker box To reset the tracker box Do one of the following Under Track click Reset The tracker box size is reset to its default values and i...

Страница 780: ...the File Browser 2 Click Reset in the Tool Options The size and position of the reference box tracker boxes and the X and Y Shift values are reset Changing the Color of a Tracker Each Tracker Analyzer is automatically assigned a different color However the color may be obscured by existing colors in the footage you are tracking You can change the color of the tracker to make tracking easier 768 Ch...

Страница 781: ...area that matches the contents of the reference box The Tracker uses luma cues white versus black and shape cues to determine what is a match Once it finds a match the Tracker uses the location of the match to move the center of the tracker box over the center of the match This change in position is stored as an X and Y shift value On the next frame and on all future frames the Tracker gets a litt...

Страница 782: ... no scale or rotation changes to the wing NOTE Although this example uses the 2D transform tool there are many other tools that have position and translation parameters that can be tracked such as Reaction Panner the Garbage Mask Remove Dust tool and the Warp 2D tool To track position 1 Play the footage a few times to evaluate what reference feature you want to use and if there are any foreseeable...

Страница 783: ... the footage 6 From the Tools tab open the Composition folder and drag a Blend and Comp node to the dependency graph between the footage node and the Output node 7 Connect the bird footage to the Back input of the Blend and Comp node Tracking Position 771 ...

Страница 784: ... UI select 1 Point from the Transform Type menu The Source and Destination coordinate value editors appear 11 The Source X and Y coordinates are set to 0 0 fixing the center of the arrow image exactly at the center of the tracker 12 To set the Destination transform right click on the Destination label and select Set Tracker The Tracker Selector appears Expand the Tracker and select the Tracker Ana...

Страница 785: ...mple you want to lock a new license plate to the old one You would position one reference box over one corner of the license plate and the other reference box over the diagonally opposite corner The license plate is a layer It assumes you have a Reaction node with two layers the background layer and the source layer In this example the background is the car footage and the source is the license pl...

Страница 786: ...Select the first analyzer from the File browser and click Analyze to start the analysis 8 Return to the first frame 9 Select the second analyzer from the File browser and click Analyze to start the analysis 10 Drag a Reaction tool from the Tools tab and place it in the dependency graph between the footage node and the Output node 11 With the cursor over the Reaction node right click and select Add...

Страница 787: ...layers inside Reaction Tracking the Rotation of an Object In some cases you may want the object to track only a rotational change The Tracker requires two tracker boxes to track rotation The first Tracker goes over the pivot point of the rotation you want to track You place the second over an area that describes the axis of the rotation you want to apply to the object NOTE You can also use the 2D ...

Страница 788: ...the cursor over the Reaction node right click and select Add Source 12 To associate a layer with the source you just created select Bilinear at the bottom of the Layer Editor and click Create 13 In the Layer Editor right click inside the Z field under Rotation and select Track Rotation The Tracker Selector browser appears 14 Using Ctrl click select both the trackers then click Link The rotation ha...

Страница 789: ...ge The reference points you use must be well defined it is recommended that you plan them when shooting the sequence for example add markers to the scene It is not always possible to do four point tracking when the reference points are not well defined In the following example the goal is to pin an image of a jet to the screen of a monitor as the camera moves NOTE You can also use the Reaction too...

Страница 790: ...he blue portion of the monitor Keyer The Tracker will track and analyze the movement of the four corners of the monitor The Tracker super tool is used because multiple Tracker Analyzers are required Tracker super tool The Blend Comp node will combine the two processed images Blend Comp The 2D transform tool will apply the necessary transformations to the image to be corner pinned 2D Transform Outp...

Страница 791: ...four corners to pin 4 Adjust the Display Analyze Reference box and Tracking box settings 5 Analyze each track do not forget to reset the footage back to the start frame after each analysis You can also select the first Tracker Analyzer and Shift click the last one to select all trackers to analyze at the same time 4 Point Tracking 779 ...

Страница 792: ...click on the Destination label and select Set Trackers 11 Select the trackers in the same sequence as you created them from the Tracker Selector window and activate the Use Offset toggle 12 Click Link The bilinear image is pinned to the background image 13 If the corner pinned image is too small or too large for the screen it s replacing create another transform and adjust its scale while in the S...

Страница 793: ...a match is not found a keyframe is not set and the position of the reference point is interpolated between the previous keyframe and the next keyframe If the reference point is temporarily hidden by another object you can use the Tolerance value to make the tracker ignore the reference point in parts of the clip where it is hidden then continue tracking it normally when it reappears This can preve...

Страница 794: ...ate the reference point to the tracker box contents 1 Select the appropriate tracker by clicking the appropriate Tracker button 2 Press Backspace The last keyframe is deleted and the positioner moves back one frame The tracker box is now on the previous keyframe 3 If you want to remove this keyframe press Backspace again 4 Repeat step 2 for all incorrect keyframes 5 When you reach the last good ke...

Страница 795: ...erence point NOTE Backspacing deletes the keyframes as you go back If you do not delete the keyframes they will be overwritten when you reanalyze Backspacing in this instance makes it easier to see the tracking path clearly 3 Click Analyze Forward to continue the analysis Stabilizing Stabilizing is a powerful process that represents one of the most common uses of the Tracker Stabilizing is most of...

Страница 796: ...d the selected feature s Once you have set the tracker positions start the tracking process also referred to as analyzing the footage During the analysis the tracker box associated with each tracker moves as the Stabilizer looks for a pattern that matches the reference in each frame of the clip The Stabilizer calculates the difference between the position of the tracker box and the position of the...

Страница 797: ...alues as is To stabilize the Stabilizer inverts the X and Y Shift values in each frame of the sequence and moves the image according to these values This gives the impression that the reference point stays in the same position throughout the sequence Because the image is moved during stabilization a border appears on one or more edges which means that some pixels are lost The following illustratio...

Страница 798: ...ng is useful when the motion you want to remove is horizontal vertical side to side up and down Hand held camera and helicopter shots nearly always have undesired horizontal or vertical motion jitter 786 Chapter 32 Tracking and Stabilizing ...

Страница 799: ...d reference feature A decorative point at the six o clock position was chosen as the reference feature 2 Click Analyze Forward to track the selected reference position in the footage 3 Drag a Reaction tool from the Tools tab and place it on the dependency graph between the footage node and the Output node 4 With the cursor over the Reaction node right click and select Add Source 5 To associate a l...

Страница 800: ...e tracking data to the stabilizing filter for position Y 8 Play the footage to view the result 2 point Stabilizing 2 point stabilizing is useful when the motion you want to remove involves changes in scale rotation zoom roll For example your camera may be zooming out from someone in a rocking chair 788 Chapter 32 Tracking and Stabilizing ...

Страница 801: ...on choose two reference features that are as far as possible from each other This gives the Tracker the maximum amount of roll to analyze and correct If you do 2 point stabilizing each of the two reference features stays fixed throughout the stabilized clip That is if you are stabilizing scaling the scaling change is eliminated If you are stabilizing rotation the rotation is eliminated To perform ...

Страница 802: ...ou can associate trackers with both source and destination points of the transform means that you can effectively do stabilization and tracking simultaneously This is used to place one moving object in a clip onto a second moving object in a different clip To 2 point track one moving element onto another moving element 1 Track the first video clip using a Tracker node with 2 trackers In this examp...

Страница 803: ... node with 2 trackers A moving image of a cat was tracked 3 Track the second video clip using a Tracker node with 2 trackers 4 Connect the first clip into a Transform2D node 5 Set Transform Type to 2 Point Simultaneous Stabilizing and Tracking 791 ...

Страница 804: ...he first video clip Make sure Use Offset is toggled to active then click Link 7 Click on Set Destination Trackers and choose the 2 trackers from the second video clip Make sure Use Offset is toggled to active then click Link 792 Chapter 32 Tracking and Stabilizing ...

Страница 805: ...8 Add any correction using the Translation Rotation Scale parameters Simultaneous Stabilizing and Tracking 793 ...

Страница 806: ...794 ...

Страница 807: ...ogressive Outputting progressive material to interlaced format Removing or adding 3 2 pulldown to convert the frame rate of footage Deinterlace Video media is interlaced meaning one frame consists of two fields representing different points of time Since each field is sampled on only the odd or even scanlines each field is missing half the pixels needed to make a full frame at that point in time D...

Страница 808: ...tool to perform the following steps of the deinterlacing process Determine the field dominance Select fields frame rate conversion Adjust the adaptive threshold Choose a scanline spatial interpolation method Choose antialiasing parameters Choose a temporal interpolation method The Deinterlace tool UI has the following parameters Adaptive threshold Temporal interpola tion Spatial interpola tion Fie...

Страница 809: ... when you convert interlaced media to progressive You can opt to remove fields which outputs the first field of each frame merge the fields which outputs a merge of the two fields of each frame or change fields to frames which outputs all input fields separately as a frame creates clip of twice the duration Depending on the parameter settings the set of output frames will vary as described in the ...

Страница 810: ... this threshold are considered to be static parts of the scene and we preserve both fields of input i e we use temporal interpolation If you place the motion threshold at 100 then we consider all pixels to be static and output both fields essentially not deinteracing as seen in the following image The above image has great detail in the static grey rock region because it keeps both fields of input...

Страница 811: ...ng image where the Motion Threshold is 30 Here we see that the baton has no interlace artifacts but the details of the static brick areas of the scene are preserved The softness threshold can be used to make a smoother ramp between the thresholded regions but since the internal calculation of motion already has a bit of blurring built in you may not want to add more Adjusting the Adaptive Threshol...

Страница 812: ...creasing the number of angles sets the number of steps from 0 to 90 degrees or the direction of the antialiasing Setting Temporal Interpolation To create an output frame from a given input field we copy the field consisting of every second line of input to the output frame The remaining lines in the output must be interpolated somehow Temporal interpolation is what is used in areas of the scene th...

Страница 813: ...s exactly equivalent to a field merge where each output line is a weighted sum of the corresponding input line and the lines above and below it with weights of 0 5 0 25 and 0 25 respectively Interlace Use the Interlace tool to convert a sequence of progressive frames to an output of interlaced video frames Each pair of input frames result in one output frame To convert progressive frames to interl...

Страница 814: ...eo frames 10 fields given film frames A B C and D it produces video frames AA BB BC CD DD the first and second letter correspond to what goes in the first and second field respectively To recover the original 24 frames per second of film and perform compositing work on progressive frames you need to go through the reverse process called 3 2 pullup In order to do this you need to know Cadence At wh...

Страница 815: ...t be the following list of output field pairs where the 6th input frame is used 3 times There are actually 25 cadence possibilities for 25i as compared to only 5 in the NTSC 30i case It is too awkward to refer to these cadences in the same way as for NTSC for example WSSSSSSSSSSSSWWWWWWWWWWWW Therefore the 25 cadences have been labeled 1 to 25 in the Cadence drop down menu where the number indicat...

Страница 816: ...he conversion For instance the conversion 30i 24p will create output with a frame rate 4 5 of the input Normally the input would be 30 fps and the output 24 fps but the input can be any frame rate and the output will just be this frame rate multiplied by the appropriate ratio Therefore the Pulldown is a true frame rate converter unlike the Deinterlace and Interlace and the Pulldown tool will not a...

Страница 817: ...es are analytic tools that you can use to view images without changing pixel data they are display modifiers only Utilities are available in the Utilities folder of the Tools tab The utilities tools available Description Tool Lets you Link Image Lets you view the output of your composition Output Lets you compare images see Comparison Tool on page 806 Comparison Lets you Freeze Frame 34 805 ...

Страница 818: ... the Tools tab Like any other tool you can place the Comparison tool anywhere in the current composition by dropping the tool in the Schematic Player etc The Display Tools is the desired location for the Comparison tool The Display Tools contains two place holders one for the Comparison tool and one for the Display Modifier By default these place holders contain the Comparison and the Display Pass...

Страница 819: ...arison tool will already exist in the Player Display Tools but will be muted To enable the Comparison tool Do one of the following Right click in the Player and select Comparison Press Shift C or Shift D for the Display Modifier Select the Mute button in the tool options of the Comparison Tool tab To delete the Comparison tool from the Display Tools Select the Delete button in the tool options of ...

Страница 820: ...er information will indicate what sources are being shown for the primary and reference inputs see Cycling Through Inputs and Outputs on page 71 Comparison Tool Controls The Comparison tool has the following parameters The comparison tool contains a list of manipulators a split bar and a region which can be selected to change the behavior of what areas are being compared The split bar is the defau...

Страница 821: ... the split bar either above or below the pivot point Reference processed with Gray tool To move the split bar Drag the pivot point You can also Ctrl click the viewer to place the pivot point under the cursor and then drag over the viewer to move the split bar Comparison Tool Controls 809 ...

Страница 822: ... points indicated by small boxes on each corner and side to change the width and height of the region The letter R next to the left pivot point indicates whether the reference input is displayed in the interior or exterior of the region Reference processed with Color Space tool To move the region Do one of the following Drag the interior of the region 810 Chapter 34 Utilities ...

Страница 823: ...u want the center of the region to be and press Ctrl click To resize the region Drag any of the pivot points Reference processed with Color Space tool To show or hide a particular manipulator Press Shift H When the manipulator is hidden it is still active Comparison Tool Controls 811 ...

Страница 824: ...lways remain 100 opaque Use Shift O to toggle the opacity Translate and scale the entire viewer using the pan and zoom hotkeys currently implemented To translate and zoom the refer Zoom Translate X Translate Y ence image use the controls in the Comparison tool UI To translate and zoom the primary image swap the images and use the controls in the Comparison tool UI Notes Tool The Notes tool lets yo...

Страница 825: ...ge copying format change or content change is performed It can also be used as a placeholder in the Display Tools for most color conversion and image modifying tools and affects only what you see in the Player To add a display modifier to the Display Pass Through placeholder 1 Drag a tool from the Tools tab and pause in the Player then middle click or press the tilde key 2 Go through the south gat...

Страница 826: ...t views from multiple nodes without having to disconnect and reconnect nodes It has multiple image inputs but only one output There is a single primary input and a secondary input that can receive input from multiple nodes The Switcher functions as a pass through for one selected image Specifically the output acts as a pass through for the primary input The Switcher tool has just one option in the...

Страница 827: ...he Schematic view or directly into a dependency graph 2 Connect one node to the primary input on the Switcher Multiple nodes can be connected to the secondary input To switch inputs 1 In the Switcher tool UI click the name button to display the nodes connected to the secondary input 2 Select the node from the list of secondary inputs that you want to connect to the primary input Switcher Tool 815 ...

Страница 828: ...816 ...

Страница 829: ...818 User Interface Elements on page 819 Browsers on page 823 Composition Hotkeys on page 824 Views on page 827 Tools on page 832 Mac OS on page 837 Login Screen on page 838 General on page 838 User Interface Elements on page 839 Browsers on page 842 Composition Hotkeys on page 843 Views on page 846 Tools on page 851 A 817 ...

Страница 830: ...Mac OS on page 837 Windows and Linux The following are the Composite hotkeys for Windows and Linux Login Screen The following hotkeys work in the login screen To Press Log in Enter Exit Composite Ctrl Q General The following hotkeys work throughout the application Exit The following hotkey is to exit the application To Press Exit Composite Ctrl Q 818 Appendix A Hotkeys ...

Страница 831: ...asic editing operations To Press Cut the element Ctrl X Copy the element Ctrl C Paste the element Ctrl V Add to or remove from the selection Ctrl click Select the range of elements between this one and the last one selected Shift click Undo the last operation Ctrl Z Redo the last undo Ctrl Y User Interface Elements The following hotkeys are available for different interface elements Menubar and Ta...

Страница 832: ...et the cursor Ctrl Alt Shift C Tabs and Controls The following hotkeys are available for tabs and controls To Press Go to previous control Shift Tab Go to next control Tab Go to previous tab Alt Left Arrow Go to next tab Alt Right Arrow Text Editor and Text Fields The following hotkeys are available in the text editor and in any text field To Press Text editor Add a line break Text field Accept te...

Страница 833: ...he cursor Shift Left Arrow Select one character to the right of the cursor Shift Right Arrow Text editor only Select from current position backward to same position on previous line Shift Up Arrow Text editor only Select from current position forward to same position on next line Shift Down Arrow Move cursor left by one word Ctrl Left Arrow Move cursor right by one word Ctrl Right Arrow Select wor...

Страница 834: ... Shift drag Increment 100 Alt Shift drag Edit text Enter Reset to default Ctrl click Display the standard calculator Shift click Display the Espresso calculator if you can animate the field or the standard calculator if you cannot Alt Shift click Display the pop up menu context menu click or right click Pop up Dialogs The following hotkeys are available in pop up dialogs To Press Accept Enter Canc...

Страница 835: ...ment selected and this one Shift click Add the column to the sort criteria Shift click on Sort area of the column Edit the text F2 Cancel the text edit Esc Move to next row Down Arrow Move to previous row Up Arrow Move to next column Right Arrow Move to previous column Left Arrow Move to next page Page Down Move to previous page Page Up Move to first item in list Home Move to last item in list End...

Страница 836: ...tion Hotkeys The following hotkeys are available when working with a composition To Press Save composition Ctrl S Go to Pick List tab Ctrl P Toggle play backward J Toggle play forward L Move to the first frame Shift Left Arrow Move to the last frame Shift Right Arrow Move to the next frame Right Arrow Move to the previous frame Left Arrow Set mark in I Set mark out O Set cue mark U Next cue mark C...

Страница 837: ...ift Tab Next view Ctrl Tab Refresh This includes a refresh of the current composition if it is out of date its composition icon is red F5 Reset node Ctrl R Close composition Ctrl W Go to previous tool Shift Tab Go to next tool Tab Go to home tool Shift Home Go to next tab Alt Right Arrow Go to previous tab Alt Left Arrow Toggle Marking State of Current Selection Shift A Selection History back Alt ...

Страница 838: ...gh a gate Calculator The following hotkeys are available for the Calculator To Press Activate or deactivate the Calculator Alt C Close the Calculator Esc Color Picker The following hotkeys are available in the Color Picker To Press Perform an average rectangle Ctrl drag in the color spectrum Use the eyedropper to pick a color without displaying the Color Picker P Pick a color for a color pot witho...

Страница 839: ...et zoom and pan Home Zoom in Up Arrow Zoom out Down Arrow Integer zoom in Ctrl Up Arrow Integer zoom out Ctrl Down Arrow Zoom Ctrl Spacebar drag Zoom region Shift Spacebar drag Zoom selected items Ctrl Home Zoom all scene Ctrl Alt Home Activate Viewpoint 1 4 F1 F4 Set Viewpoint 1 4 Ctrl F1 F4 Delete Viewpoint 1 4 Ctrl Shift F1 F4 Views 827 ...

Страница 840: ... Shift O Cycle interpolation mode keyframes Shift I Cycle extrapolation mode curves Shift E Set keyframe K Set keyframe for marked attributes Shift K Delete keyframe Delete Select all curves Ctrl A Select all keyframes on selected curves Ctrl Alt A Move to previous keyframe on selected curves Ctrl Left Arrow Move to next keyframe on selected curves Ctrl Right Arrow Add previous keyframe on selecte...

Страница 841: ... View the green channel of the target G View the blue channel of the target B View the alpha channel of the target A View the channels of the target C Display C1 Output output of context point 1 1 Display C2 Output output of context point 2 2 Display C3 Output output of context point 3 3 Display C4 Output output of context point 4 4 Display Tool Input input of the currently selected tool 5 Display...

Страница 842: ...ext point For example pressing 1 click sets context point 1 Pressing 3 click sets context point 3 1 4 click a node Clear the context point The number indicates the number of the context point to clear For example pressing 2 click clears context point 2 and pressing 4 click clears context point 4 1 4 click the background of Schematic Connect the two nodes Kiss Release Shift and continue dragging to...

Страница 843: ... Ctrl R Mark node for keyframe A click node Toggle node thumbnails T Display the details of a selected node without opening the node D drag over node Show all node details Shift D Expand or collapse node E Select all nodes and connections Ctrl A Select all upstream nodes You can select multiple branches without clearing the selection X click layout selected L Layout all Ctrl L Increase Auto pan sp...

Страница 844: ...ys available in specific tools GarbageMask alsoappliestoRemoveDustand Warp 2D tools The following hotkeys are available in the Garbage Mask tool To Press Create Freeform D Create Rectangular S Create Elliptical W Finish shape Esc Edit E Transform T Nudge left Shift Left Arrow Nudge right Shift Right Arrow Nudge up Shift Up Arrow Nudge down Shift Down Arrow 832 Appendix A Hotkeys ...

Страница 845: ... curve Delete a control point Alt click on con trol point Move a control point in auto tangent mode Ctrl Alt click drag on control point Add tangent handle Repeat to remove tangent handle Ctrl click on con trol point Adjust the length of both sides of a tangent handle Alt drag the handle Break a tangent handle Ctrl click drag the handle Move a curve between points Ctrl Alt drag over location on a ...

Страница 846: ...Master Keyer The following hotkeys are available in the Master Keyer tool To Press Sample matte M Sample patch 1 9 Shift 1 9 Paint The following hotkeys are available in the Paint tool To Press Adjust brush size Drag right to increase drag left to decrease S drag Clone brush Ctrl click Line brush Shift click Flip foreground background colors X 834 Appendix A Hotkeys ...

Страница 847: ...t grasp Q click Truck the camera W Truck grasp W click Dolly the camera E Dolly grasp E click Enter Move mode M Enter Rotate mode comma Enter Scale mode period Cameras The following hotkeys for the camera are available in the Player when using the Reaction tool To Press Switch cameras If you are using more than one camera you will cycle through each camera Shift 1 View from perspective camera Shif...

Страница 848: ...resize Ctrl drag Maintain ratio Shift drag Maintain image input ratio Shift I drag Maintain image output ratio Shift O drag Retimer The following hotkeys are available in the Retimer tool To Press Cycle show vectors mode M Tracker The following hotkeys are available in the Tracker tool To Press Delete track point Delete Delete track point and step back Backspace 836 Appendix A Hotkeys ...

Страница 849: ...mparison The following hotkeys are available in the Comparison tool To Press Opacity Shift O Toggle tool visibility Shift H Swap reference Shift R Move pivot point or region center Ctrl click Cycle through inputs and outputs Player hotkeys 1 9 on reference side of manipulator Cycle between channels and alpha Player hotkeys C A on reference side of manipulator Mac OS The following are the Composite...

Страница 850: ...ite Cmd Q Context Menus The following hotkeys are available for context or right click menus To Press Display the context menu If a keyboard includes the context menu key it is typically located three keys to the right of the Spacebar context menu click or right click Select Edit Undo Redo The following hotkeys are available to perform basic editing operations To Press Cut the element Cmd X Copy t...

Страница 851: ...ng hotkeys are available for different interface elements Menubar and Taskbar The following hotkeys are available for the menubar and taskbar To Press Turn the taskbar on or off Cmd T Turn the menubar on or off Ctrl M Layout Presets The following hotkey is available for the layout presets To Press Previous layout preset Cmd Backspace Cursor The following hotkey is available for the cursor To Press...

Страница 852: ...nt word Double click Delete previous character Backspace Delete next character Delete Move to beginning of line Cmd Home Move to end of line Cmd End Move cursor left Left Arrow Move cursor right Right Arrow Select text from current position to beginning of line Cmd Shift Home Select text from current position to end of line Cmd Shift End Select one character to the left of the cursor Shift Left Ar...

Страница 853: ... entry Esc Auto Complete Alt Numeric Fields Value Editors The following hotkeys are available in numeric fields To Press Increment with autorepeat Up Arrow Decrement with autorepeat Down Arrow Increment 10 Ctrl drag Increment 10 Alt drag Increment 100 Ctrl Shift drag Increment 100 Alt Shift drag Edit text Enter Reset to default Ctrl click Display the standard calculator Shift click Display the Esp...

Страница 854: ...Browser view and the File workspace are browsers To Press Delete Delete Refresh F5 Select all Cmd A Copy Ctrl drag Add to or remove from the selection Ctrl click Select the range between the last element selected and this one Shift click Add the column to the sort criteria Shift click on Sort area of the column Edit the text F2 Cancel the text edit Esc Move to next row Down Arrow Move to previous ...

Страница 855: ...sers The following hotkeys are available for the Floating Browser To Press Activate deactivate Floating File Browser Cmd I Activate deactivate floating view Alt O Activate or deactivate the Floating File Browser Cmd O Close the Floating Browser Esc Composition Hotkeys The following hotkeys are available when working with a composition To Press Save composition Cmd S Go to Pick List tab Cmd P Toggl...

Страница 856: ...row Toggle Timecode Frame Shift T Select downstream node Alt Shift Right Arrow Select upstream node Alt Shift Left Ar row Select next input output Alt Shift Down Arrow Select previous input output Alt Shift Up Ar row Create a new composition Cmd N Previous view Ctrl Shift Tab Next view Ctrl Tab Refresh This includes a refresh of the current composition if it is out of date its composition icon is ...

Страница 857: ...ollowing hotkey is available for the Gate UI To Press Display the Gate UI Middle click Display the Gate UI The backquote key shares the same key with the tilde key and is located below the Esc key on the keyboard backquote key Close the Gate UI Esc Continue displaying the UI element of the gate you swiped through Alt swipe through a gate Calculator The following hotkeys are available for the Calcu...

Страница 858: ...he Color Picker Ctrl click color pot Activate or deactivate the pop up Color Picker Alt P Accept Ctrl Enter Cancel Esc Views The following hotkeys are available in Schematic Animation Editor and Player views To Press Pan Spacebar drag Reset zoom and pan Home Zoom in Up Arrow Zoom out Down Arrow Integer zoom in Cmd Up Arrow Integer zoom out Cmd Down Arrow Zoom Cmd Spacebar drag Zoom region Shift Sp...

Страница 859: ... key mode minus Cancel add delete key mode Esc Lock keyframe time Shift T Lock keyframe value Shift V Lock tangent length Shift L Lock tangent orientation Shift O Unify tangent length Cmd Shift L Unify tangent orientation Cmd Shift O Cycle interpolation mode keyframes Shift I Cycle extrapolation mode curves Shift E Set keyframe K Set keyframe for marked attributes Shift K Delete keyframe Delete Se...

Страница 860: ...ode Shift minus sign Player The following hotkeys are available in the Player To Press Set a region of interest ROI Click and drag to define an initial ROI then use the cursor to adjust the size or location of the re gion Shift Z Toggle full screen Player F View the red channel of the target R View the green channel of the target G View the blue channel of the target B View the alpha channel of th...

Страница 861: ...es Cmd Shift R Toggle Comparison tool Shift C Toggle Display Modifier tool Shift D Next stream stereo 0 Previous stream stereo Shift 0 Separators The following hotkey is available for manipulating UI separators To Press Reset to previous location Ctrl click Schematic The following hotkeys are available in the Schematic view To Press Set a context point on that node The number indicates the number ...

Страница 862: ...ag a node onto a connection Disconnect the nodes joined by that connection or by those connections Cmd drag through one or more connec tions Group or ungroup the selected node s G Edit the selected group Double click Exit the group Double click back ground Mute or unmute nodes M Clean up Schematic C Delete nodes Delete Reset nodes Ctrl R Mark node for keyframe A click node Toggle node thumbnails T...

Страница 863: ...O Close visual group Shift C Add to visual group V drag Remove from visual group Shift V drag Copy node C drag Tools The following describes hotkeys available in specific tools GarbageMask alsoappliestoRemoveDustand Warp 2D tools The following hotkeys are available in the Garbage Mask tool To Press Create Freeform D Create Rectangular S Create Elliptical W Finish shape Esc Edit E Tools 851 ...

Страница 864: ...Down Arrow Close shape Enter Select all control points Cmd A Select next control point Cmd Select previous control point Cmd Shift Insert a control point Alt click on curve Delete a control point Alt click on con trol point Move a control point in auto tangent mode Ctrl Alt click drag on control point Add tangent handle Repeat to remove tangent handle Ctrl click on con trol point Adjust the length...

Страница 865: ...dge point Ctrl click drag on the curve Keyer The following hotkeys are available in the Keyer tool To Press Sample matte M Sample patch 1 9 Shift 1 9 Sample degrain D Spill suppress S Adjust blend Shift B Master Keyer The following hotkeys are available in the Master Keyer tool To Press Sample matte M Sample patch 1 9 Shift 1 9 Keyer 853 ...

Страница 866: ...und background colors X Spill Blend The following hotkeys are available in the Spill Blend tool To Press Spill suppress S Adjust blend Shift B Reaction The following hotkeys are available in the Reaction tool To Press Orbit the camera Q Orbit grasp Q click Truck the camera W Truck grasp W click Dolly the camera E Dolly grasp E click Enter Move mode M Enter Rotate mode comma 854 Appendix A Hotkeys ...

Страница 867: ...era you will cycle through each camera Shift 1 View from perspective camera Shift 2 View from front Shift 3 View from Left Shift 4 View from Top Shift 5 Reset camera Shift Home Resize The following hotkeys are available in the Resize tool To Press Symmetrical resize Ctrl drag Maintain ratio Shift drag Maintain image input ratio Shift I drag Maintain image output ratio Shift O drag Resize 855 ...

Страница 868: ...te Delete track point and step back Backspace Warping Tools The following hotkeys are available in the Warping tools To Press Input transform manipulator M Effect transform manipulator Output transform manipulator Crop Set Pivot also for 2D Transform tool Insert Twirl Rotation T Comparison The following hotkeys are available in the Comparison tool To Press Opacity Shift O 856 Appendix A Hotkeys ...

Страница 869: ...reference Shift R Move pivot point or region center Ctrl click Cycle through inputs and outputs Player hotkeys 1 9 on reference side of manipulator Cycle between channels and alpha Player hotkeys C A on reference side of manipulator Comparison 857 ...

Страница 870: ...858 ...

Страница 871: ...mposite executable files let you verify stored information edit settings and perform certain tasks The Composite executable files reside in the Composite program directory or in the Compositebin directories for Linux and Mac NOTE As the behavior of Composite is the same on a Linux or Mac workstation as on a Windows workstation the screen shots in this chapter were taken from Composite running on a...

Страница 872: ...le The composite executable is used to start the interactive application To start Composite from a command line In a shell enter composite To set the Composite command line arguments initialization options and environement variables see Initialization Variables on page 873 txcheck Executable The txcheck executable checks the installed Composite license for each Composite feature checks the CPU typ...

Страница 873: ...ck the cpu In a shell enter txcheck cpu Summarized information regarding the CPU type configuration and supported processor features is listed To get a full report on a cp in a shell enter the following txcheck cpu full To check the graphics In a shell enter txcheck graphics txcheck Executable 861 ...

Страница 874: ...arameter to parse the given Composite xml file and check it s validity For example from the Composite installation folder txcheck xml resources toolUi crop xml txperf Executable The txperf executable is used to test the performance of various Composite subsystems txperf is built by the Composite application layer as a separate executable which depends on several Composite libraries It runs a numbe...

Страница 875: ...sist of reading and writing bytes through single threaded calls The behavior of disk IO tests are controlled by the following suboptions size read block write block file iterations size n where n is the number of bytes the operation read write This suboption measures the speed at which bytes can be read written depending of the size of the file This measures the effect of file fragmentation depend...

Страница 876: ...les opening files and closing files are be performed in various orders sequential reverse random butterfly The default is 256 files subdir l where l is the number of subdirectory levels This suboption indicates that files created by the test will be spread across a directory tree of depth l The default is to create a flat directory structure Valid range is from 1 to 16 loc path where path indicate...

Страница 877: ...fault size is 4096 blocks s where s is the size of I O blocks in kilobytes used for testing I O performance I O will be performed in blocks of this size The default will be 512 queue q where q is the number of outstanding requests The default will be 32 Memory The memory performance tests are controlled by the mem switch Using this switch will cause memory to memory transfers to be measured for pe...

Страница 878: ...ied than memory transfers will be performed continuously txversion Executable The txversion executable reports the version of Composite txversion supports one command line parameters called full which returns the extended version information To verify the version of Composite In a shell do one of the following Enter txversion Enter txversion full 866 Appendix B Composite Executables ...

Страница 879: ...Python API NOTE The Composite Python API documentation can be accessed through the Help via the Scripting menu the HTML files are located in the documentation scripting directory of the Composite installation With Python and the Composite Python API installed you can write scripts to automatically perform certain repetitive managerial tasks and creative work on a project such as creating compositi...

Страница 880: ...script or change the render py script located in resources scripts to modify the default rendering behavior like performing post render tasks for example How to Run a Composite Python Script To successfully run a Python script that makes use of the Composite Python API or more specifically a script that imports Composite Python modules it is important to run it in the right environment in order fo...

Страница 881: ...ystems except Mac OS DL_INSTALL_DIR INSTALL_DIR On Windows 1 PYTHONHOME INSTALL_DIR python 2 PATH INSTALL_DIR program INSTALL_DIR plugins On Linux 1 PYTHONHOME INSTALL_DIR 2 LD_LIBRARY_PATH INST ALL_DIR lib INST ALL_DIR plugins INST ALL_DIR lib python2 5 site packages autodesk_toxik libs Automatic Setup The procedure to automatically set up the environment required to run a Composite Python script...

Страница 882: ...the script 3 To run the script without any parameter choose Run 4 To run the script with parameters choose Run with Parameters and type in the script arguments as you would in a shell Externally WARNING To run a Composite Python script it is strongly recommended to use the Python distribution shipped with Composite deployed under the Composite installation directory Running a Composite Python scri...

Страница 883: ...ded at any time through the Re Load Scripts entry of the Scripts top menu DL_SCRIPTED_ACTIONS_PATH toxik scripting scriptedActionsPath 1 Search path for action scripts a list of directory paths separated by the character conventionally used by the operating system to separate search path components on Linux and Mac OS on Windows 2 By default the search path is empty but the following directory of ...

Страница 884: ...pen the User Preferences window 2 Select the Embedded Scripting tab 3 Deselect any of the following Script Console Show Controls whether the script console is displayed when the script executes Post Execution Message Box Show Only on Errors In addition to errors displays all outputs that were produced Standard Output Captured Normal messages are captured If capture is disabled messages go to the s...

Страница 885: ...itialization variables are listed in a table as they appear in the Composite initialization file The table is available from the Help menu via the The Menu Bar on page 19 If you specify the command line argument the argument takes priority over the environment variable and the initialization variable If you specify the environment variable then it takes priority over the initialization variable To...

Страница 886: ... dialog appears 2 On the Advanced tab click the Environment Variables button The Environment Variables dialog appears displaying system variables in the lower part of the dialog and variables defined for the current user in the top part To set the environment variables on Linux Issue the following command in a tcsh shell setenv variable name value OR In a bash shell export variable name value To v...

Страница 887: ...NOTE Two of the tokens Time and Date will return different results depending when they are evaluated String Substitutions 875 ...

Страница 888: ...876 ...

Страница 889: ... stabilizing A technique for removing the motion or changes in scale rotation zoom roll 2 point tracking A technique for tracking two features using the relationship between the two to track scale rotation 3D LUT A type of LUT for converting from one color space to another It applies a transformation to each value of a color cube in RGB space 3D LUTs use a more sophisticated method of mapping colo...

Страница 890: ...d parameter The time and value of the animated parameter is displayed on two axes the vertical axis representing the value and the horizontal axis representing the time AutoKey A mode that when activated sets a keyframe whenever you change the selected object s properties background The composition background defines the rendering plane and sets its format after which other layers can be created b...

Страница 891: ...nce to another The term generally refers to adjustment changes made as part of a single effect color curves Color curves lets you remove color spill by either suppressing a sampled color by modifying the red green blue or hue by modifying the saturation or by modifying the luminance of the selected color or by shifting the hue of a color range to a sampled hue shift target Each curve in color curv...

Страница 892: ... boundaries of useful information in an image Generally everything outside of the DOD will have a value of 0 in all channels of the image The DOD is usually determined automatically as opposed to a Region of Interest See also Region of Interest expressions Mathematical formulas that let you control any parameter that can be animated such as translation rotation scaling material or texture Expresso...

Страница 893: ...parent or creating an alpha channel where those pixels are located layer An object that you can composite over another layer using a matte A layer composed of a source input that you assign to a geometrical support or 3D geometry and a material node that is automatically generated layers Layers are composed of three separate components a surface 3D geometry object and local axis a multi channel ma...

Страница 894: ...s See also keying external matte garbage matte static matte and traveling matte metadata Information embedded in the image attained through tags that further describes the image motion blur A digital effect that simulates the blur of fast moving objects multiple point tracking Multi point tracking tracks as many features as you want You can apply the stored motion to various elements such as the c...

Страница 895: ...your sequence proxy A low resolution copy of a high resolution image one for each frame Proxies are used to provide real time playback of processed results and to provide low resolution stand in clips in a compositing environment so composites can be quickly created See also composition thumbnails Region of Definition ROD In Composite each image has a size and position within a 2D reference plane ...

Страница 896: ...visual sense of the abruptness of an edge It highlights the detail in an image or image sequence SMPTE Society of Motion Picture and Television Engineers A frame numbering system used for electronic editing and timing of video productions Each frame of video is assigned a number Timecode denotes the hours minutes seconds frames 00 00 00 00 elapsed on videotape There are two types of timecode drop ...

Страница 897: ...lack in the matte tracking Tracking allows the capture and storage of motion that s applied to a second element so that the two appear to be locked together Tracking of one two four or multiple features is possible using 1 point 2 point 4 point or multiple point tracking traveling matte A matte that changes position or shape over time See also matte external matte garbage matte and static matte X ...

Страница 898: ...886 ...

Страница 899: ...epth 410 Crop tool 410 Detect Edge tool 354 Drop Alpha tool 356 Edge tool 356 Extract Alpha tool 357 Fade tool 357 filtering tools 379 Flip tool 435 formatting tools 409 image generation tools 419 Invert Alpha tool 358 inverting alpha 358 Lens Blur tool 400 Linear Ramp tool 425 Math Ops tool 370 Median Alpha tool 358 Median tool 406 Noise tool 427 operators 352 563 Orient tool 436 Out of Range too...

Страница 900: ...stomizing layout 689 global and local time 690 keyframe 660 Player controls 667 time offsets 690 timeline Property Area 666 using expressions 733 Animation Editor 662 adding and deleting keyframes 683 animation 662 663 deleting keyframes 683 edit keyframe 682 move keyframe 682 Animation Editor feedback animation 664 Animation Timeline 661 accessing panel 661 Property Area 666 archive 104 changing ...

Страница 901: ...m cameras tab 279 transforming interactively 279 working with 274 catalogs Hotkey 163 CC Basics tool adjusting color balance 635 adjusting hue 634 color correcting shadows midtones highlights 631 color wheel 635 gain and offset 637 gamma 636 matching colors 638 quick gain 636 Rewire controls 631 suppressing colors 637 CC Basics tool color correcting 630 CC Histogram tool accessing 640 input slider...

Страница 902: ...color model 511 color palette creating 155 Color Picker 154 creating color palette 155 examining values 155 modifying color palette 155 reverting color palette 155 selecting from screen 155 selecting with pop up palette 155 switching color palettes 155 working with 155 Color Source tool 424 Color Space tool color correcting 645 color transformation language CTL tool 463 color transformations 463 C...

Страница 903: ...rping 485 CTL tool 463 cue marks adding 668 670 deleting 668 naming 668 670 setting 668 customized effects PXL tool 440 D database archive restore 104 default UDA tag 187 Degrain tool 504 fine tuning 505 profiles saving and loading 507 response curve 506 Deinterlace tool adaptive threshold 798 field dominance 796 field selection 797 spatial interpolation 800 temporal interpolation 800 video format...

Страница 904: ...s 722 Expresso calculator 161 comment 730 graph 729 738 set expression 733 738 Extract Alpha tool 357 extracting alpha 357 channels 362 key Diamond Keyer 514 key Luma Keyer 518 extrapolation 660 modifying 688 F Fade tool 357 file name extension on Linux 859 film grain adding 502 defined 501 removing 504 film look obtaining 501 filtering 417 filtering tools 379 Blur tool 385 defect matte viewing 38...

Страница 905: ...203 H hardware rendering 194 turn on off 205 highlights redefining with Ranges controls 643 histogram See CC Histogram 639 hold out matte 510 Hotkey resetting a Hotkey 167 resetting all Hotkey 167 Hotkey Editor about 163 164 accessing 166 Hotkey format 167 hotkeys 187 browsers 823 842 calculator 826 845 color picker 826 846 context menu 819 Creative workspace 824 843 Curve Editor 828 847 editing 8...

Страница 906: ...ting method 687 Invert Alpha tool 358 Invert tool accessing 649 inverting alpha 358 inverting an image with Invert tool 649 K Keyer super tool 522 about 522 features 523 inputs outputs 523 master keyer 526 node select 525 UI 525 workflow 524 keyframing adding and deleting 683 animation 660 composition browser example 679 cue marks setting 673 deleting keyframes 683 editing in Animation Editor 682 ...

Страница 907: ... Output controls 405 Lens Distort tool warping 487 lights about 241 add projector texture 273 adding 269 directional 270 omni 270 set spotlight attributes 270 setting basic properties 271 shadow properties 272 spotlight 270 working with 268 Linear Ramp tool 425 linear reference 628 linked compositions archive 106 linking composition 234 236 local time 690 Log and Delog tools accessing 627 Login Sc...

Страница 908: ...Player 211 use 212 Mirror tool warping 492 modifying blend 533 modulaiton blur 391 modulation blur Blur tool 391 Mono tool accessing 655 creating monochrome image with 655 morphing Warp 2D tool 478 Motio tool vectors 711 motion blur 398 Multi channel file import openexr file 133 multi stream compositing about 371 workflow 372 N negative film gamma 628 modifying with Log Delog trackball 629 648 net...

Страница 909: ...cedure 456 example script 456 fundamental types 456 gather operator 456 image processing algorithm categories 456 interface with Composite executable 462 numeric constants 456 operators 456 point operator 456 PXL tool 456 qualifiers 456 scatter operator 456 variable declarations 456 pixel expressions 463 about 439 CTL tool 463 PXL tool 440 pixel mask about 560 example 562 parameters 561 playback i...

Страница 910: ...7 set user 168 Premultiply tool 413 presets 140 To Library 77 presets tool 146 previewing video 172 processing images with Photo Lab 646 profile functions 751 project UDAs 176 projects definition 96 imported compositions into project folders 126 preferences 96 preferences set 97 Property Area Animation Timeline 666 published results about 224 snapshots 228 publishing compositions 83 publishing to ...

Страница 911: ...5 assign layer to source 248 axis 241 basic 3D compositing 242 basic compositing 243 basic compositing workflow 242 basic multilayer compositing 242 building composition using layer editor 243 camera 241 compositing workflow 242 concepts 240 creating sources and layers 248 layer 241 Layer editor setting the background automatically 246 light 241 material 241 objects 240 Player display settings 244...

Страница 912: ... publishing 228 setting as current 230 retrieving and storing pixel aspect ratio information 118 rewiring RGB channels 631 RGB color model 511 RGB channels rewiring with CC Basics 631 Ripple tool warping 494 ROD region of definition 194 ROI region of interest setting in Player 194 202 rounding functions 750 S saturation 511 adjusting with CC Basics 634 Schematic Reaction setting the background aut...

Страница 913: ...Alpha 585 parts of an image revealing 586 region of an image cloning 589 straight line drawing 585 undoing operations 568 using stencils 592 super tool Reaction 240 super tools 2D Compositor 339 Garbage Mask 538 Keyer 522 Paint 567 Tracker 754 supported media formats 116 suppressing colors with CC Basics 637 suppressing spill 533 surfaces about 241 bilinear 254 modifying 254 working with 254 Switc...

Страница 914: ...ar Ramp 425 Math Ops 370 Median Alpha 358 Median tool 406 Noise 427 Orient 436 Out of Range 362 Panner tool 437 Pick List 141 Premultiply tool 413 Radial Ramp 426 Remap Alpha 358 Remove Dust tool 380 Resize tool 415 Set Alpha tool 360 Sharpen tool 408 Slate 429 transform tools 431 Unpremultiply tool 414 Unsharp Mask tool 408 Tracker changing color 768 how it works 769 position 770 stabilizing 783 ...

Страница 915: ...ing UDAs 181 utilities about 805 Comparison tool 806 Notes tool 812 Pass Through tool 813 Switcher tool 814 V vector functions 748 Vector motion blur with alpha 398 vectors computing within a composition 714 Motio tool 711 Show vectors 716 vectors blur 395 Blur tool 395 video preview 172 video tools about 795 Deinterlace tool 795 Interlace tool 801 Pulldown tool 802 view layouts four zoom and pan ...

Страница 916: ...4 Mirror 484 Pinch 484 Polar 484 Ripple 484 Twirl 484 Warp 2D 467 Wave 484 Wave tool warping 496 Wiretap IFFFS libraries on the network 111 network assessing IFFFS libraries 111 workflow 3D 242 administrative tasks 97 basic multilayer 242 compositing 242 keying 512 workflows export 126 import 126 tools 126 workspace other workspace functions 187 presets 140 task groups 140 146 tool presets 146 X X...

Отзывы: