310
Chapter 9
Setting/Using Control and Management Functions
Managing Files
NOTE
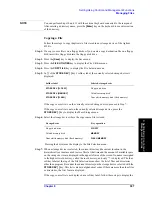
You can perform Steps 11 and 12 with the external keyboard connected to the rear panel.
After entering the filename, press the
[Enter]
key on the keyboard to execute the save.
The same extension as that of the copy source is automatically added to the filename of the
copy destination file.
Deleting a File or Directory
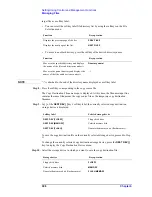
Follow these steps to delete a file or directory on a storage device of the Agilent 4294A.
Step 1.
To delete a file or directory on a floppy disk, insert it into the floppy disk drive.
Step 2.
Press the
[Save]
key to display the Save menu.
Step 3.
Press the
FILE UTILITIES
key to display the File Utilities menu.
Step 4.
In [ ] of the
STORE DEV [ ]
key's softkey label, the currently selected storage device is
displayed.
To delete a file or directory on the currently selected storage device, proceed to Step 6.
To delete a file or directory on a storage device other than the currently selected one, press
the
STORE DEV [ ]
key to display the Mass Storage menu.
Step 5.
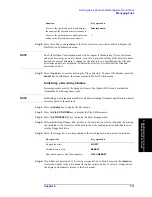
Select the storage device from which you want to delete a file or directory.
Pressing one of the above keys returns the display to the File Utilities menu.
Step 6.
Press the
PURGE FILE
key to display the File Selection menu.
Step 7.
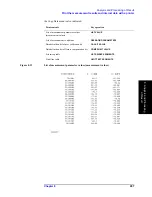
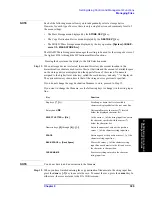
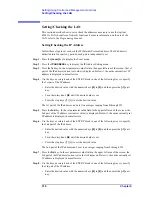
Use the following softkeys to display the file or directory you want to delete as a softkey
label.
Softkey label
Selected storage device
STORE DEV [FLOPPY]
Floppy disk drive
STORE DEV [MEMORY]
Volatile memory disk
STORE DEV [FLASH]
Nonvolatile memory disk (flash memory)
Storage device
Key operation
Floppy disk drive
FLOPPY
Volatile memory disk
MEMORY
Nonvolatile memory disk (flash memory)
FLASH MEMORY
Function
Key operation
Displays the previous page of the file/directory
list.
PREV FILES
Displays the next page of the file/directory list.
NEXT FILES
Содержание 4294A
Страница 1: ......
Страница 2: ......
Страница 4: ......
Страница 5: ......
Страница 6: ......
Страница 8: ......
Страница 16: ...8 ...
Страница 30: ...22 Chapter1 Installation Power Cable Figure 1 2 Alternative Power Cable Options ...
Страница 70: ...62 Chapter3 Front Rear Panel and LCD Display Items Displayed on the LCD ...
Страница 100: ...92 Chapter5 Setting Measurement Conditions Setting Sweep Range Figure 5 7 After MKR CENTER Figure 5 8 ...
Страница 101: ...Chapter 5 93 Setting Measurement Conditions Setting Sweep Range 5 Setting Measurement Conditions Figure 5 9 ...
Страница 106: ...98 Chapter5 Setting Measurement Conditions Setting Number of Points NOP Figure 5 13 Number of points 801 ...
Страница 330: ...322 Chapter9 Setting Using Control and Management Functions Performing Self Diagnosis of the Agilent 4294A ...
Страница 436: ...428 AppendixB Key Definitions Softkeys displayed by pressing the Recall key ...
Страница 454: ...446 AppendixC Error messages WRONG I O PORT DIRECTION ...
Страница 462: ...454 AppendixD Initial Settings Initial Settings Settings that can be Saved Recalled Settings that can be Backed Up ...
Страница 468: ......


