Chapter 8
271
Analysis and Processing of Result
Save and Recall the Agilent 4294A Internal Data
8. A
nal
ys
is
a
nd P
roc
es
si
ng
of
Res
ult
NOTE
Before saving the calibration data (user calibration data array, fixture compensation data
array) with the STATE save, you must turn on (enable) each calibration function. For how
to turn on the user calibration functions, refer to “Turning User Calibration On/Off” on
page 148. For how to turn on the fixture compensation function, refer to “Turning the
fixture compensation on or off” on page 153.
Before saving the memory array or memory trace array with the STATE save or the DATA
save, you must save the data into the memory array and memory trace array with the
DATA
®
MEMORY
key. For more information on using the
DATA
®
MEMORY
key to save data
into the memory array and memory trace array, refer to “Trace-based Comparison and
Calculation” on page 179.
For the each saving step, see “Save the setting state, calibration data and memory array
(State Save)” on page 271, “Save the calibration data and trace data (Data Save)” on page
273, and “Saving display screen (GRAPHICS save)” on page 288.
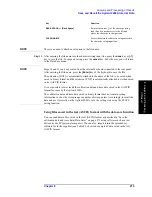
Save the setting state, calibration data and memory array (State Save)
The following steps are used to save the setting state, calibration data (user calibration data
and graphic compensation data), and memory array (memory data before being sent to the
memory trace through measurement parameter conversion) except for the Agilent 4294A
adapter setup data:
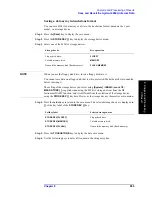
Step 1.
Press the
[Save]
key to display the save menu.
Step 2.
Press the
STORE DEV [ ]
key to display the storage device menu.
Step 3.
Select the Agilent 4294A storage device.
Trace data
Data array (measurement data before
data trace storage)
on/off
Memory array (measurement data
before data trace storage)
Ö
on/off
Data trace array
on/off
Memory trace array
on/off
Graphics
Surface screen at the time of saving
Ö
1.
Ö
: always saving, on/off: saving on/off selection possible
2. The adapter setup data will not be lost even if you turn off the power or execute presetting with the
[Preset]
key.
The adapter setup data is maintained for each adapter selection. For how to set up adapters (adapter selection and
adapter setup), refer to “Adapter Setting” on page 67.
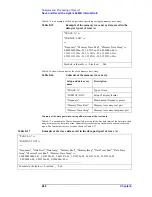
Table 8-4
Agilent
4294A internal data and saving methods
Agilent
4294A internal data
Saving method and saved contents
1
State save
Data save
Graphics save
Storage device
Key operation
Floppy disk drive
FLOPPY
Volatile memory disk
MEMORY
Содержание 4294A
Страница 1: ......
Страница 2: ......
Страница 4: ......
Страница 5: ......
Страница 6: ......
Страница 8: ......
Страница 16: ...8 ...
Страница 30: ...22 Chapter1 Installation Power Cable Figure 1 2 Alternative Power Cable Options ...
Страница 70: ...62 Chapter3 Front Rear Panel and LCD Display Items Displayed on the LCD ...
Страница 100: ...92 Chapter5 Setting Measurement Conditions Setting Sweep Range Figure 5 7 After MKR CENTER Figure 5 8 ...
Страница 101: ...Chapter 5 93 Setting Measurement Conditions Setting Sweep Range 5 Setting Measurement Conditions Figure 5 9 ...
Страница 106: ...98 Chapter5 Setting Measurement Conditions Setting Number of Points NOP Figure 5 13 Number of points 801 ...
Страница 330: ...322 Chapter9 Setting Using Control and Management Functions Performing Self Diagnosis of the Agilent 4294A ...
Страница 436: ...428 AppendixB Key Definitions Softkeys displayed by pressing the Recall key ...
Страница 454: ...446 AppendixC Error messages WRONG I O PORT DIRECTION ...
Страница 462: ...454 AppendixD Initial Settings Initial Settings Settings that can be Saved Recalled Settings that can be Backed Up ...
Страница 468: ......


