166
Chapter 7
Setting Up the Display of Measurement Results
Manual Scale Setting (for measurements other than COMPLEX Z-Y)
Manual Scale Setting (for measurements other than
COMPLEX Z-Y)
This section describes how to manually scale the active trace for a Cartesian-coordinate
graph. Note that these procedures do not apply when the Agilent 4294A is configured to
perform a COMPLEX Z-Y measurement (complex impedance for Trace A, complex
admittance for Trace B).
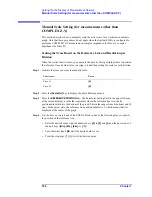
Scaling the Trace Based on the Reference Line and Resolution per
Division
When the vertical axis is linear, you can scale the trace by first specifying where to position
the reference line and what value to assign to it and then setting the scale for each division.
Step 1.
Activate the trace you want to manually scale.
Step 2.
Press the
[Scale Ref]
key to display the Scale Reference menu.
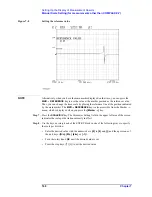
Step 3.
Press the
REFERENCE POSITION
key. The Parameter Setting field in the upper left area
of the screen displays a value that represents where the reference line is currently
positioned in relation to the bottom of the graph. This value ranges from 0 (bottom) and 10
(top). In the preset state, the reference line position defaults to 5, which means that it is
displayed at the center of the graph.
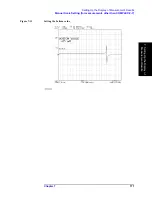
Step 4.
Use the keys or rotary knob of the ENTRY block in one of the following ways to specify
the position of the reference line.
•
Enter the desired value with the numeric keys (
[0]
to
[9]
and
[.]
) and then press one of
the unit keys (
[G/n]
,
[M/
m
]
,
[k/m]
, or
[
´
1]
).
•
Turn the rotary knob (
m
m
m
m
) until the desired value is set.
•
Press the step keys ([
][
¯
]) to set the desired value.
To activate:
Press:
Trace A
[A]
Trace B
[B]
Содержание 4294A
Страница 1: ......
Страница 2: ......
Страница 4: ......
Страница 5: ......
Страница 6: ......
Страница 8: ......
Страница 16: ...8 ...
Страница 30: ...22 Chapter1 Installation Power Cable Figure 1 2 Alternative Power Cable Options ...
Страница 70: ...62 Chapter3 Front Rear Panel and LCD Display Items Displayed on the LCD ...
Страница 100: ...92 Chapter5 Setting Measurement Conditions Setting Sweep Range Figure 5 7 After MKR CENTER Figure 5 8 ...
Страница 101: ...Chapter 5 93 Setting Measurement Conditions Setting Sweep Range 5 Setting Measurement Conditions Figure 5 9 ...
Страница 106: ...98 Chapter5 Setting Measurement Conditions Setting Number of Points NOP Figure 5 13 Number of points 801 ...
Страница 330: ...322 Chapter9 Setting Using Control and Management Functions Performing Self Diagnosis of the Agilent 4294A ...
Страница 436: ...428 AppendixB Key Definitions Softkeys displayed by pressing the Recall key ...
Страница 454: ...446 AppendixC Error messages WRONG I O PORT DIRECTION ...
Страница 462: ...454 AppendixD Initial Settings Initial Settings Settings that can be Saved Recalled Settings that can be Backed Up ...
Страница 468: ......


