GETTING TO KNOW YOUR DOCUCOLOR 12
2–16
DOCUCOLOR 12 USER GUIDE
2
3
4
5
6
7
2
Paper Trays and Paper Path
Paper Trays
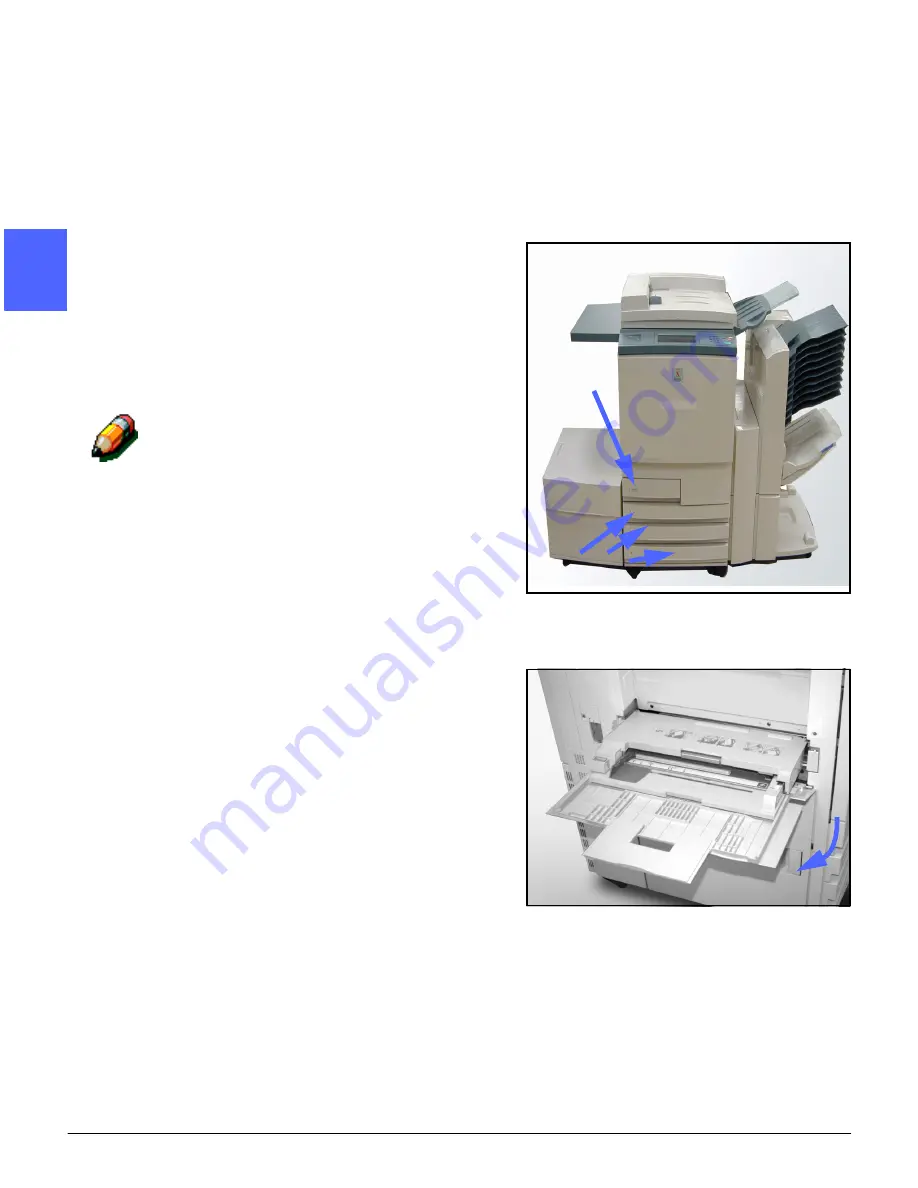
Paper Trays 1, 2, 3, and 4 are located at the lower
front of the copier/printer, as illustrated in Figure
14. Paper Tray 5 is on the left of the copier/printer,
as illustrated in Figure 14 and Figure 15.
Paper Tray 1 can accommodate 8.5 x 11 inch, A4,
A5, or B5 paper.
Paper Trays 2, 3, and 4 can accommodate an
assortment of standard paper sizes, from 8 x 10
inch through 11 x 17 inch, and A3 through B5.
NOTE: Paper Trays 2, 3, and 4 can also
accommodate 12 x 18 inch paper through a
special, optional tray setup procedure performed
by a Xerox service representative. If you are
interested in this option, contact your Xerox
service representative.
Paper Tray 5 (sometimes called the Bypass Tray
or Multiple Sheet Inserter) is located on the left
side of the copier/printer. Tray 5 can
accommodate non-standard paper sizes up to
12 x 18 inches or 12.6 x 17.7 inches (SRA3). Tray
5 can also accommodate special materials such
as transparencies and heavy weight paper.
Figure 14: Paper Trays
Figure 15: Paper Tray 5
Tray 1
Trays 2, 3, 4
5
Summary of Contents for DOCUCOLOR 12
Page 1: ...DOCUCOLOR 12 COPIER PRINTER USER GUIDE ...
Page 26: ...CONTENTS XXVI DOCUCOLOR 12 USER GUIDE 1 2 3 4 5 6 7 ...
Page 130: ...ADDED FEATURES 5 32 DOCUCOLOR 12 USER GUIDE 2 3 4 5 6 7 5 ...
Page 156: ...IMAGE QUALITY 6 26 DOCUCOLOR 12 USER GUIDE 2 3 4 5 6 7 6 ...
Page 186: ...OUTPUT FORMATS 7 30 DOCUCOLOR 12 USER GUIDE 2 3 4 5 6 7 7 ...
Page 192: ...JOB ASSEMBLY 8 6 DOCUCOLOR 12 USER GUIDE 2 3 4 5 6 7 8 ...
Page 230: ...SORTER MAILBOX 11 8 DOCUCOLOR 12 USER GUIDE 2 3 4 5 6 7 11 ...
Page 270: ...PROBLEM SOLVING 13 26 DOCUCOLOR 12 USER GUIDE 2 3 4 5 6 7 13 ...
Page 284: ...TECHNICAL INFORMATION 14 14 DOCUCOLOR 12 USER GUIDE 2 3 4 5 6 7 14 ...
Page 291: ......


