DOCUCOLOR 12 USER GUIDE
13–11
PROBLEM SOLVING
1
3
4
5
6
7
13
Paper jam inside Paper Tray 5
1
Use the message that displays on the Touch
Screen to locate the paper jam.
2
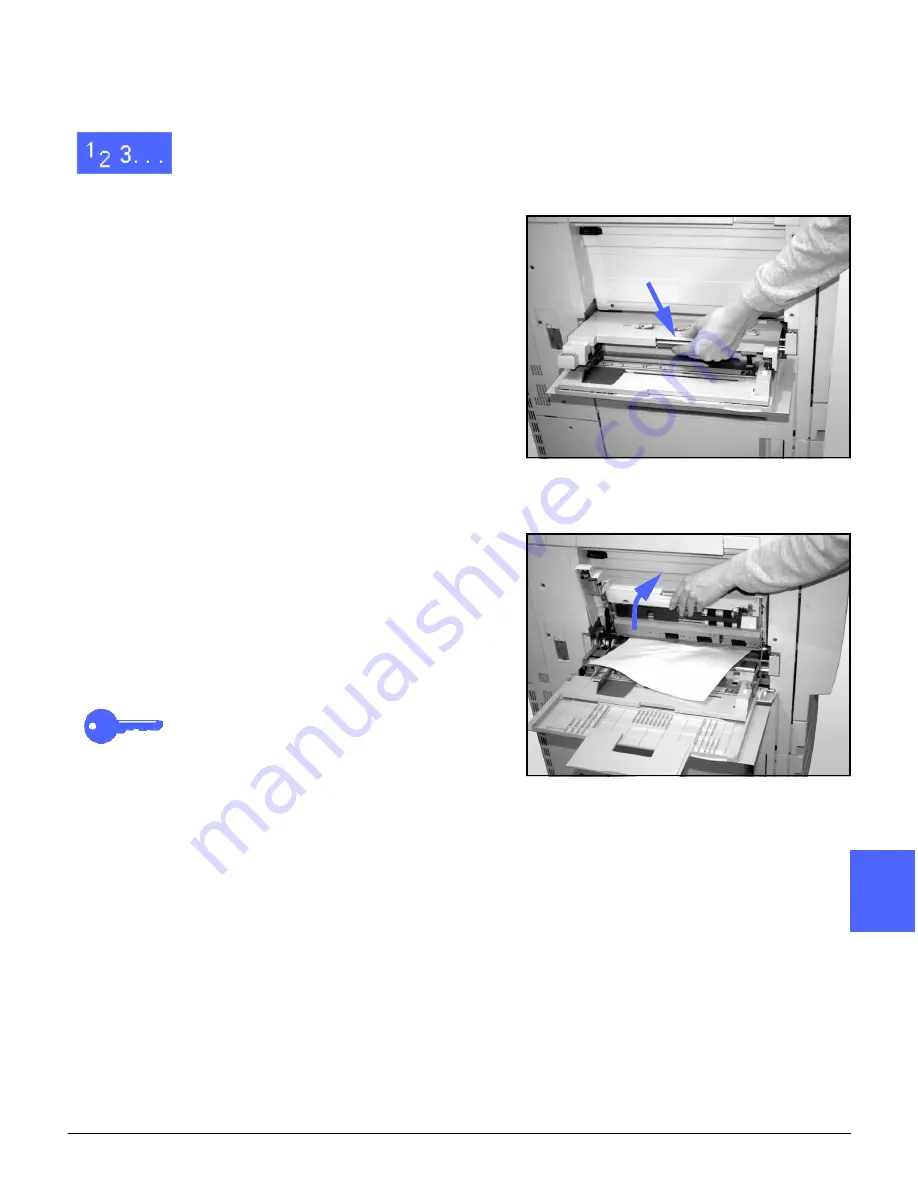
If necessary, grasp the center top handle and
raise the top of Paper Tray 5 toward the copier/
printer to access the jam, as illustrated in Figure
16 and Figure 17.
3
Remove all of the visible jammed paper, including
any partially fed sheets.
If you cannot grasp all of the jammed paper at the
entrance of Paper Tray 5, open the Front Door
and follow the procedure, “Paper jam behind the
Front Door.”
After you have cleared all of the paper jams, grasp
the center top handle and lower the top of Paper
Tray 5. Readjust the paper stack and the paper
guide in Paper Tray 5.
KEY POINT:
•
Move the edge guide so it lightly touches the
paper stack. Adjust the edge guide each time
you load paper into Paper Tray 5.
•
If Paper Tray 5 is not fully extended, paper
jams or misregistration may occur.
Figure 16: Grasping the top of Paper Tray 5
Figure 17: Lifting the top of Paper Tray 5
Center top handle
Summary of Contents for DOCUCOLOR 12
Page 1: ...DOCUCOLOR 12 COPIER PRINTER USER GUIDE ...
Page 26: ...CONTENTS XXVI DOCUCOLOR 12 USER GUIDE 1 2 3 4 5 6 7 ...
Page 130: ...ADDED FEATURES 5 32 DOCUCOLOR 12 USER GUIDE 2 3 4 5 6 7 5 ...
Page 156: ...IMAGE QUALITY 6 26 DOCUCOLOR 12 USER GUIDE 2 3 4 5 6 7 6 ...
Page 186: ...OUTPUT FORMATS 7 30 DOCUCOLOR 12 USER GUIDE 2 3 4 5 6 7 7 ...
Page 192: ...JOB ASSEMBLY 8 6 DOCUCOLOR 12 USER GUIDE 2 3 4 5 6 7 8 ...
Page 230: ...SORTER MAILBOX 11 8 DOCUCOLOR 12 USER GUIDE 2 3 4 5 6 7 11 ...
Page 270: ...PROBLEM SOLVING 13 26 DOCUCOLOR 12 USER GUIDE 2 3 4 5 6 7 13 ...
Page 284: ...TECHNICAL INFORMATION 14 14 DOCUCOLOR 12 USER GUIDE 2 3 4 5 6 7 14 ...
Page 291: ......


