


ADDED FEATURES
5–30
DOCUCOLOR 12 USER GUIDE
2
3
4
5
6
7
5
1
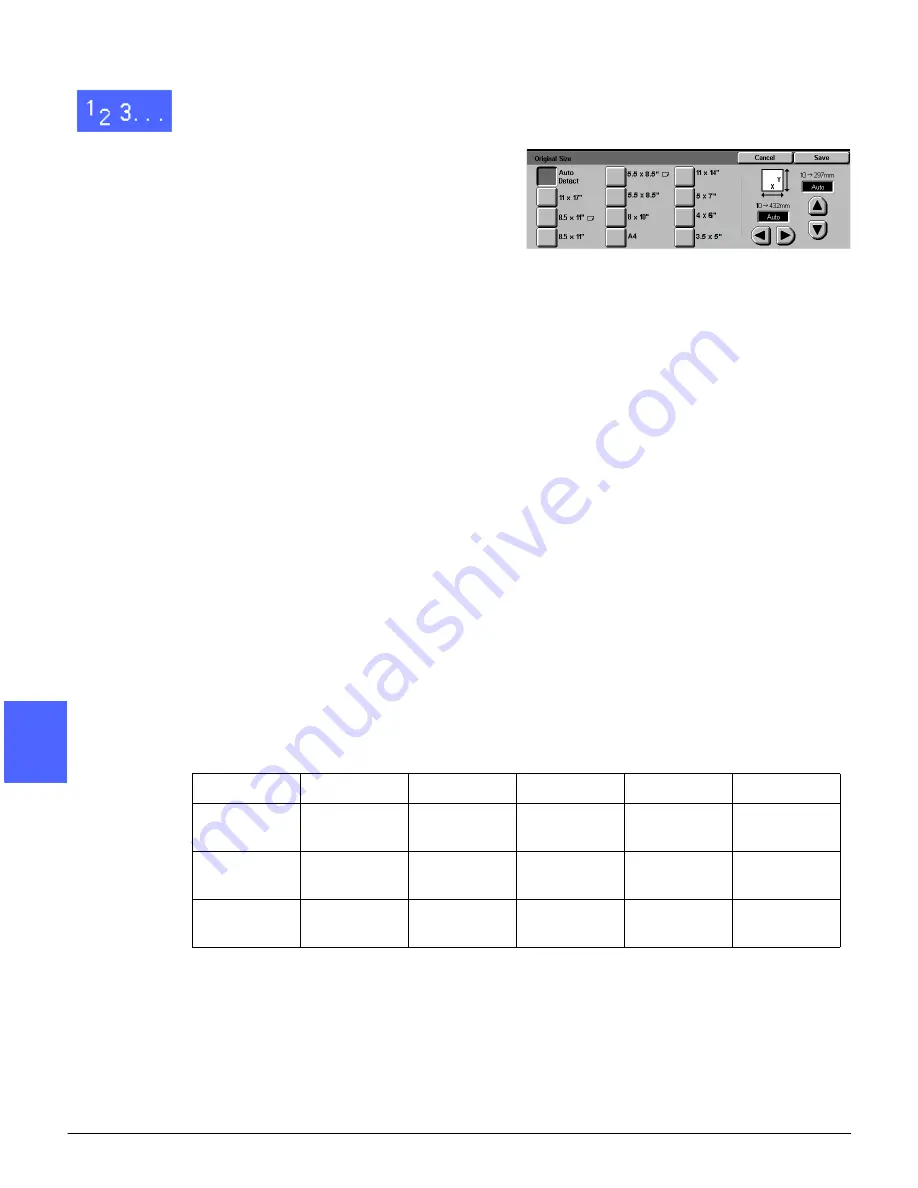
At the Added Features tab, select the Original
Size icon to display the Original Size screen, as
illustrated in Figure 32.
2
Perform one of the following:
•
Touch the Auto Detect option (default) to
have the copier/printer identify the size of the
original document.
•
Touch the appropriate size for the original
document.
•
For non-standard sizes, enter the width (X)
and length (Y) dimensions of your original
document in millimeters.
–
For the X dimension, touch the right
arrow to increase the value or the left
arrow to decrease the value. Appropriate
X dimensions range from 10 to 432 mm.
–
For the Y dimension, touch the up arrow
to increase the value or the down arrow
to decrease the value. Appropriate Y
dimensions range from 10 to 297 mm.
Notice that the values in the boxes increase or
decrease according to your selections.
3
Touch Save to return to the Added Features tab.
Table 1: Original Size Presets
Inches
International
11 x 17
5.5 x 8.5 LEF
4 x 6
A3
B4
B6
8.5 x 11 LEF
8 x 10
3.5 x 5
A4 Land-
scape
A4
A6
8.5 x 11 SEF
11 x 14
B5 Land-
scape
B5
5.5 x 8.5
SEF
5 x 7
A5 Land-
scape
A5
Figure 32: Original Size screen
Summary of Contents for DOCUCOLOR 12
Page 1: ...DOCUCOLOR 12 COPIER PRINTER USER GUIDE ...
Page 26: ...CONTENTS XXVI DOCUCOLOR 12 USER GUIDE 1 2 3 4 5 6 7 ...
Page 130: ...ADDED FEATURES 5 32 DOCUCOLOR 12 USER GUIDE 2 3 4 5 6 7 5 ...
Page 156: ...IMAGE QUALITY 6 26 DOCUCOLOR 12 USER GUIDE 2 3 4 5 6 7 6 ...
Page 186: ...OUTPUT FORMATS 7 30 DOCUCOLOR 12 USER GUIDE 2 3 4 5 6 7 7 ...
Page 192: ...JOB ASSEMBLY 8 6 DOCUCOLOR 12 USER GUIDE 2 3 4 5 6 7 8 ...
Page 230: ...SORTER MAILBOX 11 8 DOCUCOLOR 12 USER GUIDE 2 3 4 5 6 7 11 ...
Page 270: ...PROBLEM SOLVING 13 26 DOCUCOLOR 12 USER GUIDE 2 3 4 5 6 7 13 ...
Page 284: ...TECHNICAL INFORMATION 14 14 DOCUCOLOR 12 USER GUIDE 2 3 4 5 6 7 14 ...
Page 291: ......


