2000 MS Hardware Maintenance
90
Mass Spectrometer Maintenance
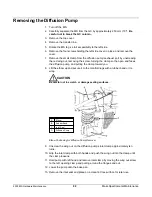
24. Reinstall the clamp by pushing it onto the joined exhaust flanges.
25. Rotate the clamp 180° and install the screw from the left side.
26. Thread the wing nut onto the screw.
27. Rotate the clamp as far to the left as possible, while still allowing room to turn the
wing nut. Otherwise, the wing nut will prevent reinstallation of the side panel.
28. Tighten the wing nut.
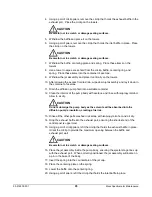
29. Refit the vacuum tubing to the elbow and tighten the clamp.
30. Insert the pneumatics exhaust tube into the elbow until the O-ring seats. Screw
plastic nut in place using fingers.
31. Reconnect the thermocouple gauge cable to the thermocouple gauge.
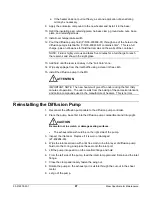
32. Push the Peltier baffle duct base over the heat sink and onto the rear panel.
Fasten in place using the two screws through the rear panel.
33. Reconnect the Peltier baffle leads to the Peltier baffle.
The pins and sockets
are differentiated by size.
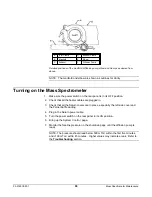
34. Refit the Peltier baffle ducting by inserting the tabs into the rear panel and
pushing the front of the duct down onto the front post.
35. Refit the left side cover and fasten in place with the four screws and two spacers.
36. Bring the MS alongside the GC and refit the transfer line.
37. Reconnect the manifold and trap heater cables.
38. Refit the top cover.
39. Carefully slide the MS up to the GC.
40. Close the vent valve by lowering the vent valve lever.
41. Turn on the MS.
Replacing the Diffusion Pump Peltier Baffle
The Peltier baffle is a sealed unit that must not be taken apart for cleaning or
repair. If the thermoelectric cooling element fails, the whole baffle assembly
must be replaced. A failed TEC will be detected by the diffusion pump controller
and a system shutdown will be initiated. To replace the Peltier baffle:
1. Turn off the MS, if it has not already been shutdown.
2. Carefully separate the MS from the GC by approximately 250 mm (10"). Be
careful not to break the GC column.
3. Remove the top cover.
4. Disconnect and remove the transfer line, manifold, and trap heater cables.
5. Remove the Peltier baffle ducting by pulling up at the front and sliding
forward.
6. Disconnect the Peltier baffle power leads (orange and yellow wires) from the
Peltier baffle and slide out of the way.
7. Unscrew the front pillar and use a 5/16" socket to remove the rear retaining
nuts holding the Peltier baffle in place.
8. Lift and remove the Peltier baffle.


