03-914978-00:1
127
GC Maintenance
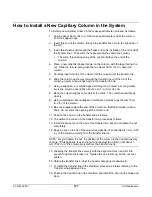
How to Install a New Capillary Column in the System
To install a new capillary column in the mass spectrometer, proceed as follows:
1. Unwind about 60 cm (24 in.) of the mass spectrometer end of the column
from the support cage.
2. Insert this end of the column through the transfer line hole in the right side of
the GC.
3. Insert the column end through the brass nut (to be installed on the GC end of
the transfer line). Then slide the nut several inches down the column.
•
The wide, threaded opening of the nut should face the end of the
column.
4. Place a new graphite/Vespel ferrule on the column, with the taper facing the
nut. Slide the ferrule, along with the nut, about 30 cm (12 in.) down the
column.
5. Carefully insert the tip of the column into the nose end of the transfer line.
6. Slide the column all the way through the transfer line until the tip of the
column projects a few inches beyond the transfer line tip.
7. Using a sapphire-, or carbide-tipped scribing tool or ceramic scoring wafer,
score the column once lightly about 2 cm (1 in.) from its end.
8. Bend the column slightly to break it at the mark. The column should break
cleanly.
9. Using
a
Kimwipe
tissue dipped in methanol, carefully wipe the last 15 cm
(6.0 in.) of the column.
10. Be sure to wipe toward the end of the column so that the Kimwipe
tissue
fibers do not enter the opening at the column end.
11. Position the column in the transfer line as follows.
12. To position the column in the transfer line, proceed as follows:
13. Install the brass nut on the end of the transfer line, but do not tighten the nut
completely.
14. Keep an eye on the tip of the column and position it so that about 1 mm (1/32
in.) of the column projects from the transfer line tip.
NOTE: As you tighten the nut, the position of the column in the transfer line may
change. If this happens, loosen the nut and readjust the column until about 1
mm (1/32 in.) of the column projects from the transfer line tip.
15. Grasping the transfer line securely with the alignment tool, use a 5/16-in.
wrench to tighten the brass nut. Tighten the nut until snug, but do not over
tighten.
16. Rotate the transfer line so that the heater cable projects downward.
17. To install the transfer line in the manifold, proceed as follows referring to the
Transfer Line Exploded View.
18. Position the transfer line in the manifold, and install the clip into the holes and
slots.


