Rostock MAX v2 Assembly Guide – 4thEd.
A quick note about the PEEK fan wiring. The firmware used on the RAMBo is configured to
use a single hot end. Because of this, the
Heat 1
terminal block position will automatically turn on the
PEEK fan when the hot end is first heated and will automatically turn off when the hot end temperature
falls below 50C. At some point in the future, you may want to install a second hot end. If you do this,
you'll need to modify the firmware so you can use the
Heat 1
output for a hot end and the
Fan 1
output
for one or more PEEK fans.
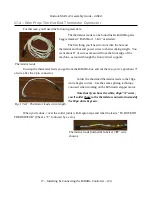
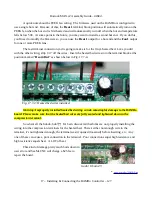
The last terminal connection you're going to make is for the Onyx heated bed. Like you did
with the other wiring, strip 1/4” off the wires. Insert the heated bed wires into the terminal block at the
position marked “
Heat2-Bed
” as shown below in Fig. 17.7-4.
Warning: Improperly installed heated bed wiring can do catastrophic damage to the RAMBo
board. Please make sure that the heated bed wires are fully seated and tightened down in the
compression terminal.
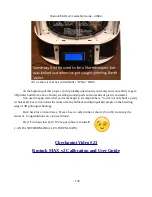
So what's all the hubub, bub?[*] It's been discovered that folks are not properly installing the
wiring into the compression terminals for the heated bed. There's either not enough wire in the
terminal, it's not tightened enough, the terminal wasn't opened (loosened) before inserting, etc. Any
one of these can cause a poor connection to the terminal. Poor connections equal high resistance and
high resistance equals heat. A LOT of heat.
This kind of damage pretty much boils down to
user error and SeeMeCNC will charge a $25 fee to
repair the board.
*
https://youtu.be/71NbODPietg
17 – Installing & Connecting the RAMBo Controller – 127
Fig. 17.7-4: Heated bed wires installed.
Gaah! It burns!!!


