Pakscan IIE System Manual
76 of 132
Publication S177E V2.0 Issue 03/05
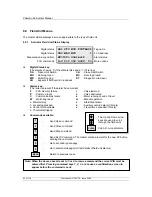
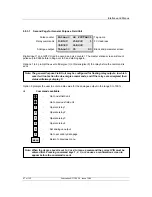
To set the loop parameters, start from the Top Setup Menu (as shown in section 8.8.1). If the Ports
have just been set then this is the screen displayed.
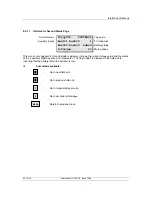
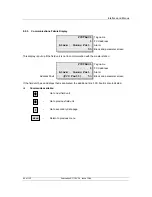
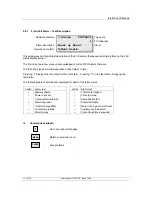
Press '3' to select Loop Options. The screen revealed is as shown in section 8.8.4.
Press '2' to step around the available baud rates, when the correct one is revealed leave it there.
Press '3' to set the number of the highest address for the connected field units on the loop. Enter the
number of the highest address with the keypad numbers and press 'Load' to confirm the setting. The
Master Station will then only poll around field units up to and including this address number. Note that
if the Master Station is a 60 channel unit it cannot have the highest address set above 60, likewise for
a 120 or 180 channel master station.
Press '4' to toggle between Baud Rate Doubling 'On' or 'Off'. Most systems will probably want to be
run with doubling on, as this improves the speed of communication on the loop by a factor of 2.
However whilst commissioning the system it may be better to start with this option set to 'Off'. It can
always be change to 'On' once the loop is successfully operating. Take care when upgrading from an
older Pakscan II system as the baud rate doubling function will only operate successfully if all the field
units are also upgraded to Pakscan IIE standards.
Once these three parameters are set they will only become active when this screen is left by pressing
'MENU'. This returns to the Top Setup screen shown in 8.8.1.
9.4 Tag
Names
It is possible to insert a tag name for every field unit, and also for the master station itself. Tag
numbers help maintenance in checking that they have the right MOV. Tag names can also be set
using the MasterTools PC based utility connected to the serial port, or by the Pakscan Ethernet Web
browser utility.
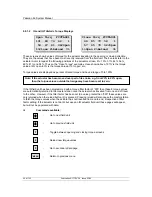
Option '5' on the screen shown in section 8.8.1 selects the Tag Name Setting screen (as shown in
section 8.8.6).
By pressing buttons '1', '2', or '3' you can select which field to edit. To select a different field unit
address, simply use the 'Up' or 'Down' arrow keys. Section 8.6.5 explains how to select the letters and
characters for a tag name.
9.5 Date and Time
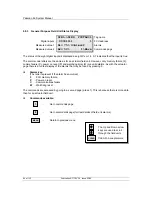
From the 'Top Setup Menu' as shown in section 8.8.1, select option '6' to enter the 'Date and Time
Setup'.
The screen revealed is as shown in section 8.8.7. Pressing buttons '1' or '2' allows the date and time
settings to be modified. In most cases the clock will have been set to U.K. or U.S. time prior to
shipment. If daylight saving time changes are in use in your territory then the clock will need altering
when this local time change occurs. The clock is used for time stamping messages from the Pakscan
Ethernet alarm e-mail system.

