6–58
Replacement Procedures
Tractors
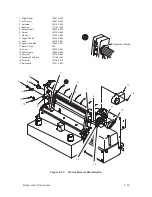
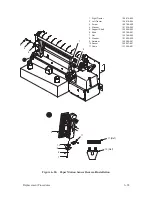
(Figure 6–19)
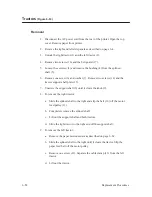
Removal
1. Disconnect the AC power cord from the rear of the printer. Open the top
cover. Remove paper from printer.
2. Remove the right and left side panels as described on page 6–4.
3. Unlock the right tractor (1) and the left tractor (2).
4. Remove two screws (16) and the belt guard (17).
5. Loosen the setscrew (3) and remove the bushing (4) from the splined
shaft (5).
6. Remove one screw (6) and washer (7). Remove two screws (14) and the
tractor support shaft plate (15).
7. Unscrew the support shaft (8) until it clears the knob (9).
8. To remove the right tractor:
a.
Slide the splined shaft to the right and slip the belt (10) off the motor
feed pulley (11).
b. Completely remove the splined shaft.
c.
Lift out the support shaft and both tractors.
d. Slide the right tractor to the right and off the support shaft.
9. To remove the left tractor:
a.
Remove the paper motion sensor as described on page 6–62.
b. Slide the splined shaft to the right until it clears the tractor. Slip the
paper feed belt off the motor pulley.
c.
Remove one screw (12). Separate the cable clamp (13) from the left
tractor.
d. Lift out the tractor.
Summary of Contents for P9012
Page 1: ...P N 132305 001 Rev E P9012 Multifunction Line Printer...
Page 49: ...2 31 Principles of Operation Power Supply PCBAs 1 3 SHORT OPEN Figure 2 21 Power Supply PCBA...
Page 58: ...2 40 Principles of Operation...
Page 84: ...4 18 Troubleshooting...
Page 118: ...5 34 Alignments and Adjustments...
Page 203: ...6 85 Replacement Procedures This page intentionally left blank...
Page 214: ...6 96 Replacement Procedures...
Page 236: ...A 22 Power Paper Stacker Maintenance...
Page 246: ...D 2 Torque Table...
Page 254: ...Index 6...
Page 255: ......
Page 256: ...132305 001 Rev E...


