Upgrading Your Server 9-23
Optional RAID Controller (N8103-116/117/118)
Your server can include the optional RAID Controller (N8103-116/117/118). The optional RAID
Controller can control the internal hard disk drives as the RAID System. To use the hard disk drives
in a RAID System, reconnect the hard disk drive interface cable on the mother board.
At the factory, the interface cable is connected to the SATA connector on the mother board.
Refer to the manual coming with optional RAID Controller (N8103-116/117/118) for details.
IMPORTANT:
The RAID Controller board is extremely sensitive to
static electricity. Make sure to touch the metal frame of the server to
discharge static electricity from your body before handling the RAID
Controller. Do not touch the RAID Controller terminals or on-board
parts by a bare hand or place the RAID Controller directly on the desk.
For static notes, see the section "Anti-static Measures" described earlier.
NOTE:
Before installing an optional RAID Controller, run the SETUP
utility, select [Advanced]
→
[PCI Configuration], and confirm that
[Enabled] is set for the parameter [PCI Slot xx ROM] (xx: PCI slot
number).
Installation
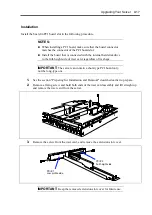
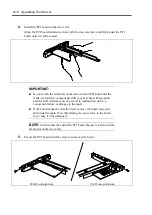
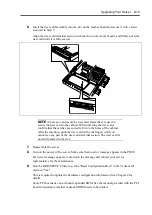
See "PCI Board" in this chapter and manual that comes with the optional RAID Controller for the
installation of a RAID Controller (N8103-116/117/118).
IMPORTANT:
When the RAID Controller is connected, the boot
priority specified in BIOS SETUP utility must be eighth or younger. If
specified ninth or later, the configuration menu of RAID Controller will
fail to start.
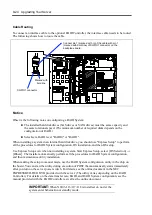
Setting of Jumper Switch
To use the optional RAID Controller (N8103-116/117/118), you need to change jumper switch
setting on the backplane board.
Removal
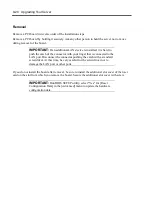
Remove the optional RAID Controller in reverse order of the installation steps.
Summary of Contents for N8100-14522F
Page 16: ...x This page is intentionally left blank...
Page 122: ...4 54 Configuring Your Server This page is intentionally left blank...
Page 178: ...6 22 Installing and Using Utilities This page is intentionally left blank...
Page 190: ...7 12 Maintenance This page is intentionally left blank...
Page 254: ...A 2 Specifications This page is intentionally left blank...
Page 262: ...C 2 IRQ This page is intentionally left blank...
Page 316: ...F 2 Using a Client Computer Which Has a CD Drive This page is intentionally left blank...
Page 320: ...G 4 Product Configuration Record Table This page is intentionally left blank...

