System Product Guide
5-15
To install SIMMs, do the following procedure:
1. Observe the precautions in “Before You Begin.”
2. Turn off all peripheral devices connected to the system.
3. Turn off the system.
4. Remove any full-length add-in boards or other components as needed to
gain access to the sockets (see Chapter for assembly procedures and
precautions).
5. Holding the SIMM only by the edges, remove it from its antistatic
package. A SIMM has a small notch in the middle of the bottom edge
that mates with a raised bump in the SIMM socket. There is also a notch
at one side of the module.
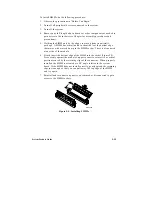
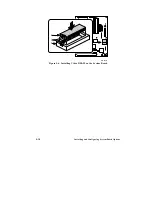
6. Firmly insert the bottom edge of the SIMM into the socket (Figure 5-5).
Press evenly against the module’s upper corners to rotate it to a vertical
position secured by the retaining clips of the connector. When properly
installed, the SIMM is oriented at a 90° angle relative to the system
board. If the SIMM does not install correctly, gently spread the retaining
clips just enough so that you can pull away the top edge of the SIMM
and try again.
7. Reinstall and reconnect any parts you removed or disconnected to gain
access to the SIMM sockets.
OM04409
Figure 5-5. Installing SIMMs
Summary of Contents for apricot VS660
Page 1: ...SYSTEM PRODUCT GUIDE VS660 apricot MITSUBISHI ELECTRIC ...
Page 2: ...Mini Tower System Product Guide ...
Page 51: ......
Page 55: ...4 4 Taking Your System Apart OM04061 A B A Figure 4 1 Removing the Side cover ...
Page 75: ......
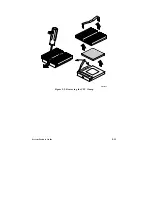
Page 86: ...System Product Guide 5 11 OM03834 Figure 5 3 Removing the CPU Clamp ...
Page 138: ......
Page 139: ......
Page 141: ......
Page 145: ......

