Operating Procedures:
Capturing and Handling Single Image
5-22
there is no reason to save an image with a higher bit and color depth
than available in an original one. Over against saving an image with a
lower bit and color depth than available leads to the loss of
information. The message is displayed in this case onscreen.
•
The
TIF
8 / 16 – greyscale image type
•
The
TIF
24 file – color image type
TIF file contains active processing information, which could be
utilized for a databar setting (see the
Preferences…
/
Databar
tab).
•
The
JPG
file is a compressed file format employing a lossy
compression algorithm resulting in the small file size with a little
loss of information, depending on the particular image appearance
and the compression level (factory preset to 80%). The 8 / 24 bit
depth is automatically selected when saving the greyscale / color
image file.
•
The
BMP
file is an uncompressed file format. The 8 / 24 bit depth is
automatically selected when saving the greyscale / color image file.
SAVING / OPENING / PRINTING
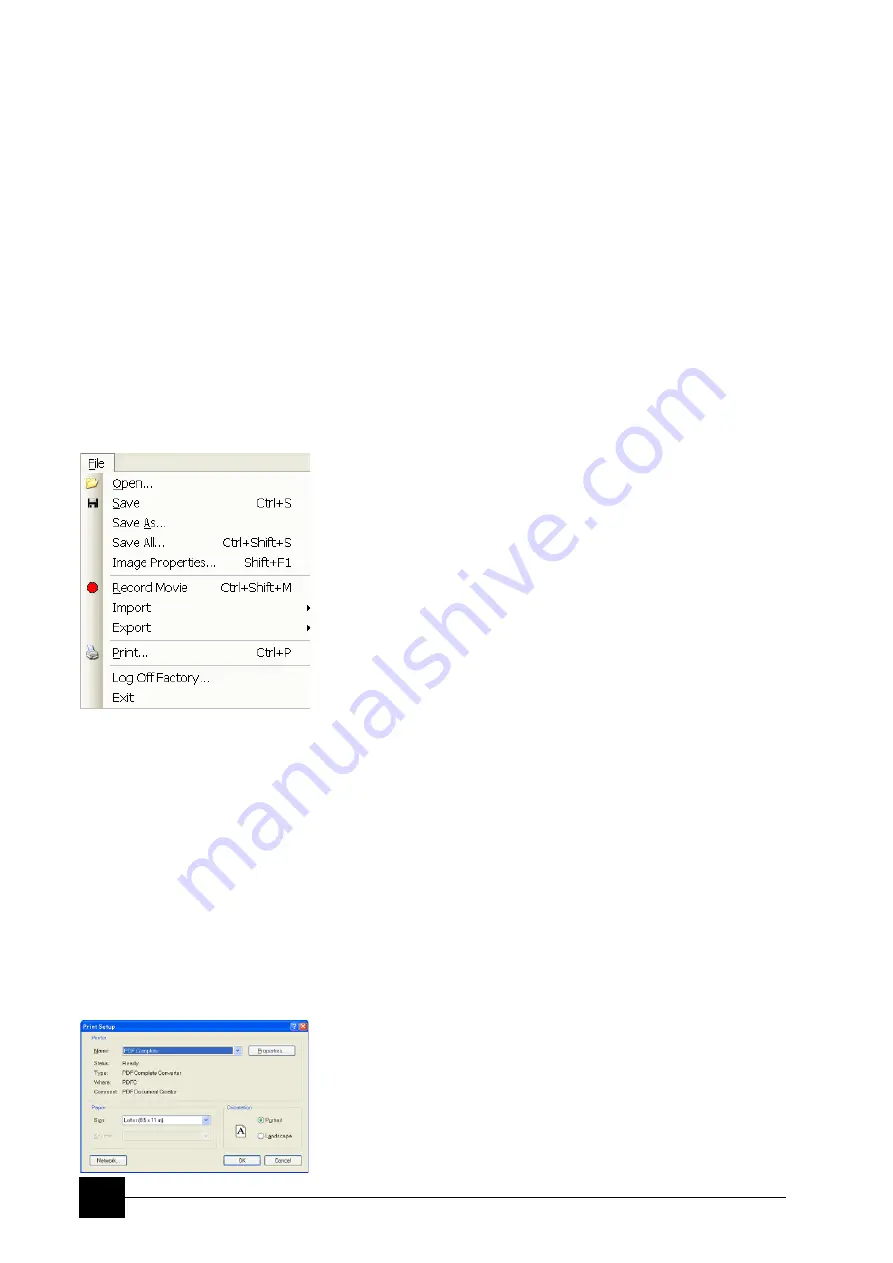
The following universal file handling functions could be used:
•
Save (Ctrl + S)
stores the image to the predetermined location
with the last used filename including an incremental number.
•
Save As…
opens a dialogue for saving images (this provides an
opportunity to change the file name, its location, and the possibility
to save also Databar and overlaid graphics). Both functions can be
linked to the Snapshot / Photo function (see the
Preferences…
/
Scanning
tab).
•
Save All...
behaves the same way as Save As functionality, but
enables to save images from all four quads at once.
•
Open…
opens a single image file into the selected quad. The
dialogue displays, by default, the location used in the last Save
As… utilization.
•
Print… (Ctrl + P)
opens the printer setup dialogue so that the
choice of printer and settings can be established to print the
selected quad. Clicking the OK button in the printer setup dialogue
activates the printer to print the job.
Image Capturing Procedure
1.
Select the area of interest and set the
Magnification
, the
Scan
condition
, the image pixel
Resolution
and the Databar
informations that are required in the saved image.
2.
Make the best image using any suitable method you are familiar
with.
3.
Use the
Pause (F6)
/
Snapshot (F4)
/
Photo (F2)
/
Active Preset
Snapshot (Ctrl + F2)
function. The scan makes one screen / quad
pass (or several passes when the number of integrated frames is
larger) and pauses.
4.
The image can now be saved by
File
menu /
Save (Ctrl + S)
/
Save As…
/
Save All…
functions.
Image Printing Procedure
1.
Select the area of interest. Set the
Magnification
, the
Scan
condition
, the image pixel
Resolution
and the required databar
informations.
2.
Capture the image or open a saved one.
3.
Click the
File
menu /
Print… (Ctrl + P)
, a print dialog appears.
4.
Complete the print setup and click the
OK
button.
Summary of Contents for Quanta FEG 250
Page 8: ...C vi...
Page 28: ...System Operation Quanta FEG System States 3 10...
Page 108: ...Alignments 1 Gun Alignment 6 6...
Page 114: ...Alignments 154 Water Bottle Venting 6 12 154 Water Bottle Venting...
Page 152: ...System Options Automatic Aperture System 9 4...
Page 154: ...System Options Nav Cam 9 6 401 NAV CAM AUTOBRIGHTNESS...
Page 177: ...System Options Cooling Stage Waterless Cooling Stage 9 29...


