


System Options:
Remote Imaging
9-65
Remote Imaging
The Remote Imaging enables to connect to the Microscope PC via
network using the VNC application and to control the microscope
operation remotely.
For information how to install this functionality, see
Installation
Instructions
available on the installation CD. For more details on the
remote connection and its possibilities, see
VNC documentation
available on the installation CD.
CONNECTION TO THE MICROSCOPE PC
Follow the steps below to connect to the Microscope PC.
1.
Double-click the VNC Viewer icon on the remote PC desktop to
launch the VNC Viewer application.
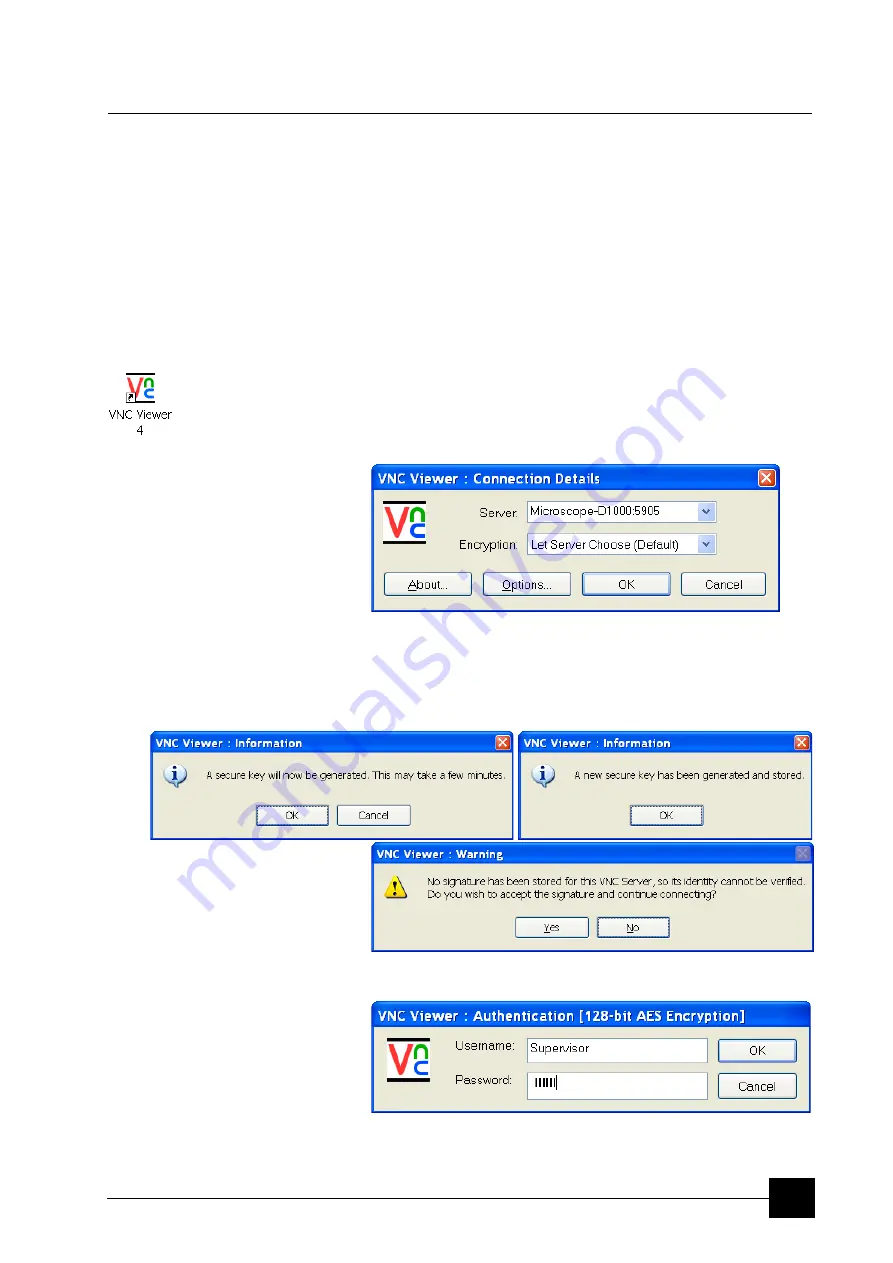
2.
In the
Connection Details
dialogue, type the computer name of
the Microscope PC you want to connect to, followed by colon (:)
and the port number 5905, into the
Server
field.
In case your configuration consists of both Microscope PC and
Support PC, you need to connect to the Support PC. Type the
Support PC name, followed by the colon (:) and the port number
5905, into the
Server
field. Press
OK
button.
3.
Some secure key and signature related dialogues may appear.
Confirm all of them by pressing
OK
or
Yes
button.
4.
In the
Authentication
dialogue, fill in your microscope
Username
and the corresponding
Password
. Press
OK
button.
When this step successfully passes, you are connected to the
Microscope PC and the VNC window with its desktop opens.
Summary of Contents for Quanta FEG 250
Page 8: ...C vi...
Page 28: ...System Operation Quanta FEG System States 3 10...
Page 108: ...Alignments 1 Gun Alignment 6 6...
Page 114: ...Alignments 154 Water Bottle Venting 6 12 154 Water Bottle Venting...
Page 152: ...System Options Automatic Aperture System 9 4...
Page 154: ...System Options Nav Cam 9 6 401 NAV CAM AUTOBRIGHTNESS...
Page 177: ...System Options Cooling Stage Waterless Cooling Stage 9 29...