


Exinda Network Orchestrator
2 Getting started
|
97
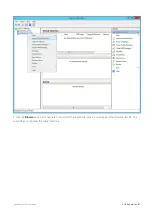
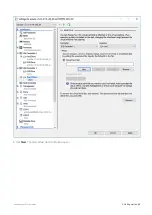
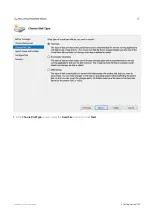
3.
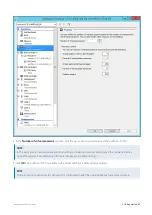
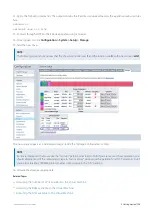
In the left pane, under
Hardware
, select any IDE Controller item. The Hard Drive settings open in the right pane.
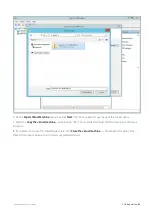
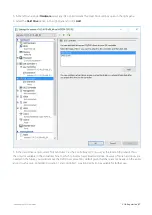
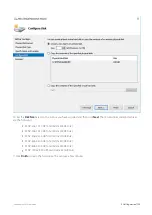
4.
Select the
Hard Drive
option in the right panel and click
Add
.
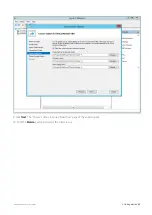
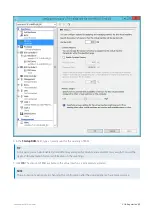
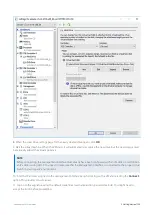
5.
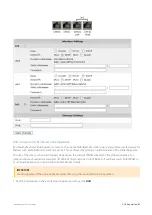
In the Hard Drive section, select “IDE Controller 1” as the Controller and “1 (in use)” as the location. By default, this is
the only slot available in the virtual machine to which to insert a new Virtual Hard Drive. However, if more hard drives are
needed in the future, you could remove the DVD Drives present by default given that these are not needed in the appli-
ance. In such a case, Controller 0: Location 1 and Controller 1: Location 0 will also be available for further use.
Summary of Contents for EXNV-10063
Page 369: ...Exinda Network Orchestrator 4 Settings 369 ...
Page 411: ...Exinda Network Orchestrator 4 Settings 411 Screenshot 168 P2P OverflowVirtualCircuit ...
Page 420: ...Exinda Network Orchestrator 4 Settings 420 Screenshot 175 Students OverflowVirtualCircuit ...


