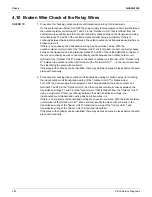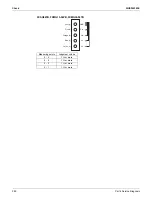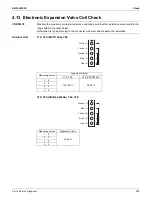
Check
SiUS342303E
393
Part 6 Service Diagnosis
Warning
Warning
Electrical Checks - High Voltage Power Circuits
HIGH VOLTAGE!
Disconnect ALL power before servicing or installing. Multiple power sources may be present.
Failure to do so may cause property damage, personal injury or death.
Line Voltage now present.
8.
The green LED on the diagnostic tool will blink indicating communications between the
tool and motor. See table below for indications of tool indicators and motor actions.
Replace or repair as needed.
Power
Button
Green
LED
Motor
Action
Indication(s)
OFF
OFF
Not
Rotating
Confirm 24VAC to UltraCheck-EZ
TM
tool. If 24VAC
is confirmed, diagnostic tool is inoperable.
ON
Blinking
Rotating
Motor and control/end bell are functioning properly.
ON
OFF
Rotating
Replace motor control/end bell.
ON
Blinking
Not
Rotating
Check motor (refer to Motor Checks on page 395).
ON
OFF
Not
Rotating
Replace motor control/end bell; verify motor (refer to
Motor Checks on page 395).
9.
Depress the orange power button to turn off motor.
10. Disconnect power. Disconnect diagnostic tool.
11. Reconnect the 4-wire harness from control board to motor.
1.
Disconnect power to air handler or modular blower.
2.
Disconnect the 5-circuit power connector to the ECM motor.
3.
Turn on power to air handler or modular.
4.
Measure voltage between pins 4 and 5 on the 5-circuit connector. Measured voltage
should be the same as the supply voltage to the air handler or modular.
5.
Measure voltage between pins 4 and 3. Voltage should be approximately half of the
voltage measured in step 4.
6.
Measure voltage between pins 5 and 3. Voltage should be approximately half of the
voltage measured in step 4.
7.
If no voltage is present, check supply voltage to air handler or modular blower.
8.
Disconnect power to air handler or modular blower. Reconnect the 5-circuit power
harness disconnected in step 2.
1
2
3
4
5
Lines 1 and 2 will be connected
for 120VAC Power Connector
applications only
Gnd
AC Line Connection
AC Line Connection
}
Summary of Contents for VRV EMERION RXYQ-AATJA
Page 1: ...Service Manual Heat Pump 60 Hz RXYQ AATJA 208 230 V RXYQ AAYDA 460 V SiUS342303E...
Page 410: ...Wiring Diagrams SiUS342303E 403 Part 7 Appendix FXEQ07 09 12 15 18 24PVJU 3D098557A...
Page 411: ...SiUS342303E Wiring Diagrams Part 7 Appendix 404 FXDQ07 09 12 18 24MVJU C 3D050501C...
Page 416: ...Wiring Diagrams SiUS342303E 409 Part 7 Appendix FXHQ12 24 36MVJU 3D048116C...
Page 417: ...SiUS342303E Wiring Diagrams Part 7 Appendix 410 FXAQ07 09 12 18 24PVJU 3D075354F...
Page 424: ...Wiring Diagrams SiUS342303E 417 Part 7 Appendix VAM1200GVJU 3D073270D...


