162
Contents
Before Using
Getting Started
Design Center
Layout & Editing
Programmable
Stitch Creator
Quick Reference
Alphabetic Index
Operation:
1
Click
File
, then
Print Setup
.
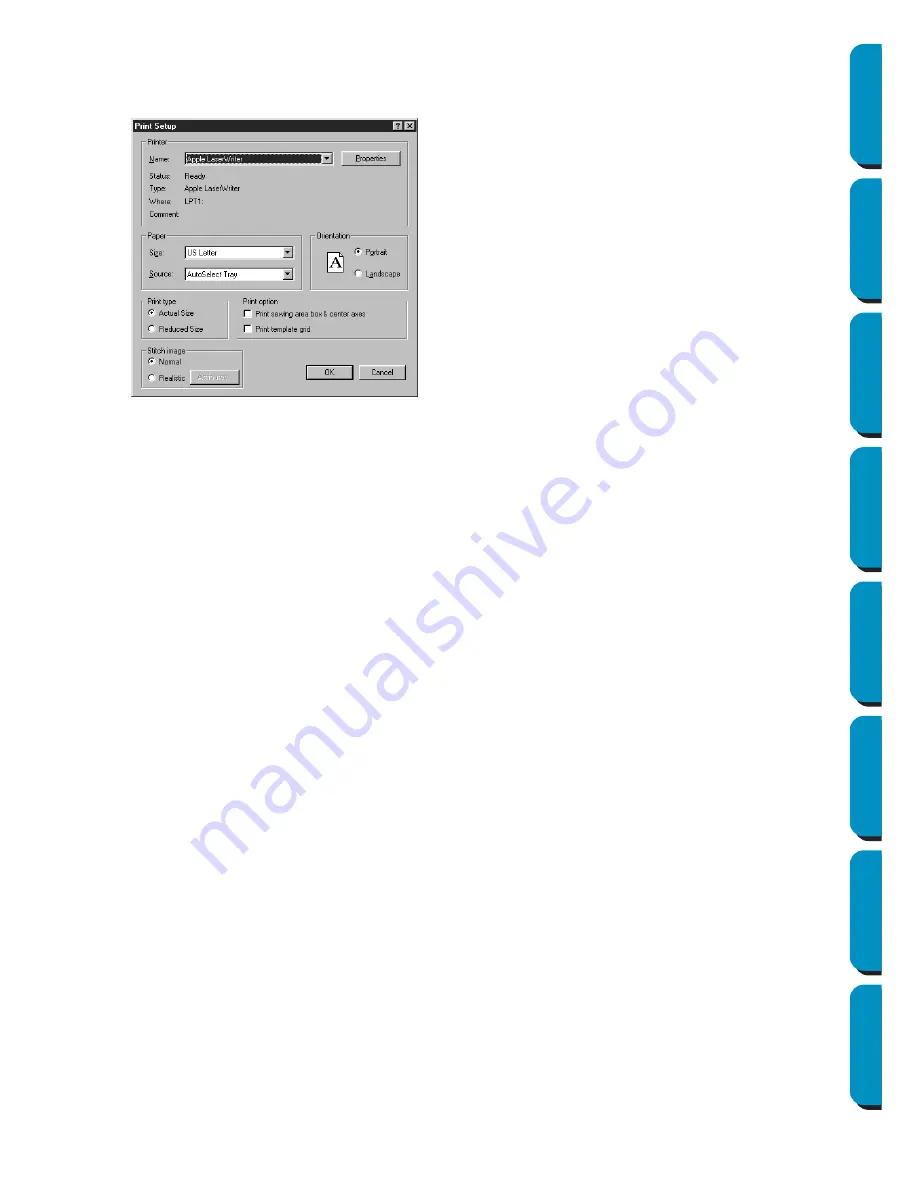
A
Print Setup
dialog similar to this will display.
You can choose to print the preview image on one or two pages for one pattern or one hoop position.
The
Actual Size
will print two pages:
The image in its actual size on the first and the dimensions of the embroidery, the sewing color
order and the needle count on the second page. The file name is printed on both pages.
The
Reduced Size
will print a reduced illustration of the image and all the above mentioned items
on a single page.
NOTE:
If a Design Page for a multi-position embroidery frame (130
×
300 mm, 300
×
130 mm, 100
×
172
mm, or 172
×
100 mm) is selected, each Print type will print the whole image of Design Page on
the first page.
And in this case, the number of pages depends on your design.
Print sewing area box & center axes
Select
Print sewing area box & center axes
to print black lines to indicate the sewing area (see
“Select Sewing Area”) and the center axes for the data.
This setting is only available when
Actual Size
is selected.
Print template grid
Select
Print template grid
to print green lines to represent the grid printed on the embroidery sheet
included with the embroidery frame.
NOTE:
The size of the grid that is printed may be slightly different from the grid printed on the embroidery
sheets for some embroidering machines.
If
Stitch Image
is set to
Normal
, the pattern is printed as lines and dots.
If
Stitch Image
is set to
Realistic
, the pattern is printed as a realistic image.
NOTE:
To change the settings of a realistic image, click
Attributes
.
See “Realistic Preview Attribute Setting” for more details.
These attributes are stored separately from the Realistic Preview attributes.
See also:
“Realistic Preview Attribute Setting” on page 221
◆
Click
Properties
to set the printer
properties.
◆
Choose the appropriate
Paper
and
Orientation
settings.
◆
Choose the
Print type
and
Option
of the preview image and
sewing information.
◆
Click
OK
to confirm the settings.
◆
Click
Cancel
to exit.


