


22
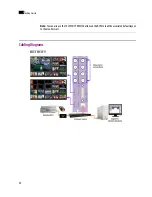
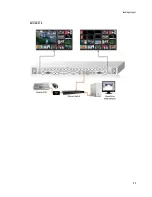
Getting Started
2
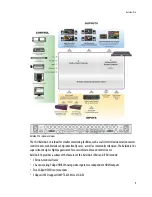
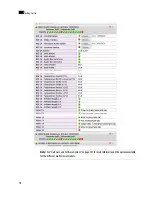
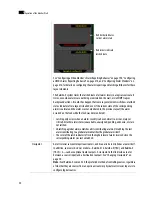
Two LEDs are visible on the front panel, one for each power supply. When lit, they both indicate the
same status:
When the ABT is powered up, all three LEDs will be orange until the boot sequence is terminated. This
is a visual indicator that the LEDs are functioning properly.
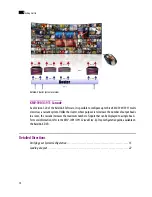
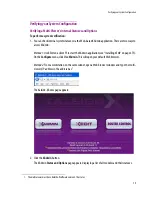
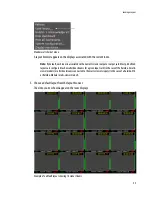
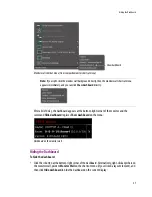
Loading a Layout
If your system was configured prior to shipment, then the designated layout will show up on all displays.
Otherwise, a gray screen will appear with the following message in the middle:
“No layout has been assigned to this room. Please load a layout.”
To load a layout on the monitor wall:
1. Connect a mouse to the Kaleido-RCP2 (if available) and log on to the multi-viewer from the RCP2, if
you have not already done so (see “Logging on to the Kaleido-RCP2” on page 368).
Alternatively, connect the mouse directly to one of the USB ports on the multi-viewer.
2. Right-click anywhere on the monitor wall, point to
Monitor Wall
(if you clicked a layout element), and
then click
Load layout
on the shortcut menu.
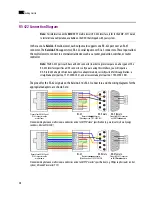
Orange
Activity
Red
Hardware fault
Flashing red
Upgrading firmware
Color
Board Status
Green
Normal
Flashing green
Normal, rebooting
Orange
Warning
Flashing Orange
Warning, rebooting
Red
Hardware fault
Flashing red
Upgrading firmware
Содержание Kaleido-X
Страница 1: ...Kaleido X User s Manual Part Number M770 2800 111 1 June 2011 ...
Страница 8: ...viii toc ...
Страница 33: ...Loading a Layout 25 Kaleido X16 ...
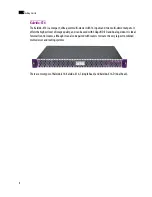
Страница 34: ...26 Getting Started 2 Kaleido X 4RU ...
Страница 152: ...144 Creating Logical Sources 7 ...
Страница 178: ...170 Setting Up Rooms 8 ...
Страница 244: ...236 Creating Layouts 9 ...
Страница 253: ...Detailed Directions 245 3 Under Properties General type a Friendly name for the Action ...
Страница 256: ...248 Creating Actions 10 ...
Страница 272: ...264 Managing Kaleido RCP2 Users 11 ...
Страница 348: ...340 Tally Interface Devices 13 ...
Страница 350: ......
Страница 352: ...344 Using the Serial to TCP IP Dispatcher 15 ...
Страница 406: ...398 Index ...