


284
Routers & Kaleido-X
12
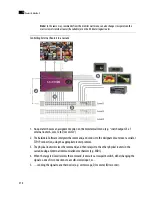
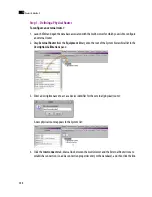
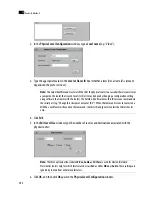
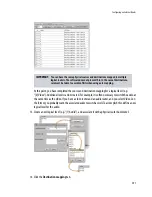
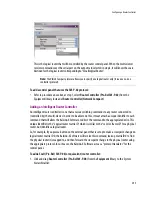
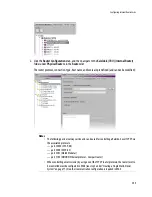
2. In the
Physical Level Configuration
window, type a
Level name
(e.g. “Video”):
3. Type the appropriate value in the
Level or frame ID
box (whether a
level ID
or a
frame ID
is relevant
depends on the protocol in use).
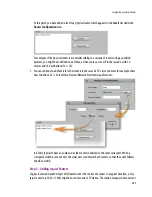
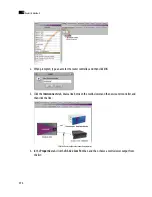
4. Click
Edit
.
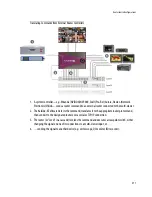
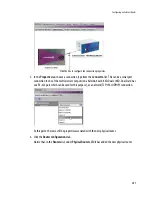
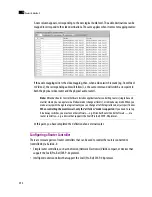
5. In the
Edit Level Size
window, type the number of sources and destinations associated with the
physical router:
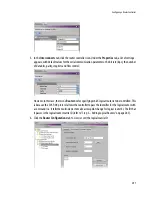
6. Click
OK
, and then click
OK
again in the
Physical Level Configuration
window.
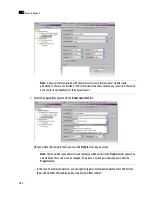
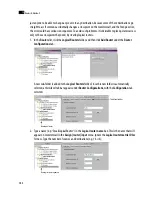
Note:
This value identifies and must match the ID of the physical router in a cascade (there is sometimes
a jumper on the router that is used to set its ID, or it may be done by changing a configuration setting
using software that comes with the router). The Kaleido-X Software uses this ID to issue a command via
the serial port (e.g. “Change this crosspoint on router ID 2”). When the command is sent to routers on a
MIDI bus, each router will examine the command, check its ID, and ignore it unless the ID matches its
own.
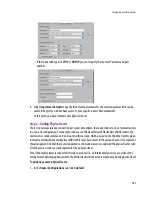
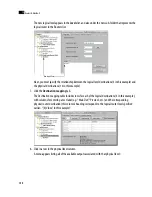
Note:
The three option buttons labeled
Video
,
Audio
and
Other
are used for Nevion (Network
Electronics) routers only, for which levels must be classified as either
Video
or
Audio
. These settings are
ignored by routers from other manufacturers.
Содержание Kaleido-X
Страница 1: ...Kaleido X User s Manual Part Number M770 2800 111 1 June 2011 ...
Страница 8: ...viii toc ...
Страница 33: ...Loading a Layout 25 Kaleido X16 ...
Страница 34: ...26 Getting Started 2 Kaleido X 4RU ...
Страница 152: ...144 Creating Logical Sources 7 ...
Страница 178: ...170 Setting Up Rooms 8 ...
Страница 244: ...236 Creating Layouts 9 ...
Страница 253: ...Detailed Directions 245 3 Under Properties General type a Friendly name for the Action ...
Страница 256: ...248 Creating Actions 10 ...
Страница 272: ...264 Managing Kaleido RCP2 Users 11 ...
Страница 348: ...340 Tally Interface Devices 13 ...
Страница 350: ......
Страница 352: ...344 Using the Serial to TCP IP Dispatcher 15 ...
Страница 406: ...398 Index ...