


242
Creating Actions
10
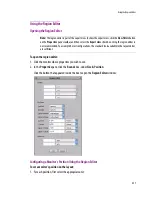
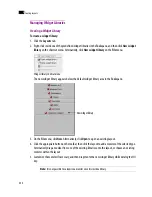
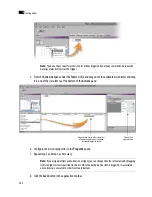
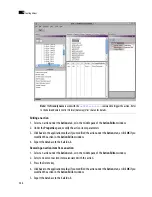
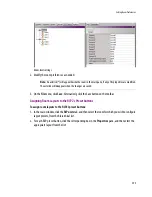
5. From the
Action List
pane under the
Tool
tab, click and drag one of the available action items and drop
it in one of the six columns at the bottom of the
Actions
pane:
6. Configure the action’s properties in the
Properties
pane.
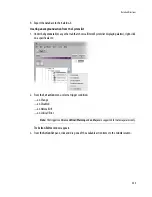
7. Repeat step 5 and step 6 as necessary.
8. Click the
Save
button in the application toolbar.
Note:
You do not have to perform this step for actions triggered by Gateway commands, because the
Gateway alarm itself acts as the trigger.
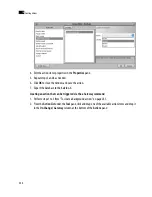
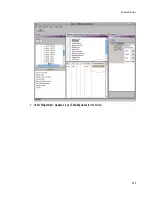
Note:
If you assign multiple action items to a trigger, you can change the order of execution by dragging
items to higher or lower positions in the list. When the background action is triggered, its associated
action items are executed in order from top to bottom.
Drag an Action Item into the column that
describes the alarm state or transition
that should trigger the action
Define Action
properties here
Содержание Kaleido-X
Страница 1: ...Kaleido X User s Manual Part Number M770 2800 111 1 June 2011 ...
Страница 8: ...viii toc ...
Страница 33: ...Loading a Layout 25 Kaleido X16 ...
Страница 34: ...26 Getting Started 2 Kaleido X 4RU ...
Страница 152: ...144 Creating Logical Sources 7 ...
Страница 178: ...170 Setting Up Rooms 8 ...
Страница 244: ...236 Creating Layouts 9 ...
Страница 253: ...Detailed Directions 245 3 Under Properties General type a Friendly name for the Action ...
Страница 256: ...248 Creating Actions 10 ...
Страница 272: ...264 Managing Kaleido RCP2 Users 11 ...
Страница 348: ...340 Tally Interface Devices 13 ...
Страница 350: ......
Страница 352: ...344 Using the Serial to TCP IP Dispatcher 15 ...
Страница 406: ...398 Index ...