11-14
IM 701830-01E
Operating Procedure
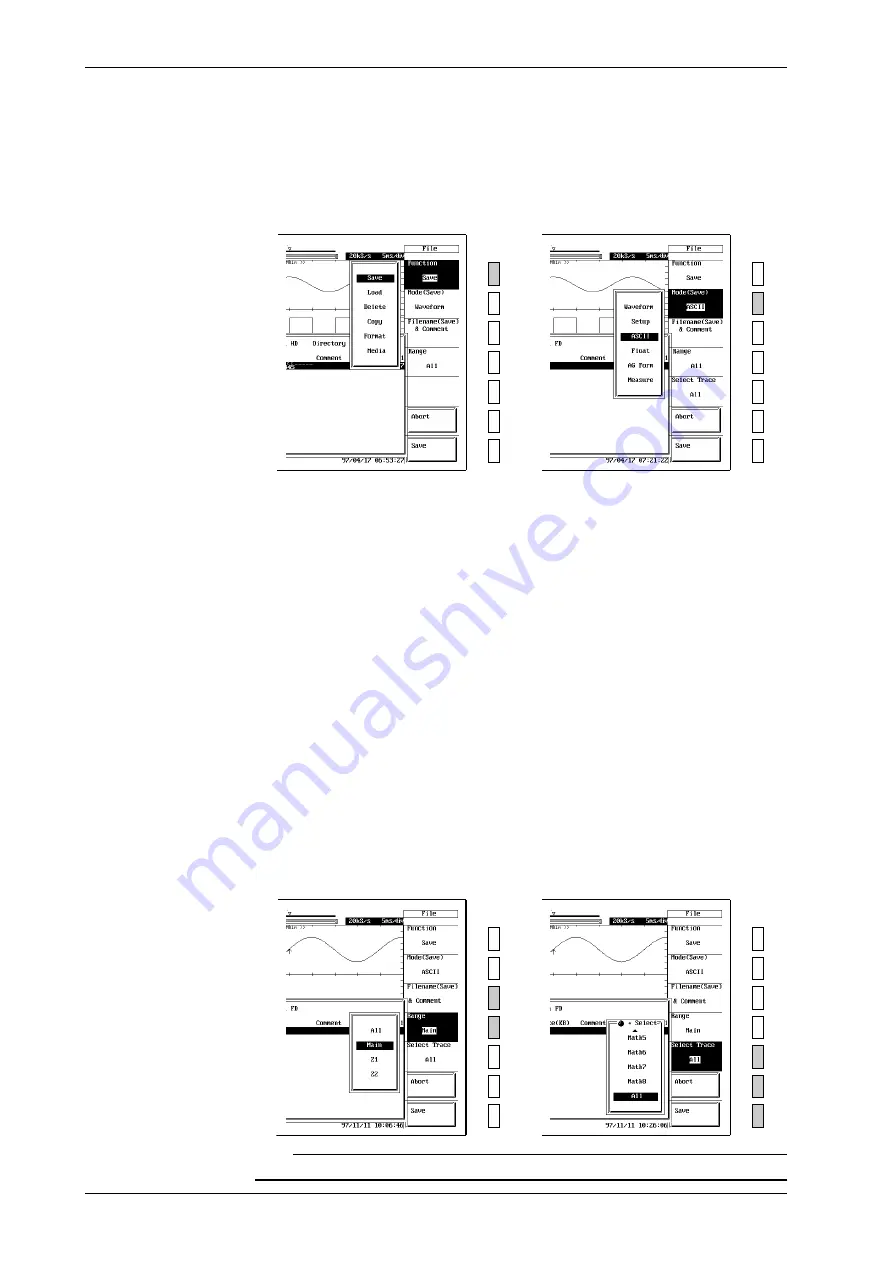
Displaying the storage menu
1.
Press the
FILE
key.
2.
Keep pressing the “
Function
” soft key until “
Save
” is selected.
Selecting the data format
3.
Press the “
Mode
” soft key to display the saving source menu.
4.
Keep pressing the “
Mode
” soft key to select either “
ASCII
”, “
Float
” or “
AG Form
.”
→
Selecting the waveform to be saved, entering a file name and comment
5.
Press the “
Select Trace
” soft key to display the saving source menu.
6.
Turn the jog shuttle to select the desired waveform source from “
CH1
” to “
Math2
.”
Channels which do not have input modules installed are not displayed on the menu.
7.
Press the “
File Name(Save) & Comment
” soft key to display the file name setting menu.
8.
Move the cursor to “
Auto Naming
” with the jog shuttle, and press
SELECT
key to select
“
ON
” or “
OFF
.” If you select “
ON
,” “***” is displayed on the soft key menu. If a file
name is specified, then “***” is displayed after the file name.
9.
Move the cursor to “
Filename
” with the jog shuttle, and press
SELECT
key to display the
keyboard screen.
10.
Enter the file name using the procedure described on page 4-2.
11.
In the same way, enter a “
Comment
” if necessary.
Setting the data save range (When using “ASCII” or “Binary”)
12.
Press the “
Range
” soft key several times to select from “
All
” to “
Z2
.”
Setting the data save range (When using AG Form)
12.
Press the “
AG Form Length
” soft key (“Next 2/2” menu) as necessary to select the range
(1K, ..., 8K).
13.
Press the “
AG Form Start
” soft key.
14.
Turn the jog shuttle to select the start position for the save. (You can use the arrow keys to
move to different columns within the value.)
Starting saving
15.
Press the “
Save
” soft key to start saving.
To stop saving, press the “
Abort
” soft key.
→
Note
For information about saves in “Measure” format, see page 11-17.
11.8 Saving Waveform Data in ASCII, Binary or AG Series Format


