


5-26 Ethernet Setup
bb
______________________________________
2.
Open XANTÉ Command Center by double-clicking its icon.
3.
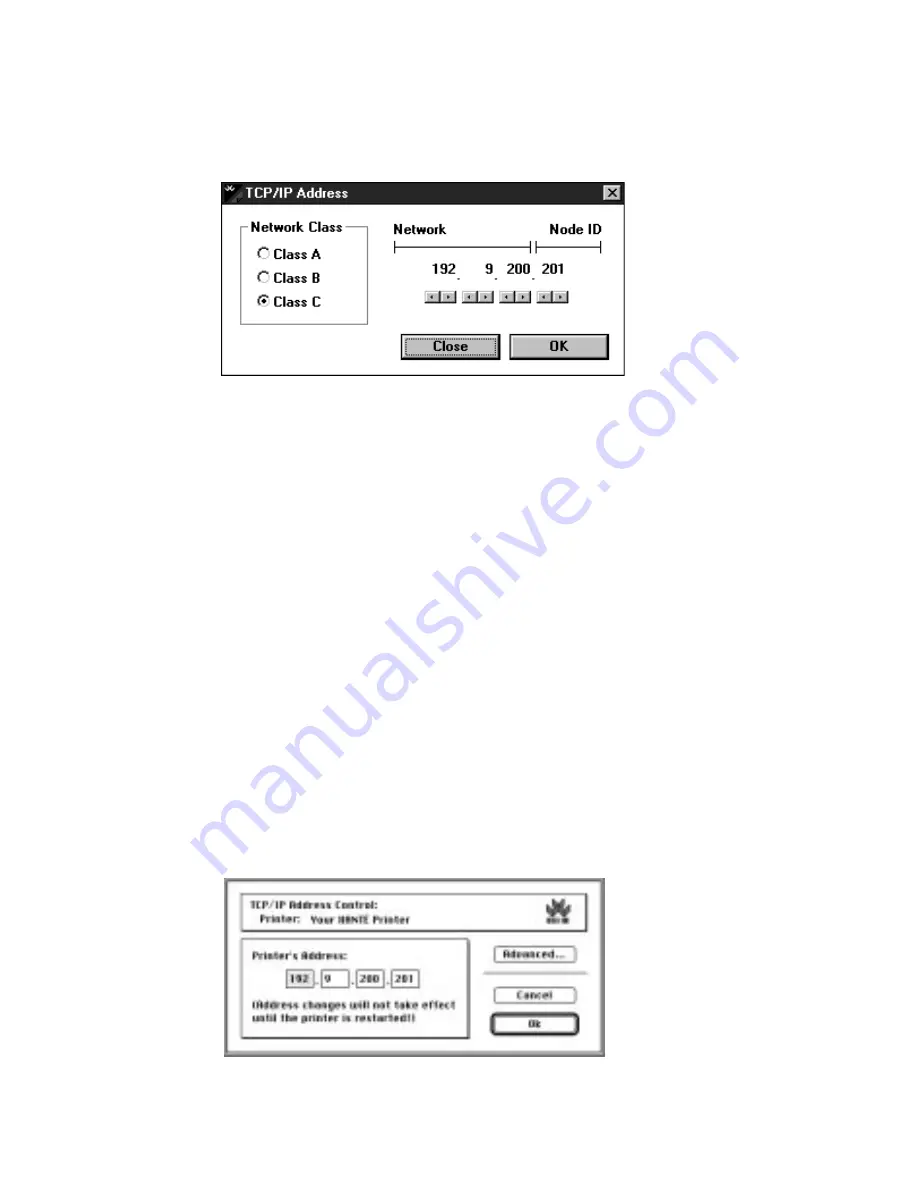
Choose Controller: General: TCP/IP Address.
Fig. 5.20 PC TCP/IP Address Window
4.
If necessary (check with your System Supervisor), change the
network class by clicking the appropriate option button.
5.
Change the printer’s default TCP/IP address to the address
assigned by your System Supervisor using the scroll bars under
each octet.
6.
Click OK. The main menu reappears.
7.
Choose File: Exit. Command Center closes.
8.
Restart the printer to make the new TCP/IP address take effect.
Using XANTÉ Command Center (Macintosh)
1.
Open XANTÉ Command Center by double-clicking its icon.
2.
Choose Networking: TCP/IP: Address.
Fig. 5.21 Macintosh TCP/IP Address Control Window
Summary of Contents for ScreenWriter 3
Page 2: ...1 2 Introductionbb ________________________________________ Notes...
Page 10: ...2 2 Installationbb_________________________________________ Notes...
Page 38: ...3 2 Macintosh Setupbb ____________________________________ Notes...
Page 86: ...3 50 Macintosh Setupbb ____________________________________...
Page 88: ...4 2 PC Setupbb __________________________________________ Notes...
Page 140: ...5 2 Ethernet Setupbb ______________________________________ Notes...
Page 206: ...7 2 Media Optionsbb ______________________________________ Notes...
Page 216: ...7 12 Media Optionsbb ______________________________________...
Page 218: ...8 2 Printing with Various Media Typesbb______________________ Notes...
Page 224: ...9 2 Maintenance and Specificationsbb ________________________ Notes...
Page 238: ...10 2 Optionsbb __________________________________________ Notes...
Page 256: ...11 2 Troubleshootingbb____________________________________ Notes...


