


- 71 -
DX-80 Programming Manual
P
ROGRAMMING
S
YSTEM
F
EATURES
> N
AMING
CO L
INES
5. Press
chg
to enter a new name/label. Use the dial pad keys and reference the lettering scheme tables to enter
the name/label for the CO line. [See Section 4.18,
Setting Up Letter Type (Enhanced Lettering Scheme)
Valid names can have up to 7 alphanumeric characters. The default is LINE1 through LINE 16, correspond-
ing to directory numbers 740 through 755.
6. Press
save
when you have finished the label to save the new name/label name.
7. Press
next
to enter another CO line directory name.
8. When finished programming CO line name/labels, press the
Volume
button (up or down) to return to the DB
Item Select screen, or exit programming.
4.6.2 PROGRAMMING USING PC-DBA
1. Select
Programming
from the PC-DBA menu and press
Enter
. The system displays the Database Program-
ming menu.
2. Use the arrow keys to highlight
System Resource
and press
Enter
. The system displays the System
Resource menu.
3. Use the arrow keys to highlight
CO Line Names
and press
Enter
. The system displays the System Resource
— CO Line Names menu.
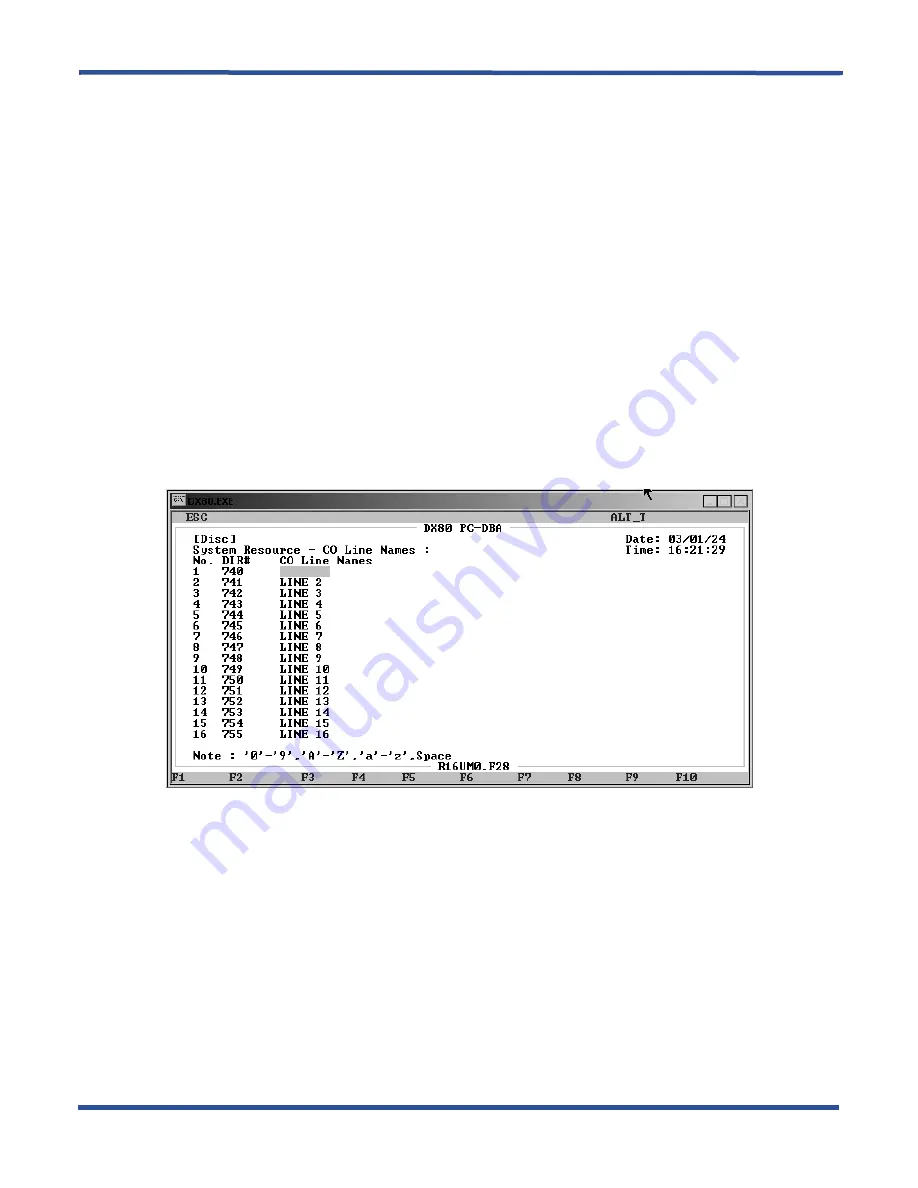
4. Highlight the
CO Line Names
field for the line to whom you want to assign a name, then press
Enter
. Key
in the name, then press
Enter
. Valid names can have up to 7 alphanumeric characters. The default is LINE
1 through LINE 16, corresponding to directory numbers 740 through 755.
5. In the same manner, assign names to other CO lines as needed.
6. When you are done, press
Esc
to return to the Database Programming screen. The system prompts: “Exit
This Feature?”; press
Y
for yes.
7. The system prompts “Save Current Setting?” Press
Y
to save your changes.
8. The system then prompts “File Exists, Override?” Press
Y
to continue with the save operation.
9. Press
Esc
to return to the Database Programming menu.
10. When you have finished all programming changes, perform a Send operation to copy your new database to
the DX-80 switch system memory. For more details, see Section 2.1.4.4,
Summary of Contents for Comdial DX-80
Page 1: ...Programming Manual Technical Manual Volume II GCA60 001 RB1105 ...
Page 4: ... iv This Page Intentionally Left Blank ...
Page 18: ...This page intentionally left blank ...
Page 58: ...GETTING STARTED SHORTCUTS TO HELP YOU WORK FASTER DX 80 Programming Manual 58 ...
Page 291: ... 291 A WORKSHEETS Worksheets DX 80 Programming Manual ...
Page 292: ...APPENDIX A DX 80 Programming Manual 292 ...
Page 293: ... 293 DX 80 Programming Manual APPENDIX A ...
Page 294: ...APPENDIX A DX 80 Programming Manual 294 ...
Page 295: ... 295 DX 80 Programming Manual APPENDIX A ...
Page 296: ...APPENDIX A DX 80 Programming Manual 296 ...
Page 297: ... 297 DX 80 Programming Manual APPENDIX A ...
Page 298: ...APPENDIX A DX 80 Programming Manual 298 ...
Page 299: ... 299 DX 80 Programming Manual APPENDIX A ...
Page 300: ...APPENDIX A DX 80 Programming Manual 300 ...
Page 301: ... 301 DX 80 Programming Manual APPENDIX A ...
Page 302: ...APPENDIX A DX 80 Programming Manual 302 ...
Page 303: ... 303 DX 80 Programming Manual APPENDIX A ...
Page 304: ...APPENDIX A DX 80 Programming Manual 304 ...
Page 308: ...APPENDIX B DX 80 Programming Manual 308 This Page Intentionally Left Blank ...
Page 321: ... 321 DX 80 Programming Manual INDEX This page intentionally left blank ...


