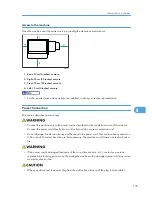
Access to the machine
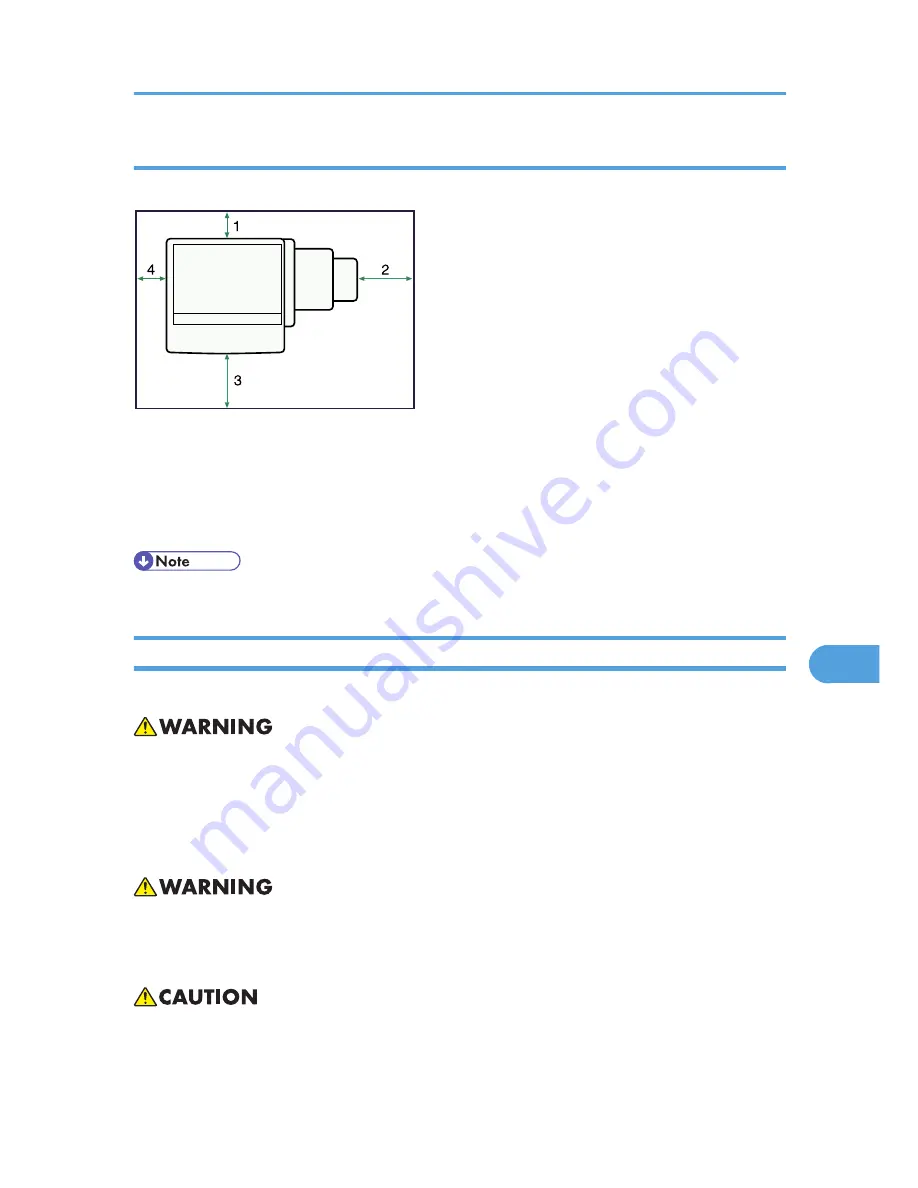
Place the machine near the power source, providing the clearance areas shown.
BBR051S
1. Rear: 10 cm (4 inches) or more
2. Right: 55 cm (22 inches) or more
3. Front: 75 cm (30 inches) or more
4. Left: 10 cm (4 inches) or more
• For the required space when options are installed, contact your service representative.
Power Connection
This section describes power supply.
• Connect the machine only to the power source described on the inside front cover of this manual.
Connect the power cord directly into a wall outlet and do not use an extension cord.
• Do not damage, break or make any modifications to the power cord. Do not place heavy objects on
it. Do not pull it hard nor bend it more than necessary. These actions could cause an electric shock or
fire.
• If the power cord is damaged (exposure of the core, disconnection, etc.), contact your service
representative to change a new one. Operating the machine with a damaged power cord may cause
an electric shock or fire.
• When you disconnect the power plug from the wall outlet, always pull the plug (not the cable).
Where to Put Your Machine
135
8
Summary of Contents for Aficio MP 4000
Page 46: ...1 Getting Started 46 1 ...
Page 50: ...2 Entering Text 50 2 ...
Page 99: ...MEMO 99 ...
Page 100: ...MEMO 100 EN USA D012 7754 ...
Page 138: ...2 Troubleshooting When Using the Copy Document Server Function 34 2 ...
Page 184: ...4 Troubleshooting When Using the Printer Function 80 4 ...
Page 217: ...BAZ035S Adding Staples 113 6 ...
Page 220: ...6 Adding Paper Toner and Staples 116 6 ...
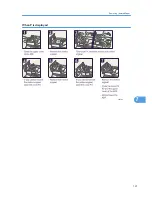
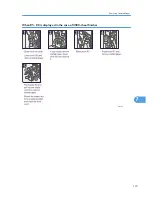
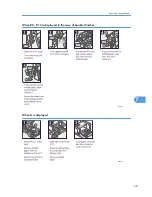
Page 224: ...When C is displayed BBR030S When D is displayed BBR031S 7 Clearing Misfeeds 120 7 ...
Page 225: ...When P is displayed BBR040S Removing Jammed Paper 121 7 ...
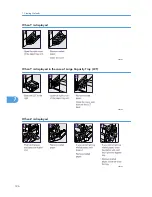
Page 234: ...BAZ062S 7 Clearing Misfeeds 130 7 ...
Page 242: ...BBR022S Clean 1 and 2 8 Remarks 138 8 ...
Page 246: ...MEMO 142 ...
Page 247: ...MEMO 143 ...
Page 248: ...MEMO 144 EN USA D012 7804 ...
Page 284: ...1 Placing Originals 32 1 ...
Page 338: ...2 Basic Copying 86 2 ...
Page 396: ...3 Advanced Copying 144 3 ...
Page 420: ...4 Document Server 168 4 ...
Page 442: ...MEMO 190 ...
Page 443: ...MEMO 191 ...
Page 444: ...MEMO 192 EN USA D012 7652 ...
Page 478: ...2 After checking the settings on the display press Exit 1 Transmission 30 1 ...
Page 602: ...1 Transmission 154 1 ...
Page 608: ... p 131 Sender Settings 2 Other Transmission Features 160 2 ...
Page 626: ...2 Other Transmission Features 178 2 ...
Page 778: ...MEMO 330 ...
Page 779: ...MEMO 331 ...
Page 780: ...MEMO 332 EN USA D346 8515 ...
Page 808: ...24 ...
Page 858: ...2 Setting Up the Printer Driver 74 2 ...
Page 915: ...ftp ftp put path name file name Virtual Printer Name Using the Virtual Printer 131 3 ...
Page 916: ...3 Other Print Operations 132 3 ...
Page 928: ...5 Appendix 144 5 ...
Page 931: ...MEMO 147 ...
Page 932: ...MEMO 148 EN USA AE AE D381 ...
Page 933: ...Copyright 2007 ...
Page 934: ...Operating Instructions Printer Reference D381 7002 EN USA ...
Page 943: ...Specifications 174 INDEX 177 7 ...
Page 954: ...18 ...
Page 986: ...1 Sending Scan Files by E mail 50 1 ...
Page 1010: ...2 Sending Scan Files to Folders 74 2 ...
Page 1050: ...4 Delivering Scan Files 114 4 ...
Page 1098: ...Scan size Maximum resolution dpi A6 1200 7 Appendix 162 7 ...
Page 1112: ...7 Appendix 176 7 ...
Page 1118: ...Operating Instructions Scanner Reference D381 7102 EN USA ...

