Chapter 1: Installation and Initial Configuration
33
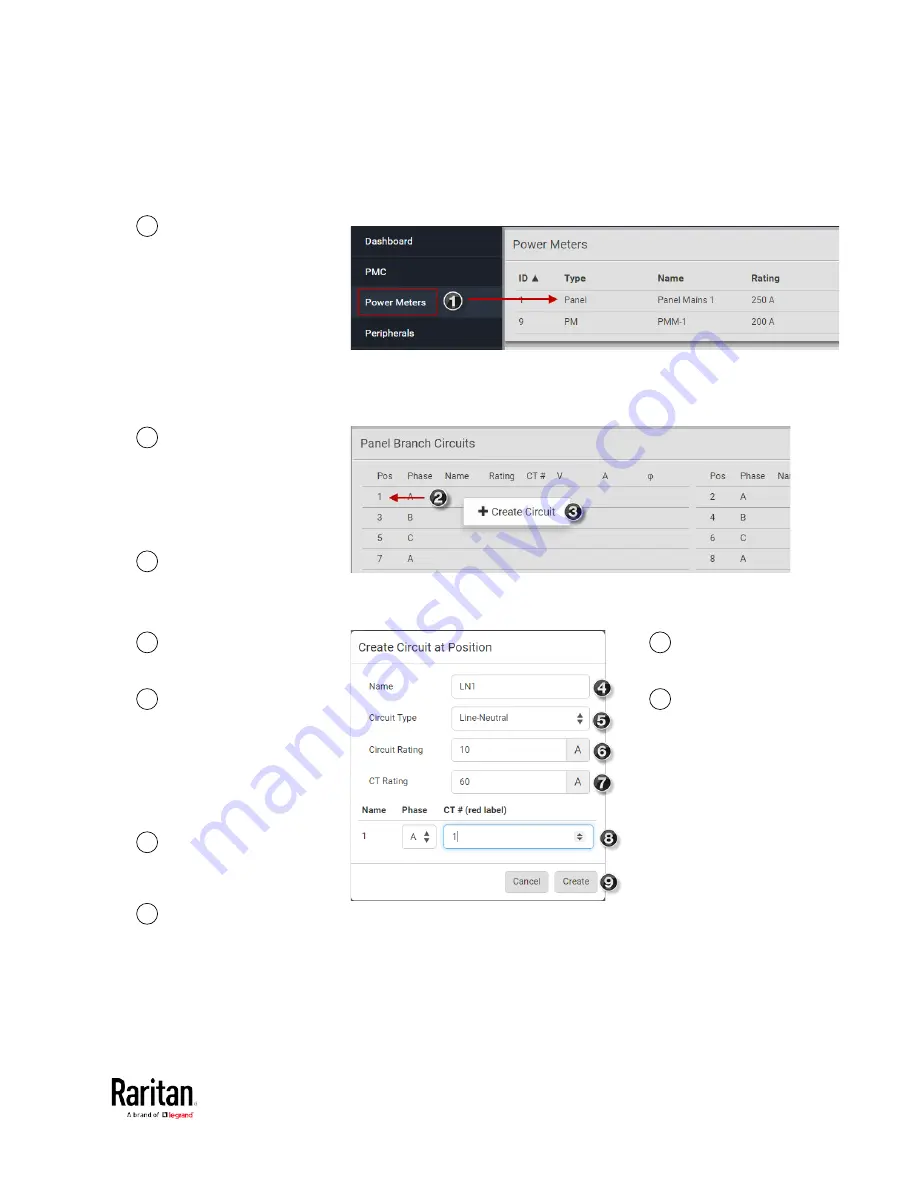
Configure Panel Branch Circuits
1
In the Power Meters
page, click the panel.
The Panel details page
opens.
2
In the Panel Branch
Circuits section, click
the circuit position to
open the pop-up
menu.
3
Click Create Circuit.
The Create Circuit
dialog opens.
4
Enter a name for the
circuit.
8
Click the Phase or CT# to
edit the automatic labels.
5
Select the circuit type:
One-Phase LN,
One-Phase LL,
One-Phase LLN, or
Three-Phase. Circuit
type cannot be
changed later.
9
Click Create.
6
Enter the current
rating of the circuit in
Amps.
7
Enter the rating of the
CT connected at this
circuit position in
Amps.
Summary of Contents for PMC-1000
Page 3: ...BCM2 Series Power Meter Xerus Firmware v3 4 0 User Guide...
Page 23: ...Chapter 1 Installation and Initial Configuration 11 Panel Wiring Example...
Page 54: ...Chapter 1 Installation and Initial Configuration 42 Branch Circuit Details...
Page 76: ...Chapter 2 Connecting External Equipment Optional 64...
Page 123: ...Chapter 3 Using the Web Interface 111...
Page 558: ...Appendix D RADIUS Configuration Illustration 546 Note If your BCM2 uses PAP then select PAP...
Page 563: ...Appendix D RADIUS Configuration Illustration 551 14 The new attribute is added Click OK...
Page 564: ...Appendix D RADIUS Configuration Illustration 552 15 Click Next to continue...
Page 594: ...Appendix E Additional BCM2 Information 582...
Page 612: ......


