


255
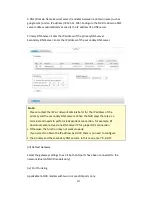
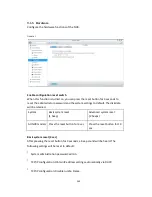
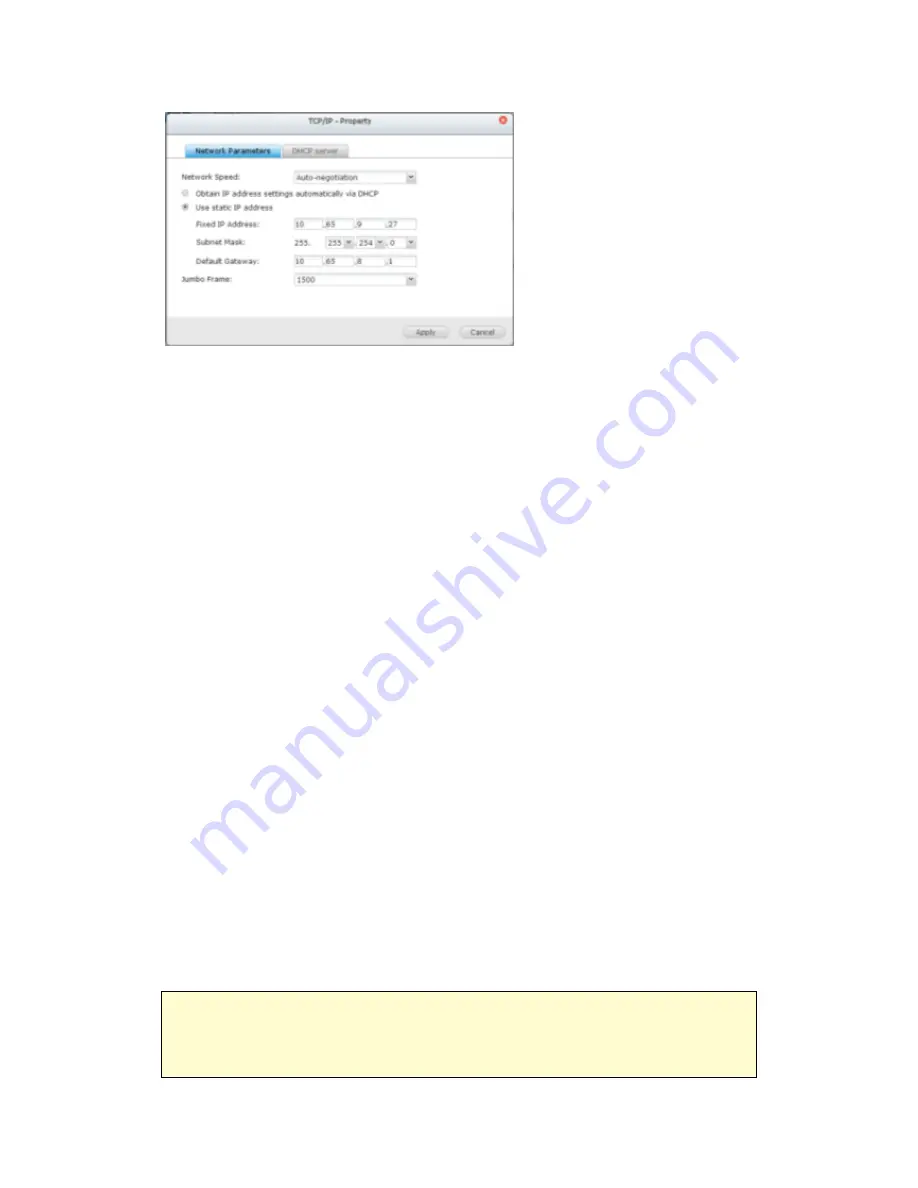
Network Speed
Select the network transfer rate according to the network environment to which the
NVR is connected. Select auto negotiation and the NVR will adjust the transfer rate
automatically.
Obtain the IP address settings automatically via DHCP
If the network supports DHCP, select this option and the NVR will automatically
obtain the IP address and network settings.
Use static IP address
To use a static IP address for network connection, enter the IP address, subnet mask,
and default gateway.
Jumbo Frame Settings (MTU)
“Jumbo Frames” refer to the Ethernet frames that are larger than 1500 bytes. It is
designed to enhance Ethernet networking throughput and reduce the CPU utilization
of large file transfers by enabling more efficient larger payloads per packet.
Maximum Transmission Unit (MTU) refers to the size (in bytes) of the largest packet
that a given layer of a communications protocol can transmit.
The NVR uses standard Ethernet frames: 1500 bytes by default. If the network
appliances support Jumbo Frame setting, select the appropriate MTU value for the
network environment. The NVR supports 4074, 7418, and 9000 bytes for MTU.
Note:
The Jumbo Frame setting is valid in Gigabit network environment only. All the
network appliances connected must enable Jumbo Frame and use the same MTU
value.
Summary of Contents for VIOSTOR
Page 47: ...47 ...
Page 49: ...49 ...
Page 90: ...90 ...
Page 114: ...114 ...
Page 115: ...115 5 2 6Enable Disable Event Alert To enable event alerts on an E map click ...
Page 122: ...122 zoom is enabled you can use your mouse wheel to use digital zoom function ...
Page 140: ...140 Note You cannot play recording files via double click here ...
Page 142: ...142 ...
Page 184: ...184 ...
Page 185: ...185 ...
Page 194: ...194 ...
Page 196: ...196 Step2 Enter the Product Authorization Key PAK code to activate the license ...
Page 217: ...217 10 Confirm the settings and click Next 11 Click Finish to exit the wizard ...
Page 264: ...264 ...
Page 292: ...292 Process This tab shows information about the processes running on the NVR ...
Page 305: ...305 4 Enter a name to register your NVR and click Next ...
Page 306: ...306 5 The wizard will configure your router automatically ...
Page 307: ...307 6 Review the summary page and click Finish to complete the wizard ...
Page 311: ...311 ...
Page 324: ...324 Step5 Specify your replication schedule ...
Page 325: ...325 Step6 Click Finish to complete the setup ...
Page 336: ...336 Step 2 Go to All Apps Step 3 Click Add QSCM Lite to QVR ...
Page 340: ...340 Step 4 Click Install Manually Step 5 Find the unzipped QSCM Lite and click Install ...
Page 341: ...341 Step 6 Click OK Step 7 The NVR will then install QSCM Lite ...
Page 351: ...351 ...


