


216
B.
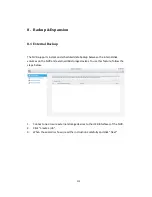
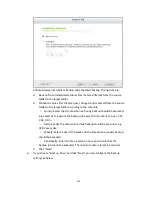
Configure backup duration
If the backup duration settings are not changed, the system will back up all
of the recording files on the specified days by default.
You can click “Backup duration and files” to configure backup duration
and files
Enable “Include auto snapshots” to also copy the auto snapshot files
when the recordings are configured to back up.
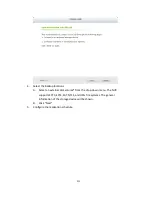
C.
Click “Next”.
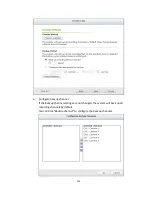
8.
Advanced Settings include the ability to overwrite old recordings and to enable
password protection.
9.
Enter a name for the backup job. A job name supports up to 63 characters; it
cannot start or end with a space. Click “Next”.
Summary of Contents for VIOSTOR
Page 47: ...47 ...
Page 49: ...49 ...
Page 90: ...90 ...
Page 114: ...114 ...
Page 115: ...115 5 2 6Enable Disable Event Alert To enable event alerts on an E map click ...
Page 122: ...122 zoom is enabled you can use your mouse wheel to use digital zoom function ...
Page 140: ...140 Note You cannot play recording files via double click here ...
Page 142: ...142 ...
Page 184: ...184 ...
Page 185: ...185 ...
Page 194: ...194 ...
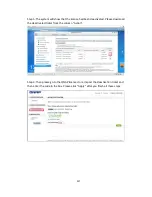
Page 196: ...196 Step2 Enter the Product Authorization Key PAK code to activate the license ...
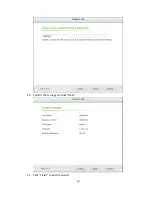
Page 217: ...217 10 Confirm the settings and click Next 11 Click Finish to exit the wizard ...
Page 264: ...264 ...
Page 292: ...292 Process This tab shows information about the processes running on the NVR ...
Page 305: ...305 4 Enter a name to register your NVR and click Next ...
Page 306: ...306 5 The wizard will configure your router automatically ...
Page 307: ...307 6 Review the summary page and click Finish to complete the wizard ...
Page 311: ...311 ...
Page 324: ...324 Step5 Specify your replication schedule ...
Page 325: ...325 Step6 Click Finish to complete the setup ...
Page 336: ...336 Step 2 Go to All Apps Step 3 Click Add QSCM Lite to QVR ...
Page 340: ...340 Step 4 Click Install Manually Step 5 Find the unzipped QSCM Lite and click Install ...
Page 341: ...341 Step 6 Click OK Step 7 The NVR will then install QSCM Lite ...
Page 351: ...351 ...


