


Clinton reserves the right, without notification, to make changes in product design & specification.
CE-RP5
User Manual
clinton
electronics
| 6701 Clinton Road Loves Park, IL 61111 | 800.549.6393 (Support) | www.clintonelectronics.com
v.05.04.18
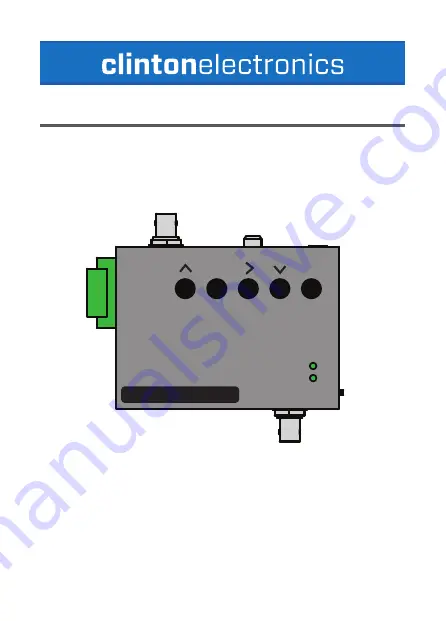
6. POWER ON DEVICE
8. VIEW MENU AND FILES
The recorded content can be viewed on the attached display by using the
included remote control, or by removing the SD card and viewing on your PC.
If removing the card, first power down the device to avoid file corruption.
Gently guide the CE-RP5’s cables into the PVM, and slide the back cover
back into place.
7. REPLACE BACK COVER
Attach the main power cord to the PVM. Turn the CE-RP5 power switch to
the ON position. The Record, and Power lights on the front of the CE-RP5 will
illuminate.
8. VIEW MENU AND FILES
The recorded content can be viewed on the attached display by using the
included remote control, or by removing the SD card and viewing on your PC.
If removing the card, first power down the device to avoid file corruption.
on/off
OSD
REC EXIT
PLAY MENU/ENTER
6 LED-
5 LED+
4 GND
3 MOTION OUT
2 GND
1 ALARM IN
REC
PWR
H.264 FULL HD-SDI RECORDER
with converter
REC EXIT
PLAY MENU/ENTER
6 LED-
5 LED+
4 GND
3 MOTION OUT
2 GND
1 ALARM IN
REC
PWR
H.264 FULL HD-SDI RECORDER
with converter


