


120
The Workstation Installation/Operation Manual Version 2 Document 51540 Rev. B1 4/8/02
2. Click
Change...
to modify the currently selected plug-in
for the selected device. This will bring up a file
selection dialog showing the Plugin directory. Select the
.CFG
or
.EXE
file associated with the desired
plug-in and click on
OK
.
3. The commands associated with the selected plug-in will now appear in the
Available Icon Menus
display. These are the commands that can now be assigned to a macro function using the
Macro Editor
,
or assigned to a
Functional Button
on the
Floor Plan Display
. These options will automatically
appear on the pulldown menu for the selected device (provided the current workstation has control of the
device).
Clicking on an available command will cause the
Device Type for Chosen Menu
display to show what devices
are affected by the chosen command. Some commands will affect all device types, others will have specific types
only. When creating devices to use plug-in commands be sure they are defined as one of the appropriate types.
When the plug-in has been configured, click
OK
to close the
Plug-In Selection and Configuration Form
.
4.1.2 Mapping Plug-ins With NIONs
In order for plug-in applications to function they must be linked with the nodes or devices to which they corre-
spond. In most cases this is done automatically and each recognized node is linked to the appropriate plug-in
application.
There may be times when nodes and devices are not automatically read and updated by the workstation and links
are not established. Therefore, it is advised that this one time linking process be checked when assigning new
plug-ins and if the device type has not been automatically assigned then assign it manually. This can be done in
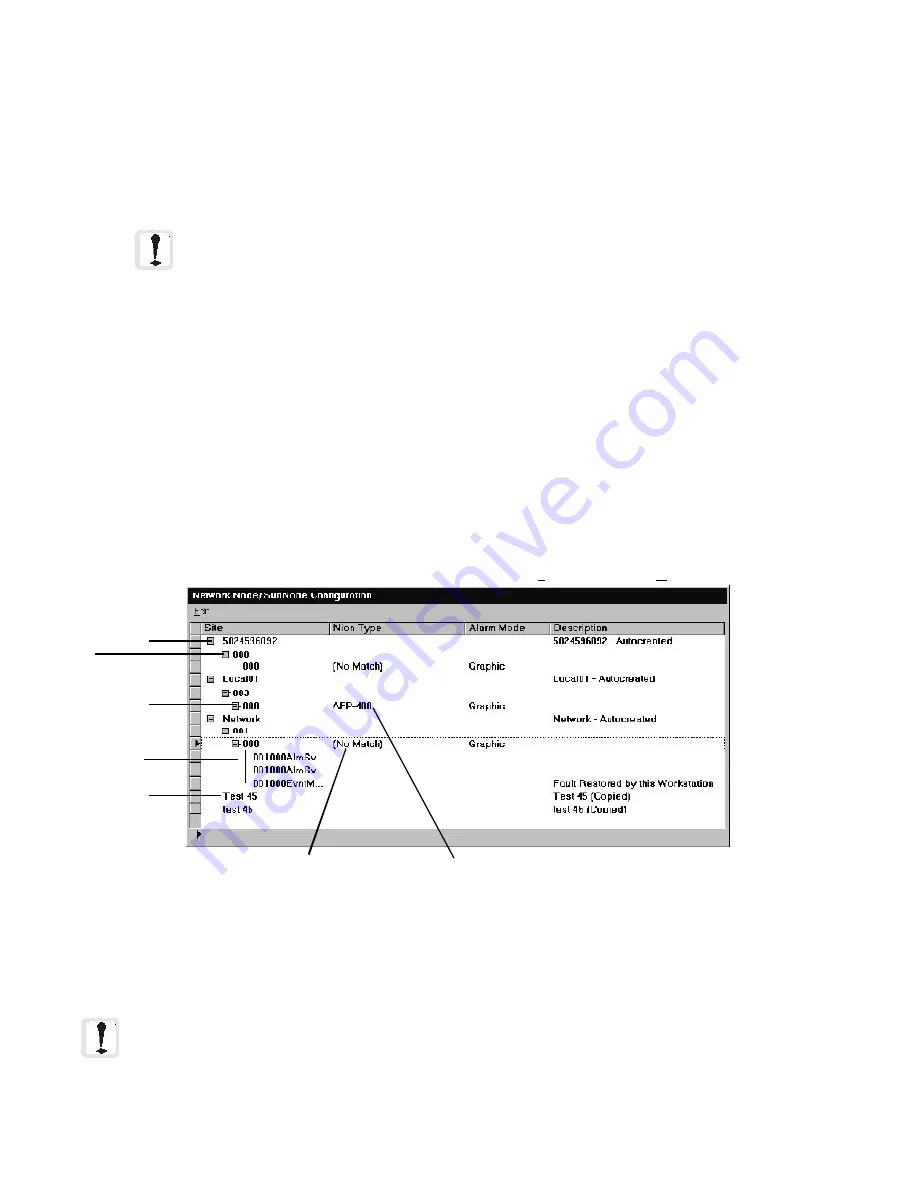
the Network Configuration Window. This window is opened by selecting
Tools, Network Administration
.
Figure 4-2: Network Configuration Window
To assign a device type to a node double click the
NION Type
field for the desired node. This opens a combo
box with a list of available device types. Select the desired device type to complete the assignment process and
establish the plug-in link. If the NION is reset while the workstation is on-line, this information will be
automatically updated.
NOTE: Plug-ins often have configuration forms for the related NIONs. These configuration tools can
only be accessed from the device pop-up menus. Therefore, before any configuration of the NION can
be done, a device must be assigned to the node.
Node
Site
Panel
Device
Site (w/ No
Nodes or
Devices)
Unassigned
Device Type
Identified
Device Type
NOTE: Whenever a NION association with a Plug-In is changed or updated, all security
options for that NION type will be reset to TRUE (access allowed) for all profiles. Following a
change or update security profiles may need to be updated as well.
Summary of Contents for UniNet 2000
Page 14: ...14 The Workstation Installation Operation Manual Version 2 Document 51540 Rev B1 4 8 02 NOTES...
Page 36: ...36 The Workstation Installation Operation Manual Version 2 Document 51540 Rev B1 4 8 02 NOTES...
Page 62: ...62 The Workstation Installation Operation Manual Version 2 Document 51540 Rev B1 4 8 02 NOTES...
Page 86: ...86 The Workstation Installation Operation Manual Version 2 Document 51540 Rev B1 4 8 02 NOTES...
Page 102: ...102 The Workstation Installation Operation Manual Version 2 Document 51540 Rev B1 4 8 02 NOTES...
Page 118: ...118 The Workstation Installation Operation Manual Version 2 Document 51540 Rev B1 4 8 02 NOTES...
Page 122: ...122 The Workstation Installation Operation Manual Version 2 Document 51540 Rev B1 4 8 02 NOTES...
Page 128: ...128 The Workstation Installation Operation Manual Version 2 Document 51540 Rev B1 4 8 02 NOTES...
Page 130: ...130 The Workstation Installation Operation Manual Version 2 Document 51540 Rev B1 4 8 02 NOTES...
Page 136: ...136 The Workstation Installation Operation Manual Version 2 Document 51540 Rev B1 4 8 02 NOTES...
Page 150: ...150 The Workstation Installation Operation Manual Version 2 Document 51540 Rev B1 4 8 02 NOTES...
Page 168: ...168 The Workstation Installation Operation Manual Version 2 Document 51540 Rev B1 4 8 02 Notes...
Page 170: ...170 The Workstation Installation Operation Manual Version 2 Document 51540 Rev B1 4 8 02 NOTES...
Page 186: ...186 The Workstation Installation Operation Manual Version 2 Document 51540 Rev B1 4 8 02 NOTES...
Page 197: ...197 The Workstation Installation Operation Manual Version 2 Document 51540 Rev B1 4 8 02 NOTES...
Page 198: ...198 The Workstation Installation Operation Manual Version 2 Document 51540 Rev B1 4 8 02 NOTES...
Page 199: ...199 The Workstation Installation Operation Manual Version 2 Document 51540 Rev B1 4 8 02 NOTES...


