Procedure 4.21.1: Drive Power-on Diagnostic Tests
PROCEDURE
1.
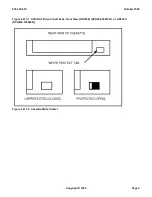
Insert a write-enabled (write-protect tab pushed to closed position on the rear of the cassette of the DAT
drive, Figure 4.21.1-2 ) "scratch" tape into the DAT drive.
2.
Is the circuit pack
OOS
LED off?
If
NO
, continue with the next step.
If
YES
, press the
ROS/RST
switch to the
ROS
position.
Response:
The
OOS
LED should come on after a few seconds.
3.
Pull the circuit pack halfway out of the card cage.
4.
Push the circuit pack back in all the way.
Response:
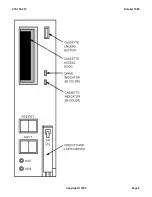
The DAT drive and cassette indicators will begin flashing, indicating that the drive's
power-on diagnostics are in progress.
5.
After the diagnostics complete, did the appropriate drive LEDs become steady green indicating the
diagnostic tests passed?
If
YES
, continue with the next step.
If
NO
, repeat from Step 4. In case of failure again, seek technical assistance.
6.
Press the
ROS/RST
switch to
RST
position to restore the drive to the
ACT
state.
7.
STOP. YOU HAVE COMPLETED THIS PROCEDURE.
235-105-210
October 1999
Copyright © 1999
Page 1
Summary of Contents for 5ESS-2000
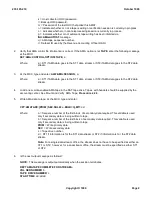
Page 96: ...235 105 210 October 1999 Copyright 1999 Page 2 ...
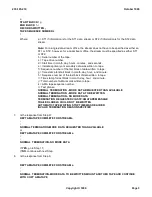
Page 184: ...235 105 210 October 1999 Copyright 1999 Page 3 ...
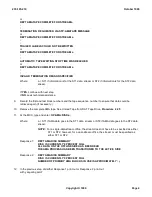
Page 300: ...13 STOP YOU HAVE COMPLETED THIS PROCEDURE 235 105 210 October 1999 Copyright 1999 Page 55 ...
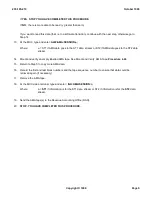
Page 339: ...7 STOP YOU HAVE COMPLETED THIS PROCEDURE 235 105 210 October 1999 Copyright 1999 Page 13 ...
Page 342: ...235 105 210 October 1999 Copyright 1999 Page 2 ...
Page 359: ...235 105 210 October 1999 Copyright 1999 Page 5 ...
Page 609: ...2 STOP YOU HAVE COMPLETED THIS PROCEDURE 235 105 210 October 1999 Copyright 1999 Page 12 ...
Page 676: ...235 105 210 October 1999 Copyright 1999 Page 9 ...
Page 792: ...3 STOP YOU HAVE COMPLETED THIS PROCEDURE 235 105 210 October 1999 Copyright 1999 Page 9 ...
Page 799: ...Figure 11 36 3 1 Cleaning Points 235 105 210 October 1999 Copyright 1999 Page 7 ...
Page 801: ...235 105 210 October 1999 Copyright 1999 Page 9 ...
Page 839: ...2 STOP YOU HAVE COMPLETED THIS PROCEDURE 235 105 210 October 1999 Copyright 1999 Page 16 ...
Page 999: ...2 STOP YOU HAVE COMPLETED THIS PROCEDURE 235 105 210 October 1999 Copyright 1999 Page 13 ...
Page 1008: ...Figure 11 55 1 CTSNS DIP Switch Settings 235 105 210 October 1999 Copyright 1999 Page 2 ...
Page 1011: ...235 105 210 October 1999 Copyright 1999 Page 5 ...
Page 1053: ...235 105 210 October 1999 Copyright 1999 Page 15 ...
Page 1289: ...Figure 15 17 2 AMATPS Data Link 235 105 210 October 1999 Copyright 1999 Page 2 ...
Page 1292: ...235 105 210 October 1999 Copyright 1999 Page 5 ...
Page 1303: ...9 STOP YOU HAVE COMPLETED THIS PROCEDURE 235 105 210 October 1999 Copyright 1999 Page 2 ...
Page 1360: ...Figure 15 47 2 Typical SCANS III Link Diagram 235 105 210 October 1999 Copyright 1999 Page 2 ...
Page 1372: ...235 105 210 October 1999 Copyright 1999 Page 2 ...
Page 1374: ...235 105 210 October 1999 Copyright 1999 Page 4 ...
Page 1421: ...Table 1 1 O M Checklist 235 105 210 October 1999 Copyright 1999 Page 3 ...


