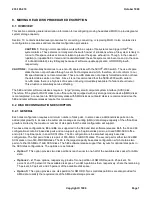
Disk reconfiguration consists of a written procedure and a set of tools to support that procedure. Normally the disk
reconfiguration tools are transmitted to an office electronically using the software change administration and
notification system (SCANS) utility just prior to the time of the reconfiguration procedure. To obtain a current copy
of the disk reconfiguration tools, contact the North American Regional Technical Assistance Center (NARTAC) at
1-800-225-7822
. More than one set of tools may exist for software releases that have had manufacturing update
loads that changed the disk layouts.
9.2.3 PREPARATION FOR A DISK RECONFIGURATION
9.2.3.1 OVERVIEW
In order to increase the probability of a successful disk reconfiguration, some verification and testing of the existing
system should be done ahead of time.
NOTE:
This verification and testing should be performed several days before the actual reconfiguration procedure
is scheduled.
9.2.3.2 Determining the Current Disk Configuration
The disk reconfiguration procedure for the 5E9 and later software releases contain a procedure that determines the
current disk base configuration and the configuration of any optional disks. The results are displayed on the master
control center (MCC) video terminal and are printed on the read-only printer (ROP). In the 5E9 and later software
releases, it is not necessary to know the current disk configuration as long as the office has a valid disk
configuration.
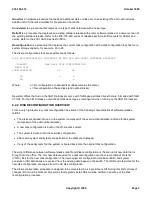
9.2.3.3 Off-Line Pump All SMs
Disk reconfiguration checks the validity of the SM ODDs on the new disk configuration by off-line pumping all of the
SMs in the office. This also verifies that the RLsmconf ODD relation is correctly built in the 5E9 and later software
releases. This test is meaningful if, and only if, all SMs can be off-line pumped before the disk reconfiguration
procedure is performed.
9.2.4 ASSIGNMENT OF OPTIONAL DISKS
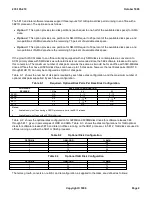
In the 5E9 and later software releases, one of the disk reconfiguration tools provides a conversational interface with
the user. This tool must be run from a recent change and verify (RC/V) or supplementary trunk and line work station
(STLWS) terminal. This tool allows the user to specify all of the disk reconfiguration parameters from a set of
menus. If the user makes an invalid choice, an error message will be printed and the menu will be redisplayed so
the user can make another choice. The configuration of each optional disk pair in the new disk configuration is
determined during this step. Disk reconfiguration does not allow optional disk pairs to be assigned completely at
random. It always tries to minimize the number of disk pairs containing the SM ODD by imposing the following rules:
Optional disk pair ``n'' can be assigned as option 2 or option 3 if, and only if, disk pair ``n-1'' is a required disk
pair (part of the base configuration), or it is an optional disk pair that has been assigned as option 3.
Optional disk pair ``n'' can always be assigned as option 1.
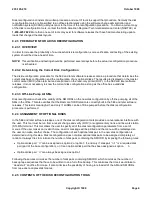
Following these rules minimizes the number of disk pairs containing SM ODD, which minimizes the number of
backup tape sequences that have to be written to do a full office backup. This minimizes the time it would take to
``dead start'' an office from tape. It also minimizes the possibility of having to reload all of the AM and SM ODDs
from tape due to duplex disk failures.
9.2.5 CONTENTS OF THE DISK RECONFIGURATION TOOLS
235-105-210
October 1999
Copyright © 1999
Page 4
Summary of Contents for 5ESS-2000
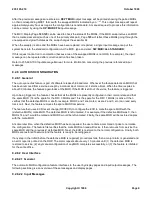
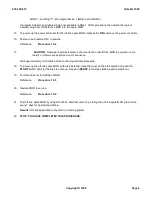
Page 96: ...235 105 210 October 1999 Copyright 1999 Page 2 ...
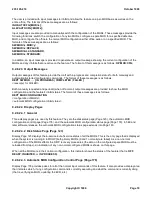
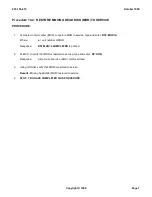
Page 184: ...235 105 210 October 1999 Copyright 1999 Page 3 ...
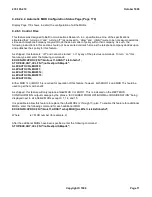
Page 300: ...13 STOP YOU HAVE COMPLETED THIS PROCEDURE 235 105 210 October 1999 Copyright 1999 Page 55 ...
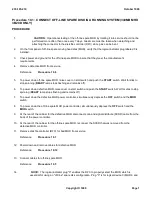
Page 339: ...7 STOP YOU HAVE COMPLETED THIS PROCEDURE 235 105 210 October 1999 Copyright 1999 Page 13 ...
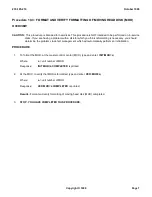
Page 342: ...235 105 210 October 1999 Copyright 1999 Page 2 ...
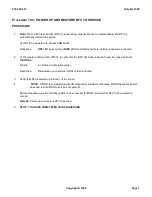
Page 359: ...235 105 210 October 1999 Copyright 1999 Page 5 ...
Page 609: ...2 STOP YOU HAVE COMPLETED THIS PROCEDURE 235 105 210 October 1999 Copyright 1999 Page 12 ...
Page 676: ...235 105 210 October 1999 Copyright 1999 Page 9 ...
Page 792: ...3 STOP YOU HAVE COMPLETED THIS PROCEDURE 235 105 210 October 1999 Copyright 1999 Page 9 ...
Page 799: ...Figure 11 36 3 1 Cleaning Points 235 105 210 October 1999 Copyright 1999 Page 7 ...
Page 801: ...235 105 210 October 1999 Copyright 1999 Page 9 ...
Page 839: ...2 STOP YOU HAVE COMPLETED THIS PROCEDURE 235 105 210 October 1999 Copyright 1999 Page 16 ...
Page 999: ...2 STOP YOU HAVE COMPLETED THIS PROCEDURE 235 105 210 October 1999 Copyright 1999 Page 13 ...
Page 1008: ...Figure 11 55 1 CTSNS DIP Switch Settings 235 105 210 October 1999 Copyright 1999 Page 2 ...
Page 1011: ...235 105 210 October 1999 Copyright 1999 Page 5 ...
Page 1053: ...235 105 210 October 1999 Copyright 1999 Page 15 ...
Page 1289: ...Figure 15 17 2 AMATPS Data Link 235 105 210 October 1999 Copyright 1999 Page 2 ...
Page 1292: ...235 105 210 October 1999 Copyright 1999 Page 5 ...
Page 1303: ...9 STOP YOU HAVE COMPLETED THIS PROCEDURE 235 105 210 October 1999 Copyright 1999 Page 2 ...
Page 1360: ...Figure 15 47 2 Typical SCANS III Link Diagram 235 105 210 October 1999 Copyright 1999 Page 2 ...
Page 1372: ...235 105 210 October 1999 Copyright 1999 Page 2 ...
Page 1374: ...235 105 210 October 1999 Copyright 1999 Page 4 ...
Page 1421: ...Table 1 1 O M Checklist 235 105 210 October 1999 Copyright 1999 Page 3 ...


