
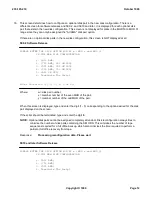


Enter Selection (1, 2, 3, or 4):
Where:
w = disk pair number.
x = member number of the even MHD of the pair.
y = member number of the odd MHD of the pair.
When this screen is displayed, type and enter the digit (1 - 3) corresponding to the option desired for the disk
pair displayed on the screen.
If the script should be terminated, type and enter the digit
4
NOTE:
Optional disk pairs cannot be assigned completely at random. Disk reconfiguration always tries to
minimize the number of disk pairs containing the SM ODD. This minimizes the number of tape
sequences required for a full office backup, which also minimizes the time required to perform a
partial or full office recovery from tape.
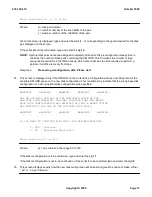
Response:
Processing reconfiguration data. Please wait.
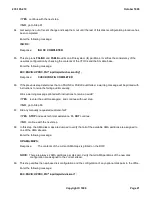
34.
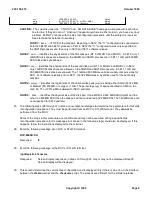
This screen is displayed only if the SM ODD on the current disk configuration will use over 90 percent of the
available SM ODD space on the new disk configuration. This condition may indicate that the wrong base disk
configuration or a wrong optional disk configuration was specified.
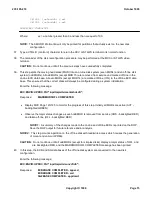
WARNING! WARNING! WARNING! WARNING! WARNING!
THE SM ODD WILL USE xx% OF THE AVAILABLE SPACE ON THE
NEW DISK CONFIGURATION. THIS MAY INDICATE THAT THE WRONG
BASE DISK CONFIGURATION WAS SELECTED OR THAT A WRONG OPTION
WAS SPECIFIED FOR ONE OF THE OPTIONAL DISK PAIRS.
WARNING! WARNING! WARNING! WARNING! WARNING!
DO YOU WANT TO CONTINUE WITH THIS DISK RECONFIGURATION?
1. YES - Continue.
2. NO - Terminate The Script.
Enter selection (1 or 2):
Where:
xx = any number in the range 90 to 100.
If the disk reconfiguration is to be continued, type and enter the digit
1
If the disk reconfiguration is not to be continued or if the script is to be restarted, type and enter the digit
2
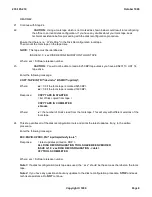
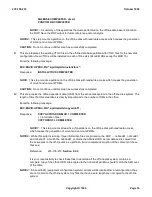
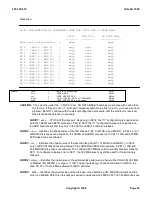
35.
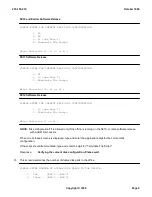
This screen displays exactly how the new disk configuration will be built and gives the option to make a final
``go'' or ``no-go'' decision.
235-105-210
October 1999
Copyright © 1999
Page 13
Summary of Contents for 5ESS-2000
Page 96: ...235 105 210 October 1999 Copyright 1999 Page 2 ...
Page 184: ...235 105 210 October 1999 Copyright 1999 Page 3 ...
Page 300: ...13 STOP YOU HAVE COMPLETED THIS PROCEDURE 235 105 210 October 1999 Copyright 1999 Page 55 ...
Page 339: ...7 STOP YOU HAVE COMPLETED THIS PROCEDURE 235 105 210 October 1999 Copyright 1999 Page 13 ...
Page 342: ...235 105 210 October 1999 Copyright 1999 Page 2 ...
Page 359: ...235 105 210 October 1999 Copyright 1999 Page 5 ...
Page 609: ...2 STOP YOU HAVE COMPLETED THIS PROCEDURE 235 105 210 October 1999 Copyright 1999 Page 12 ...
Page 676: ...235 105 210 October 1999 Copyright 1999 Page 9 ...
Page 792: ...3 STOP YOU HAVE COMPLETED THIS PROCEDURE 235 105 210 October 1999 Copyright 1999 Page 9 ...
Page 799: ...Figure 11 36 3 1 Cleaning Points 235 105 210 October 1999 Copyright 1999 Page 7 ...
Page 801: ...235 105 210 October 1999 Copyright 1999 Page 9 ...
Page 839: ...2 STOP YOU HAVE COMPLETED THIS PROCEDURE 235 105 210 October 1999 Copyright 1999 Page 16 ...
Page 999: ...2 STOP YOU HAVE COMPLETED THIS PROCEDURE 235 105 210 October 1999 Copyright 1999 Page 13 ...
Page 1008: ...Figure 11 55 1 CTSNS DIP Switch Settings 235 105 210 October 1999 Copyright 1999 Page 2 ...
Page 1011: ...235 105 210 October 1999 Copyright 1999 Page 5 ...
Page 1053: ...235 105 210 October 1999 Copyright 1999 Page 15 ...
Page 1289: ...Figure 15 17 2 AMATPS Data Link 235 105 210 October 1999 Copyright 1999 Page 2 ...
Page 1292: ...235 105 210 October 1999 Copyright 1999 Page 5 ...
Page 1303: ...9 STOP YOU HAVE COMPLETED THIS PROCEDURE 235 105 210 October 1999 Copyright 1999 Page 2 ...
Page 1360: ...Figure 15 47 2 Typical SCANS III Link Diagram 235 105 210 October 1999 Copyright 1999 Page 2 ...
Page 1372: ...235 105 210 October 1999 Copyright 1999 Page 2 ...
Page 1374: ...235 105 210 October 1999 Copyright 1999 Page 4 ...
Page 1421: ...Table 1 1 O M Checklist 235 105 210 October 1999 Copyright 1999 Page 3 ...