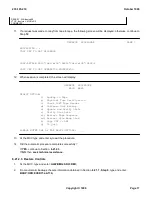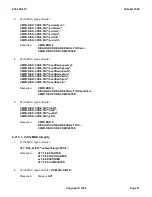
To return to GENBKUP:
Enter Poke
120
for the messages page.
Operate the
CMD
key; (causing a
NG
response)
The GENBKUP screen is not refreshed until a technician input is requested.
Then continue with GENBKUP normally.
Note 3:
If GENBKUP gets hung, the technician can force an abort by entering GENBKUP from another
terminal and following the instructions on the screen that can force the first terminal process to abort.
Note 4:
Abnormal aborts and timeouts should be accompanied by an abort message. These messages are
listed in the output message manual (
RCV:MENU:GENBKUP
).
3.
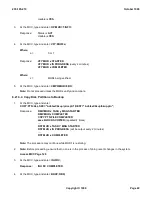
At the MCC, type and enter:
d
for a disk backup
or
rd
for restart of disk backup.
Note:
In addition to the following responses FSBLK audit, FSLINK audit, and compare-disk-to-core results
are also printed. If GENBKUP encounters any problems, an informative message will be output to the screen
and ROP directing the technician actions.
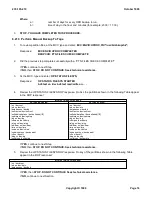
Response for restart sequence:
This option provides the ability to be able to generate a Software Backup Disk
without having to re-execute the CMPR:DISK:CORE, COPY:PTN, and BKUP:ODD
commands associated with GENBKUP running in a normal fashion. However with any
added feature that circumvents the integrity checks, certain conditions must be
satisfied in order to successfully complete the Software Backup Disk procedure:
GENBKUP was previously executed within the LAST 24 hours.
NO BKUP:ODD command was executed since GENBKUP last ran.><
NO COPY:PTN command has been executed -AND- NO BWM has been made OFFICIAL.
Realizing that most of the integrity checks WILL NOT be performed, do you wish<>
<>
to continue? Please Enter 'y' to continue or 'n' to abort:
<><>
PLEASE CONFIRM YOUR RESPONSE. ENTER 'y' yes or 'n' no:
4.
At the MCC, type and enter:
y
twice to continue.
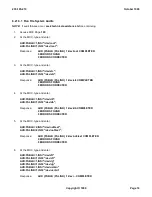
Normal Response on terminal:
GENBKUP PROCEDURE PAGE 1 of 1
PROCESSING - ## SOFTWARE DISK BACKUP
235-105-210
October 1999
Copyright © 1999
Page 7
Summary of Contents for 5ESS-2000
Page 96: ...235 105 210 October 1999 Copyright 1999 Page 2 ...
Page 184: ...235 105 210 October 1999 Copyright 1999 Page 3 ...
Page 300: ...13 STOP YOU HAVE COMPLETED THIS PROCEDURE 235 105 210 October 1999 Copyright 1999 Page 55 ...
Page 339: ...7 STOP YOU HAVE COMPLETED THIS PROCEDURE 235 105 210 October 1999 Copyright 1999 Page 13 ...
Page 342: ...235 105 210 October 1999 Copyright 1999 Page 2 ...
Page 359: ...235 105 210 October 1999 Copyright 1999 Page 5 ...
Page 609: ...2 STOP YOU HAVE COMPLETED THIS PROCEDURE 235 105 210 October 1999 Copyright 1999 Page 12 ...
Page 676: ...235 105 210 October 1999 Copyright 1999 Page 9 ...
Page 792: ...3 STOP YOU HAVE COMPLETED THIS PROCEDURE 235 105 210 October 1999 Copyright 1999 Page 9 ...
Page 799: ...Figure 11 36 3 1 Cleaning Points 235 105 210 October 1999 Copyright 1999 Page 7 ...
Page 801: ...235 105 210 October 1999 Copyright 1999 Page 9 ...
Page 839: ...2 STOP YOU HAVE COMPLETED THIS PROCEDURE 235 105 210 October 1999 Copyright 1999 Page 16 ...
Page 999: ...2 STOP YOU HAVE COMPLETED THIS PROCEDURE 235 105 210 October 1999 Copyright 1999 Page 13 ...
Page 1008: ...Figure 11 55 1 CTSNS DIP Switch Settings 235 105 210 October 1999 Copyright 1999 Page 2 ...
Page 1011: ...235 105 210 October 1999 Copyright 1999 Page 5 ...
Page 1053: ...235 105 210 October 1999 Copyright 1999 Page 15 ...
Page 1289: ...Figure 15 17 2 AMATPS Data Link 235 105 210 October 1999 Copyright 1999 Page 2 ...
Page 1292: ...235 105 210 October 1999 Copyright 1999 Page 5 ...
Page 1303: ...9 STOP YOU HAVE COMPLETED THIS PROCEDURE 235 105 210 October 1999 Copyright 1999 Page 2 ...
Page 1360: ...Figure 15 47 2 Typical SCANS III Link Diagram 235 105 210 October 1999 Copyright 1999 Page 2 ...
Page 1372: ...235 105 210 October 1999 Copyright 1999 Page 2 ...
Page 1374: ...235 105 210 October 1999 Copyright 1999 Page 4 ...
Page 1421: ...Table 1 1 O M Checklist 235 105 210 October 1999 Copyright 1999 Page 3 ...


