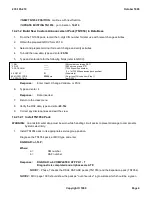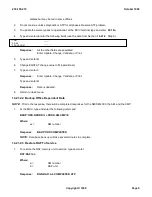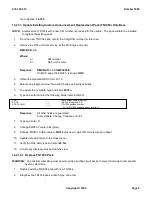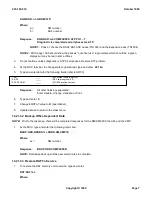
If
NEW TN1054 POSITION
, continue with next Section.
If
UPDATE EXISTING TN1054
, go to Section
14.21.3
14.21.2 Build New Custom Announcement Pack (TN1054) in Data Base
1.
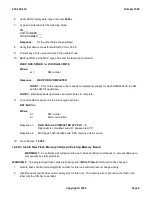
From the TN1054 pack, record the 3-digit CIN number for later use with recent change activities.
2.
Obtain the prepared GRCV form 20.10.
3.
Select and prepare terminal for recent change and verify activities.
4.
To build the new data, type and enter
20.10i
5.
Type and enter data for the following fields (refer to GRCV):
*1. SM
____
(SM number containing RAF)
*2. RAF
_____
(RAF service group, 0-3)
*3. PACK NUM
_____
(TN1054 position number
2 = 1st TN1054 expansion pack position)
4. EQSTAT
G
(Grow state)
#6. MICRO CODE
5D155
xxx
(3-digit xxx CIN code from Step 1)
7. APPLICATION
________
(per GRCV)
Response:
Enter Insert, Change, Validate, or Print:
6.
Type and enter
I
Response:
Data inserted.
7.
Return to the class menu
8.
Verify the RAF data, type and enter
20.10v
9.
Correct any discrepancies and exit the view.
14.21.2.1 Install TN1054 Pack
WARNING:
An antistatic wrist strap must be worn while handling circuit packs to prevent damage to components
by static electricity.
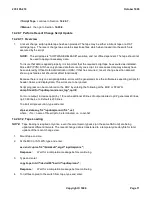
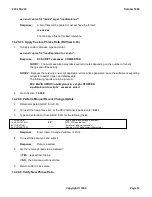
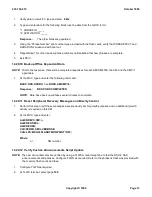
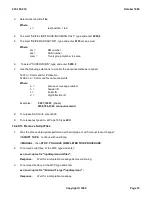
1.
Install TN1054 pack in its appropriate service group position.
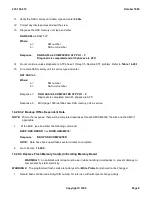
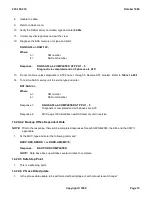
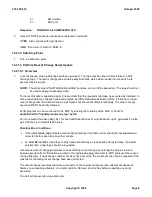
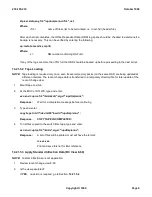
Diagnose the TN1054 pack, at MCC type and enter:
DGN:RAF=
a-b,
TLP;
Where:
a =
SM number
b =
RAF number
Response:
DGN RAF=a-b COMPLETED ATP PH 1 - 7
Diagnostic is completed and all phases are ATP.
NOTE 1:
Phase 7 checks the DSU2 RAF ASC packs (TN1053) and the Expansion pack (TN1054).
NOTE 2:
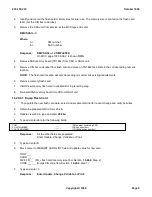
MCC page 1090 should show the pack as "out of service" in grow state which should be a green
235-105-210
October 1999
Copyright © 1999
Page 4
Summary of Contents for 5ESS-2000
Page 96: ...235 105 210 October 1999 Copyright 1999 Page 2 ...
Page 184: ...235 105 210 October 1999 Copyright 1999 Page 3 ...
Page 300: ...13 STOP YOU HAVE COMPLETED THIS PROCEDURE 235 105 210 October 1999 Copyright 1999 Page 55 ...
Page 339: ...7 STOP YOU HAVE COMPLETED THIS PROCEDURE 235 105 210 October 1999 Copyright 1999 Page 13 ...
Page 342: ...235 105 210 October 1999 Copyright 1999 Page 2 ...
Page 359: ...235 105 210 October 1999 Copyright 1999 Page 5 ...
Page 609: ...2 STOP YOU HAVE COMPLETED THIS PROCEDURE 235 105 210 October 1999 Copyright 1999 Page 12 ...
Page 676: ...235 105 210 October 1999 Copyright 1999 Page 9 ...
Page 792: ...3 STOP YOU HAVE COMPLETED THIS PROCEDURE 235 105 210 October 1999 Copyright 1999 Page 9 ...
Page 799: ...Figure 11 36 3 1 Cleaning Points 235 105 210 October 1999 Copyright 1999 Page 7 ...
Page 801: ...235 105 210 October 1999 Copyright 1999 Page 9 ...
Page 839: ...2 STOP YOU HAVE COMPLETED THIS PROCEDURE 235 105 210 October 1999 Copyright 1999 Page 16 ...
Page 999: ...2 STOP YOU HAVE COMPLETED THIS PROCEDURE 235 105 210 October 1999 Copyright 1999 Page 13 ...
Page 1008: ...Figure 11 55 1 CTSNS DIP Switch Settings 235 105 210 October 1999 Copyright 1999 Page 2 ...
Page 1011: ...235 105 210 October 1999 Copyright 1999 Page 5 ...
Page 1053: ...235 105 210 October 1999 Copyright 1999 Page 15 ...
Page 1289: ...Figure 15 17 2 AMATPS Data Link 235 105 210 October 1999 Copyright 1999 Page 2 ...
Page 1292: ...235 105 210 October 1999 Copyright 1999 Page 5 ...
Page 1303: ...9 STOP YOU HAVE COMPLETED THIS PROCEDURE 235 105 210 October 1999 Copyright 1999 Page 2 ...
Page 1360: ...Figure 15 47 2 Typical SCANS III Link Diagram 235 105 210 October 1999 Copyright 1999 Page 2 ...
Page 1372: ...235 105 210 October 1999 Copyright 1999 Page 2 ...
Page 1374: ...235 105 210 October 1999 Copyright 1999 Page 4 ...
Page 1421: ...Table 1 1 O M Checklist 235 105 210 October 1999 Copyright 1999 Page 3 ...


