Installation 4. First Step
52
RC700-D Rev.2
4.4 Firmware Update
This chapter describes the firmware upgrade procedure and data file initialization when
firmware or Robot configuration errors cause Controller startup or operation failure.
4.4.1 Updating Firmware
Firmware (software stored in non-volatile memory) and data files necessary to control the
Controller and the Robot are preinstalled in the Controller. Controller configuration set
from EPSON RC+ 7.0 is always saved in the Controller.
Controller firmware is supplied by CD-ROM as needed. Please contact the supplier of
your region for information.
You must use a PC running EPSON RC+ 7.0 connected to a Controller with USB to update
the Controller firmware. Firmware cannot be updated with an Ethernet connection.
When installing the firmware Ver.7.5.0.x or later, be sure to use the PC which EPSON RC+
7.0 Ver.7.5.0 or later is installed.
4.4.2 Firmware Upgrade Procedure
The firmware upgrade procedure is described as follows:
(1)
Connect the development PC and the Controller with a USB cable (the firmware cannot
be changed with an Ethernet connection).
(2)
Turn ON the Controller. (Do not start the development software EPSON RC+ 7.0 until
the firmware upgrade is completed.)
(3)
Insert the “firmware CD-ROM” in the development PC CD-ROM drive.
(4)
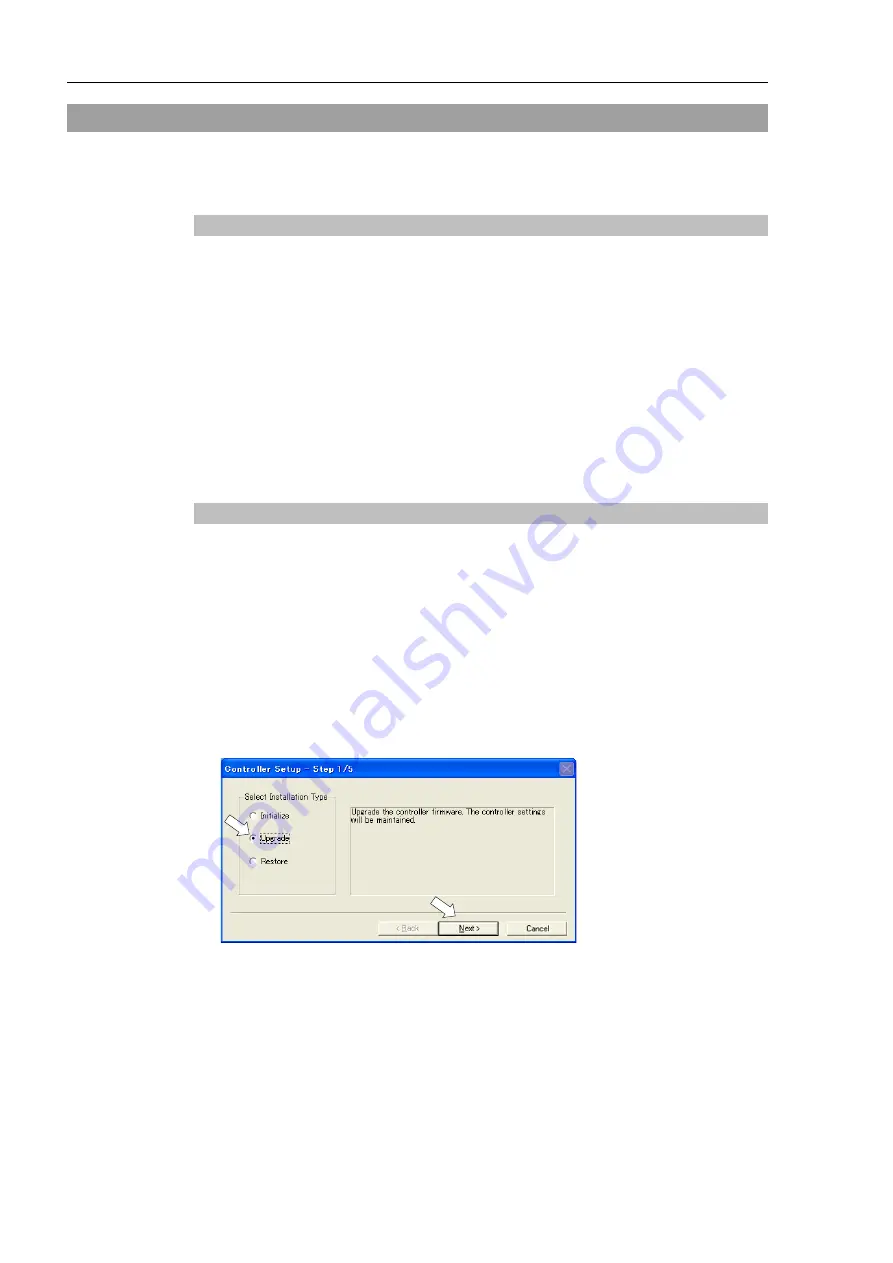
Execute “Ctrlsetup70.exe”. The following dialog appears.
(5)
Select the <Upgrade> option button and click the <Next> button.
NOTE
Summary of Contents for RC700-D
Page 1: ...Control Unit RC700 D Original instructions Rev 2 EM221C5146F ROBOT CONTROLLER RC700 D Manual ...
Page 2: ...ROBOT CONTROLLER RC700 D Manual Rev 2 ...
Page 8: ...vi RC700 D Rev 2 ...
Page 16: ...Table of Contents xiv RC700 D Rev 2 ...
Page 18: ......
Page 80: ...Installation 5 Second Step 64 RC700 D Rev 2 ...
Page 82: ......
Page 87: ...Functions 1 Specifications RC700 D Rev 2 71 1 3 Outer Dimensions Unit mm ...
Page 190: ......
Page 202: ...Regular Inspection 3 Alarm 186 RC700 D Rev 2 ...
Page 203: ...187 Appendix ...
Page 204: ......


