Installation 4. First Step
RC700-D Rev.2
41
4.2.3 Software Setup and Connection Check
The following is the steps of connecting the development PC and the Controller.
(1)
Make sure that EPSON RC+ 7.0 is installed on the Controller connected to the
development PC.
(Install the software when it is not installed.)
(2)
Connect the development PC and the Controller by the USB cable.
(3)
Turn ON the Controller.
(4)
Start the software EPSON RC+ 7.0.
(5)
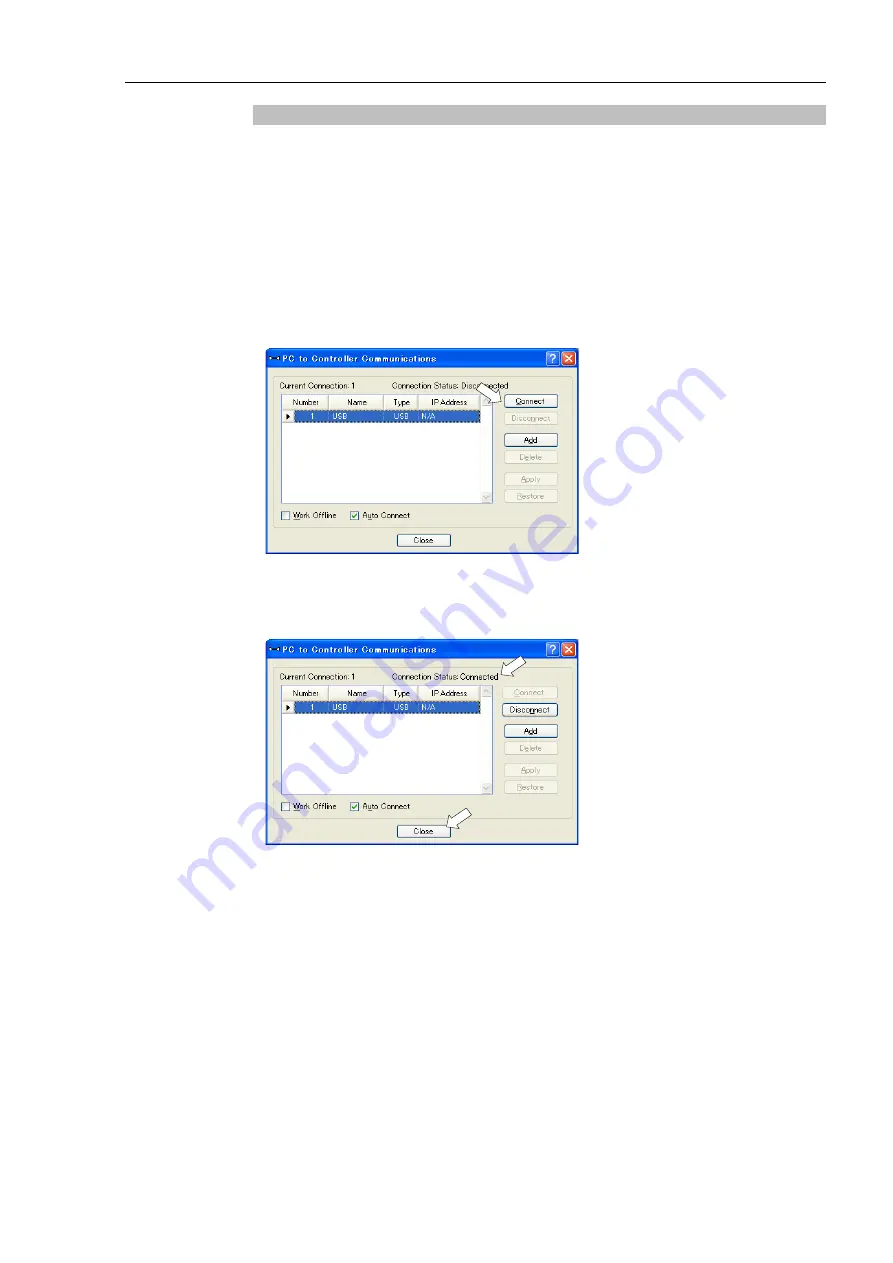
Select the EPSON RC+ 7.0 menu-[Setup]-[PC to Controller Communications] to
display the [PC to Controller Communications] dialog box.
(6)
Select the “No.1 USB” and click the <Connect> button.
(7)
After development PC and the Controller connection is completed, “Connected” is
displayed in the [Connection status:]. Make sure that “Connected” is displayed and
click the <Close> button to close the [PC to Controller Communications] dialog box.
Connection of the development PC and the Controller is completed. Now robot system can be used
from EPSON RC+ 7.0.
Summary of Contents for RC700-D
Page 1: ...Control Unit RC700 D Original instructions Rev 2 EM221C5146F ROBOT CONTROLLER RC700 D Manual ...
Page 2: ...ROBOT CONTROLLER RC700 D Manual Rev 2 ...
Page 8: ...vi RC700 D Rev 2 ...
Page 16: ...Table of Contents xiv RC700 D Rev 2 ...
Page 18: ......
Page 80: ...Installation 5 Second Step 64 RC700 D Rev 2 ...
Page 82: ......
Page 87: ...Functions 1 Specifications RC700 D Rev 2 71 1 3 Outer Dimensions Unit mm ...
Page 190: ......
Page 202: ...Regular Inspection 3 Alarm 186 RC700 D Rev 2 ...
Page 203: ...187 Appendix ...
Page 204: ......


