1183
The Staff view
Notation and lyrics
To change the Staff pane layout
1.
Click the Staff view
Edit
menu and choose
Layout
to open the
Staff View Layout
dialog box.
2.
Select a track from the list (if the track you want to edit is not in the list, click the
Tracks
menu
and choose
Pick Tracks
, then select the desired track). The
Clef
option shows the track’s clef.
3.
Select a new clef from the list.
4.
If you select Treble/Bass, select a Split point.
5.
If you select one of the Percussion options, click
Percussion Settings
to set up the appearance
of percussion notes.
6.
Repeat steps 2-5 for other tracks.
7.
Click
Close
when you are done.
SONAR displays tracks using the new staff settings.
The Fretboard
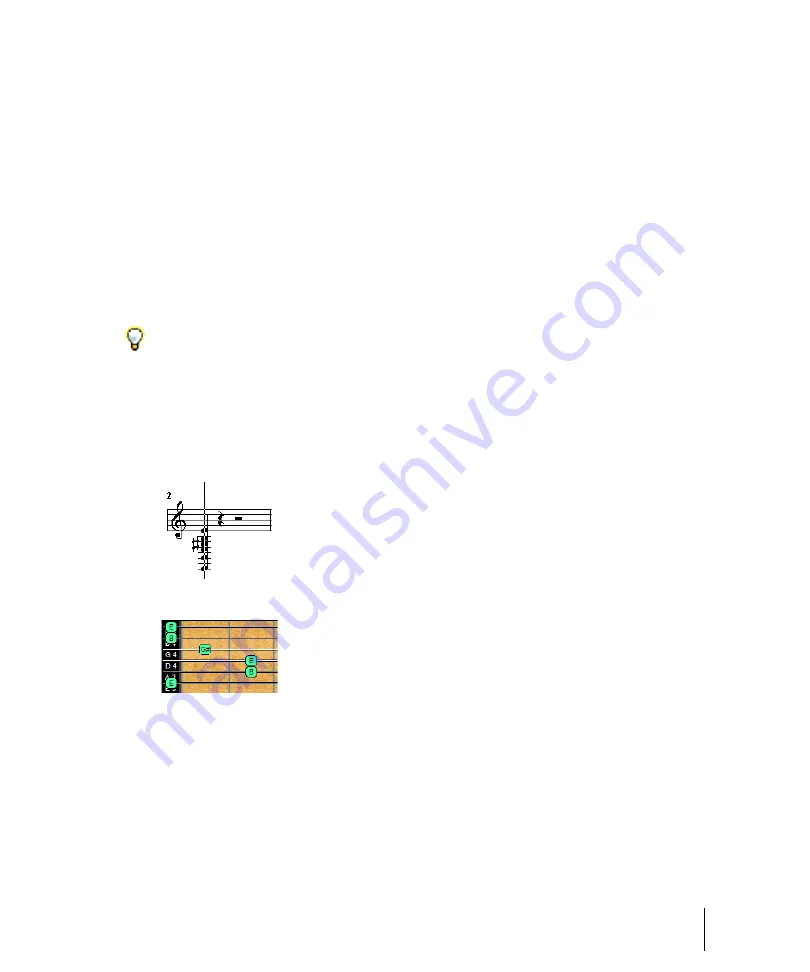
The Fretboard shows you the notes located at the Now time in the Staff pane, laid out on a virtual
guitar fretboard. For example, if the Staff pane shows you this:
The Fretboard pane shows you this:
The Fretboard stays in sync with the Now Time during playback and recording, and stays in sync
with the scrub time during scrubbing. The color of each note on the Fretboard is the same as the
color of the corresponding clip in the Track view. (See
on page 341 for information
about setting clip properties.)
To show/hide the Fretboard pane, click the Staff view
View
menu and choose
Show/Hide Fret View
.
Tip:
If a piano part’s left-hand and right-hand parts overlap, a split point will not correctly separate the
two parts into treble and bass staves. You may prefer to put the two parts into two separate tracks.
Summary of Contents for sonar x3
Page 1: ...SONAR X3 Reference Guide...
Page 4: ...4 Getting started...
Page 112: ...112 Tutorial 1 Creating playing and saving projects Saving project files...
Page 124: ...124 Tutorial 3 Recording vocals and musical instruments...
Page 132: ...132 Tutorial 4 Playing and recording software instruments...
Page 142: ...142 Tutorial 5 Working with music notation...
Page 150: ...150 Tutorial 6 Editing your music...
Page 160: ...160 Tutorial 7 Mixing and adding effects...
Page 170: ...170 Tutorial 8 Working with video Exporting your video...
Page 570: ...570 Control Bar overview...
Page 696: ...696 AudioSnap Producer and Studio only Algorithms and rendering...
Page 720: ...720 Working with loops and Groove Clips Importing Project5 patterns...
Page 820: ...820 Drum maps and the Drum Grid pane The Drum Grid pane...
Page 848: ...848 Editing audio Audio effects audio plug ins...
Page 878: ...878 Software instruments Stand alone synths...
Page 1042: ...1042 ProChannel Producer and Studio only...
Page 1088: ...1088 Sharing your songs on SoundCloud Troubleshooting...
Page 1140: ...1140 Automation Recording automation data from an external controller...
Page 1178: ...1178 Multi touch...
Page 1228: ...1228 Notation and lyrics Working with lyrics...
Page 1282: ...1282 Synchronizing your gear MIDI Machine Control MMC...
Page 1358: ...1358 External devices Working with StudioWare...
Page 1362: ...1362 Using CAL Sample CAL files...
Page 1386: ...1386 Troubleshooting Known issues...
Page 1394: ...1394 Hardware setup Set up to record digital audio...
Page 1400: ...1400 MIDI files...
Page 1422: ...1422 Initialization files Initialization file format...
Page 1463: ...1463 Misc enhancements New features in SONAR X3...
Page 1470: ...1470 Comparison...
Page 1518: ...1518 Included plug ins Instruments...
Page 1532: ...1532 Cyclone Using Cyclone...
Page 1694: ...1694 Beginner s guide to Cakewalk software Audio hardware sound cards and drivers...
Page 1854: ...1854 Preferences dialog Customization Nudge Figure 518 The Nudge section...
Page 1856: ...1856 Preferences dialog Customization Snap to Grid Figure 519 The Snap to Grid section...
Page 1920: ...1920 Snap Scale Settings dialog...
Page 2042: ...2042 View reference Surround panner...


