Conversion Workflows
This section of the manual demonstrates the set up workflows for the main conversions you can
perform with your Teranex Processor. All conversions such as standards conversion, up, down
and cross conversion, follow the same general set up using the front control panel. You will also
see how to save and recall presets for frequently used conversions and how to set cadence
settings so you can clean or remove cadence in material using 3:2 pull down.
Up Conversion
Up Conversion is the process of converting your video to a higher resolution. For example,
you may need to insert an NTSC SD source into an HD production. The NTSC clip can be
converted to many 720 and 1080 HD output formats and frame rates, depending on your project’s
requirement. Teranex processors employ high quality de-interlacing and up conversion algorithms,
assuring outstanding results. In this example, 486i59.94 component analog video is converted to
1080p29.97 using zoom aspect ratio and RCA analog audio inputs on the Teranex 2D or 3D.
Power your Teranex Processor and connect your inputs and outputs.
Setting your Input
1
Press the ‘in’ button on the control panel and select ‘anlg’ video. The ‘analog input’
menu will be displayed on the LCD.
2
Using the rotary knob, select ‘component’ as your analog input type. Press the ‘in’
button to display your input video on the LCD. Teranex automatically detects the input
format and illuminates the corresponding buttons on the control panel.
3
Press the ‘anlg’ audio button. Using the rotary knob, select RCA as your analog audio
input type.
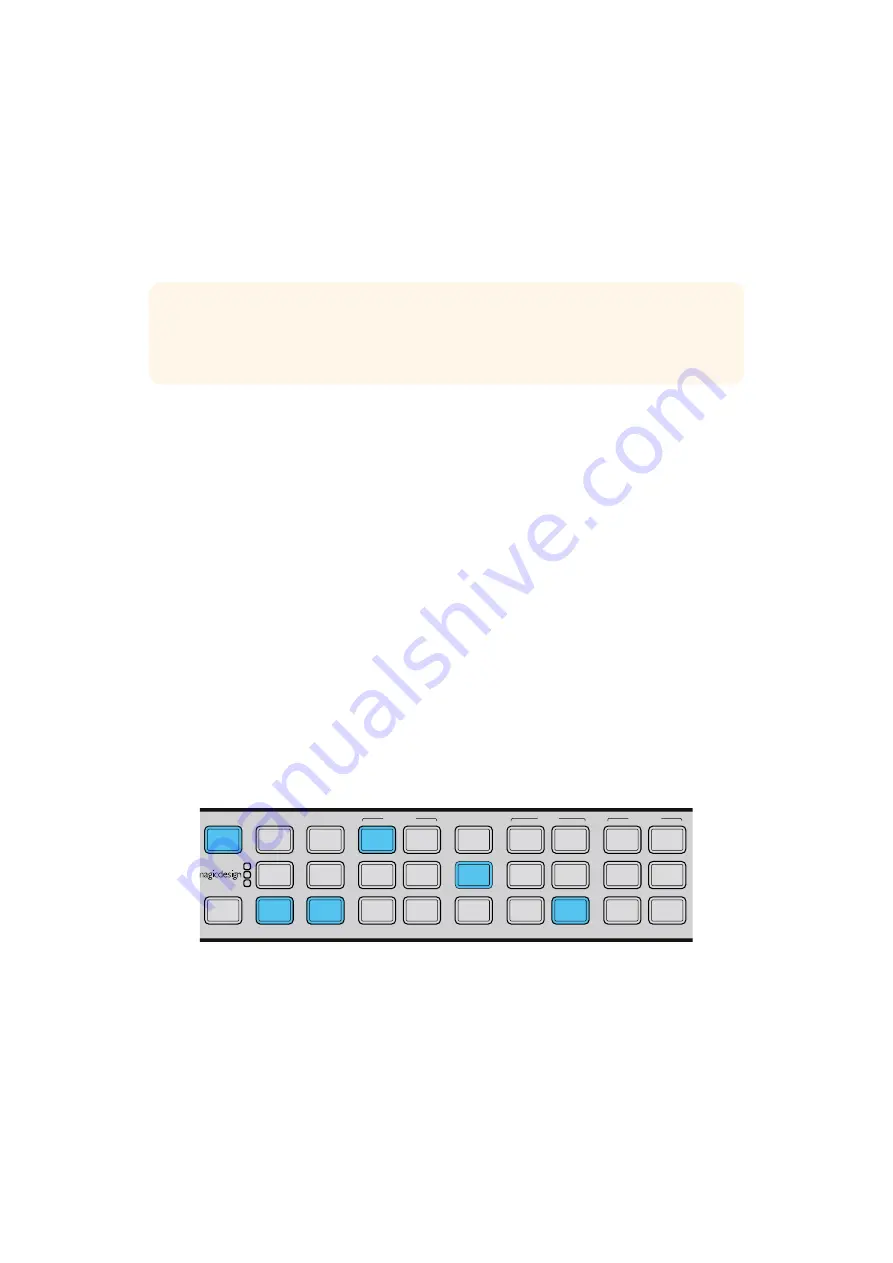
Pressing the IN button displays the input format on the control panel buttons. In the above
illustration, the input format is 486i59.94 via analog component with analog audio.
Setting your Output
1
Press the ‘out’ button on the control panel. On the Teranex 2D, all output buttons will be
illuminated blue. On the Teranex 3D, the ‘embed’ audio button will be blue. Select the
‘AES’ or ‘anlg’ button. AES/EBU and analog audio outputs share the XLR connectors.
On the Teranex Express, the ‘embed’ audio button will be blue.
TIP
When setting up a conversion, the status LEDs on the control panel let you
monitor exactly what signals are present. You can find more information in the
‘Audio and System Status LEDs’ section.
IN
OUT
SDI
VIDEO
HDMI
ANLG
AUDIO
EMBED
AES
ANLG
FORMAT
486
720
2K
1080
576
1080
FRAME
P
I
PSF
MENU
HOME
MENU
1
MENU
2
REM
LOCK
PANEL
LOCK
RATE
23.98
25
29.97
30
24
50
59.94
60
VIDEO
GAIN
SAT
R-Y
B-Y
BLK
HUE
SHARP
PRESETS
AUDIO STATUS
SYSTEM STATUS
1
3
5
2
4
6
ANAM
LBOX
PBOX
ASPECT
SMART
14:9
CCUT
ZOOM
ADJ
25
25
Conversion Workflows
Summary of Contents for Teranex 2D Processor
Page 123: ...2017 6 Teranex Processors...
Page 244: ...Manuel d utilisation et d installation Teranex Processors Juin 2017 Fran ais...
Page 365: ...Installations und Bedienungsanleitung Teranex Processors Juni 2017 Deutsch...
Page 486: ...Manual de instalaci n y funcionamiento Procesadores Teranex Espa ol Junio 2017...
Page 607: ...Teranex 2017 6...
Page 608: ...Blackmagic Design Teranex Teranex SDI HDMI Teranex SIMD Teranex Grant Petty Blackmagic Design...
Page 626: ...Configure Teranex IP Teranex Name Teranex Setup Teranex 1 626 626...
Page 684: ...1 DaVinci Resolve GPU Teranex DaVinci Resolve 2 Teranex 3 4 5 GPU Teranex 1 2 3 Stop 684 684...
Page 728: ...Teranex Processor 2017 6...
Page 729: ...Blackmagic Design Teranex Teranex SDI HDMI Teranex SIMD Teranex Teranex Blackmagic Design CEO...
Page 747: ...Configure Teranex IP Teranex Teranex Name Teranex Setup Teranex 1 1 747 747...
Page 849: ...Teranex 2017...
Page 850: ...Teranex SDI HDMI Teranex SIMD Teranex Grant Petty Blackmagic Design...
Page 868: ...Configure IP Teranex Name Teranex Setup 868 868...
Page 939: ...0 10 1023 10 Blk Gain Teranex dBFS VU dBFS VU VU 0 0 939 939 Blackmagic UltraScope...


